

English
Send Documents from InstanetForms to eZsign (old eZsign version)
It is possible to quickly send documents from InstanetForms to eZsign, i.e. without having to save them on the desktop before adding them to the desired eZsign folder.
- In the left menu of your InstanetForms platform, click on the House icon (TransactionDESK).

- Click on the transaction that contains the document you want to send to eZsign.
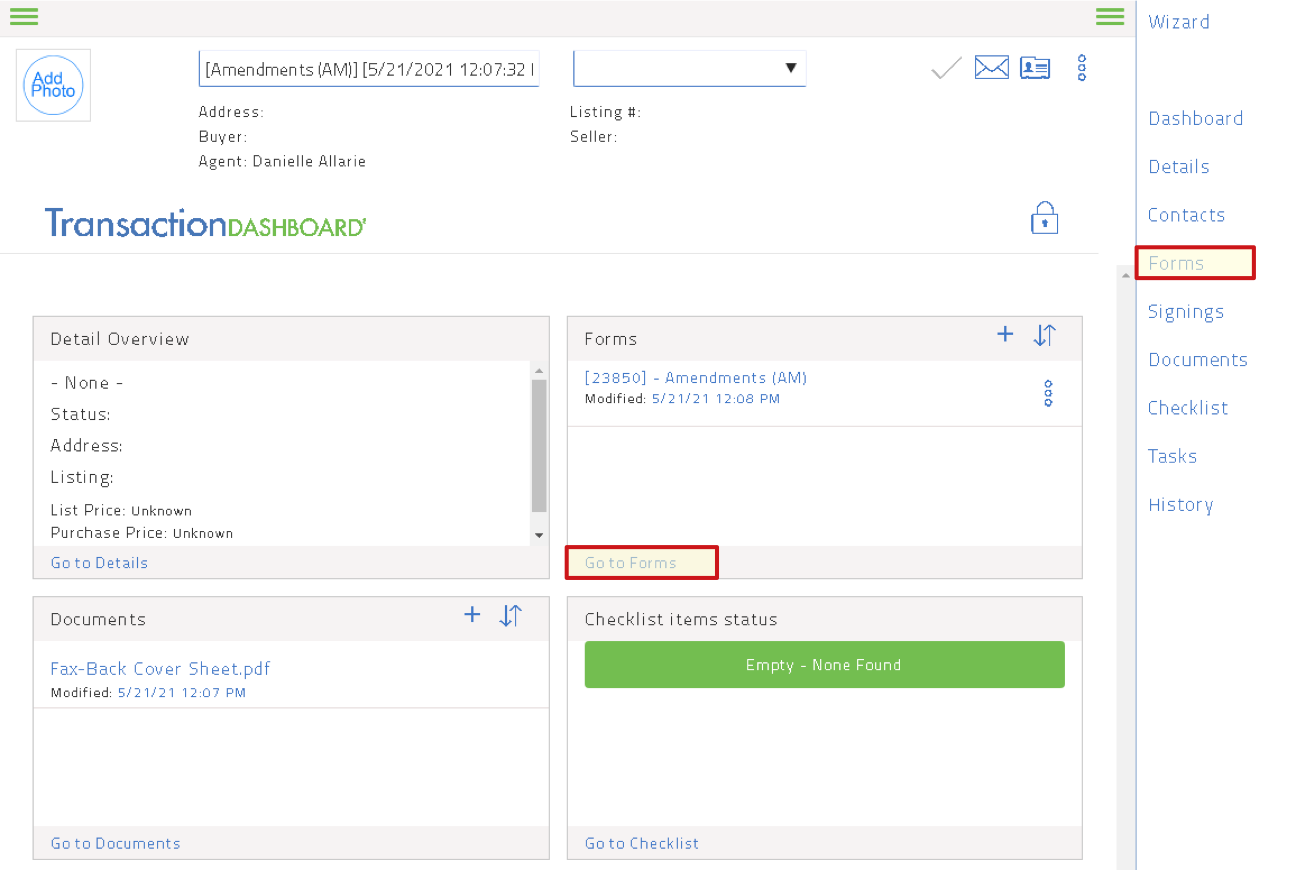
- Click on Go to Forms in the "Forms" section or on Forms in the Wizard menu on the right.

Warning
Only finalized forms can be exported so make sure to see the red F to the right of the form to send. Otherwise, the option to send to eZsign will not be displayed in the menu.
- To send the form, you have 2 options:
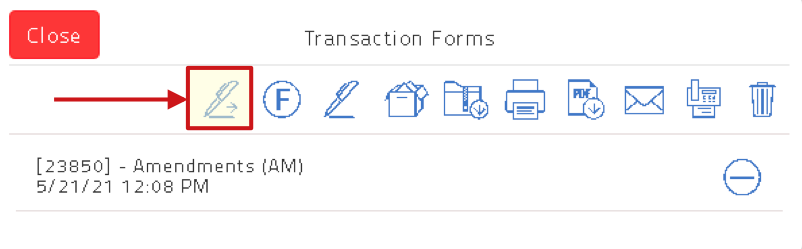
- Check the circle to the right of the document to send and click on the Shopping Cart icon. In the window that appears, click on the 1st icon on the left (Send to eZsign).
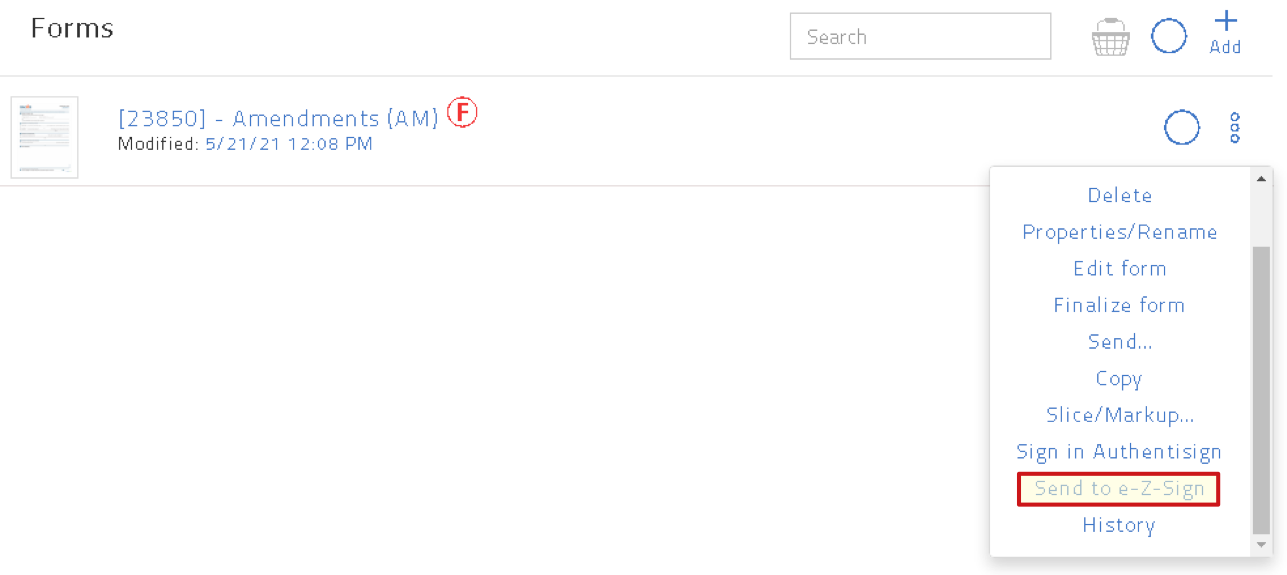
* Or, click on the 3 dots (Menu) to the right of the document to send and click on **Send to eZsign**.
- The message "Forms successfully sent to eZsign" in green and a small window will appear.
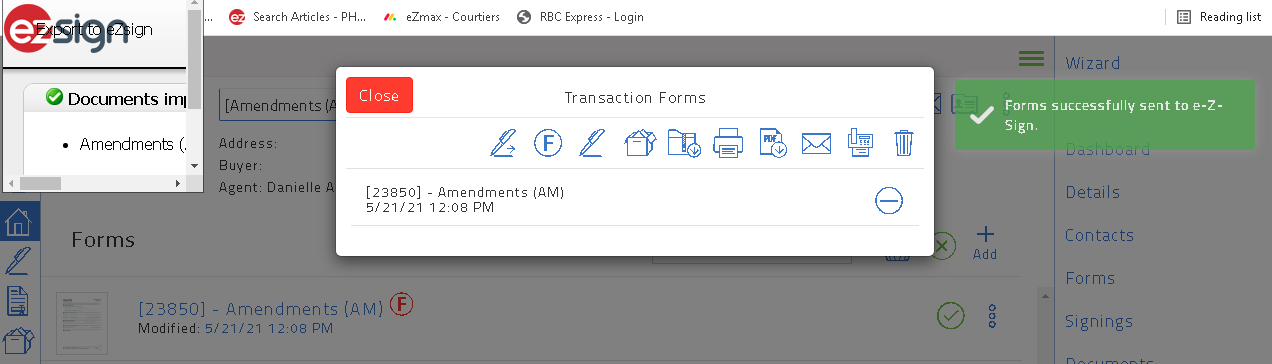
- Enlarge the window with the message "Documents imported successfully".
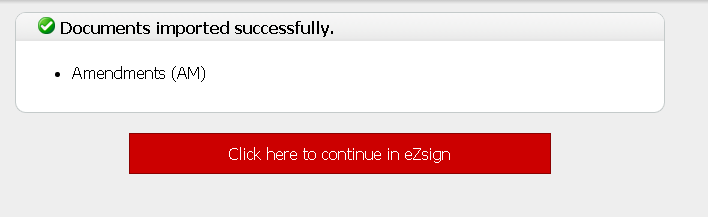
- Click on Click here to continue in eZsign.
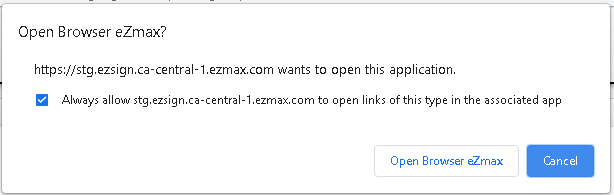
If this window opens, you can check the box if you always want to open the eZmax browser. This message will not appear again the next time. Click on Open Browser eZmax.
The eZmax logo will flash at the bottom of the screen. You must now associate the imported document with an eZsign folder.
Click on the flashing eZmax logo at the bottom of the screen, or;

- From your eZmax home page, in the "eZsign" section, click on the message "Imported Folders, Not Completed".

* Click on **Folder Name in InstanetForms**.
- The eZsign system gives you 2 options: New Folder or Associate with an Existing Folder.
New Folder
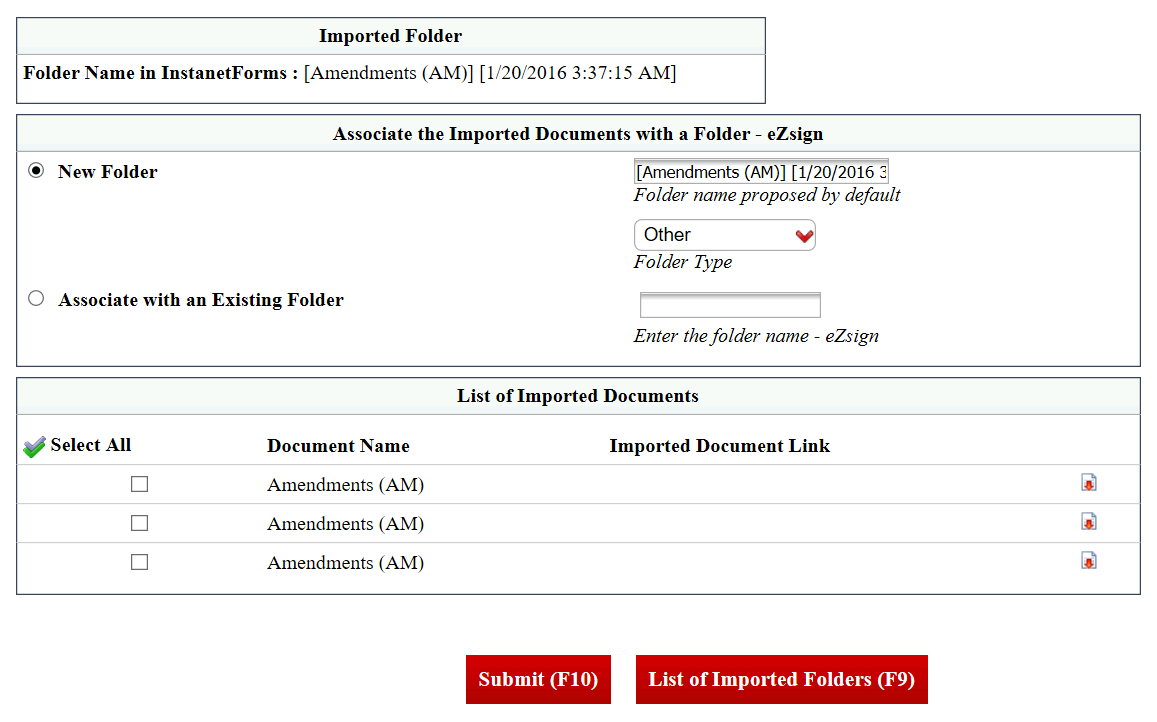
Check New Folder to create an eZsign folder for this transaction.
Verify the Folder name proposed by default and modify it if necessary.
NOTE: We recommend that you name the folder with the address associated with the transaction.
Select the desired Folder Type from the drop-down list.
In the "List of Imported Documents", check the box to the left of the desired document.
Click on Submit.
The folder will be created in eZsign and the document will be added in the "List of Documents" section.
Existing eZsign Folder
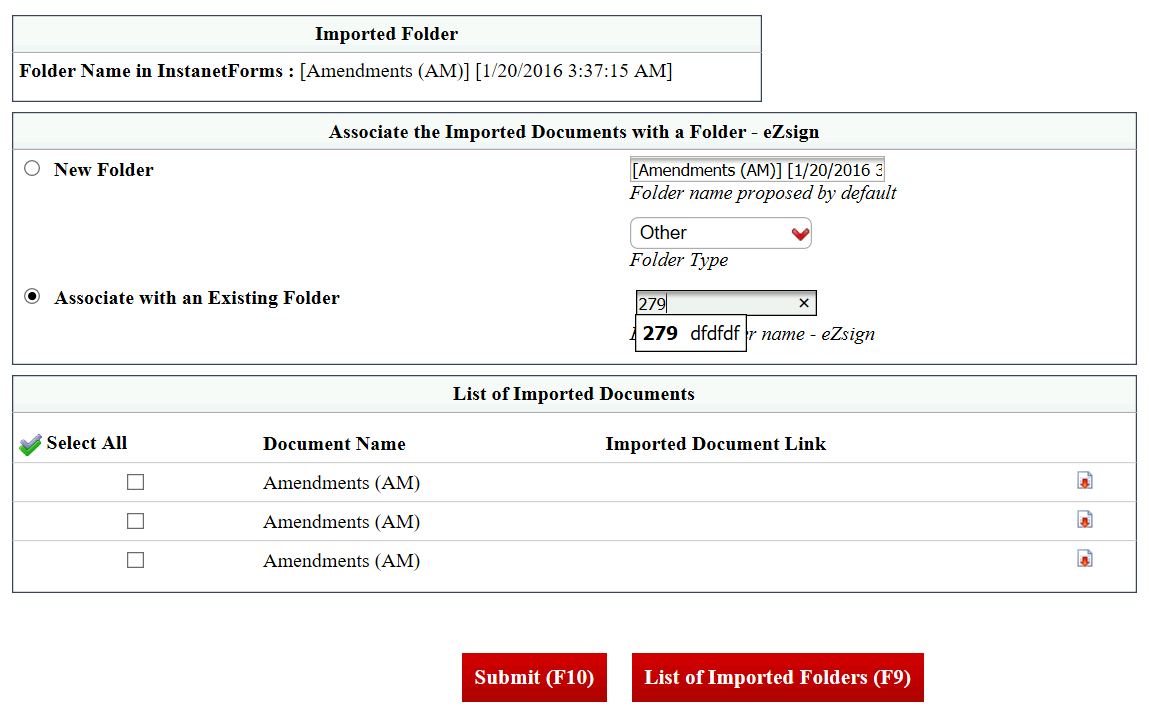
Check Associate with an Existing Folder if an eZsign folder has already been created for this transaction.
Start typing the name of the folder in the Enter the folder name - eZsign field and select it when it appears.
In the "List of Imported Documents", check the box to the left of the desired document.
Click on Submit.
The document will be added in the "List of Documents" section of the selected eZsign folder.