

English
Signing a Document as a User
Once the folder is created, here are, in order, the next steps:
- Add the signatories. For more information, please see the article Adding/Editing/Deleting a Signatory in an eZsign Folder.
- Add the documents. For more information, please see the article Adding/Editing/Deleting a Document in an eZsign Folder.
- Add the fields. For more information, please see the article Manually Adding/Editing/Deleting a Field in a Document.
- Send the documents to sign. For more information, please see the article Sending Documents to Sign.
- Sign the documents.
- Send the signed documents by e-mail. For more information, please see the article Sending Signed Documents by E-mail.
Signing a Document as a User
When you send a document in which you need to sign as a user, depending on the type of fields present in the document, you will be asked to sign the document immediately or later (via the eZsign folder or your home page).
Form fields: You will sign later via the eZsign folder or the message "You have pending forms." on your home page. For more information, please see the article Filling In a Form as a User.
Electronic signature fields "Initials", "Name" and "Signature City": You have the choice to sign immediately or later (via the eZsign folder or the message "You have pending signatures." on your home page).
All other electronic signature fields: You will sign later via the eZsign folder or the message "You have pending signatures." on your home page.
Sign the Document Immediately
Applicable only for electronic signature fields "Initials", "Name" and "Signature City".
- When sending documents, after clicking Send :
- Here is an example of a message that will appear for the field "Initials" or "Name":
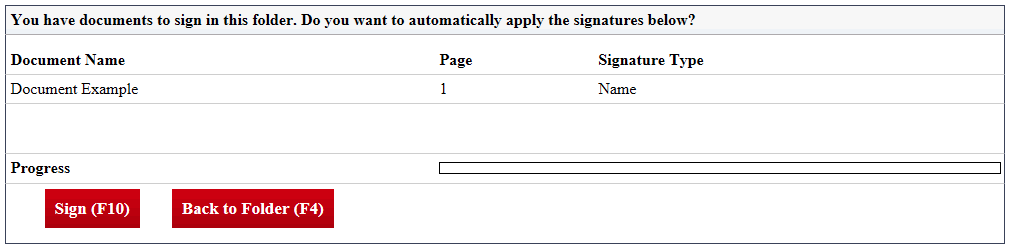
* Here is an example of a message that will appear for the field "Signature City":
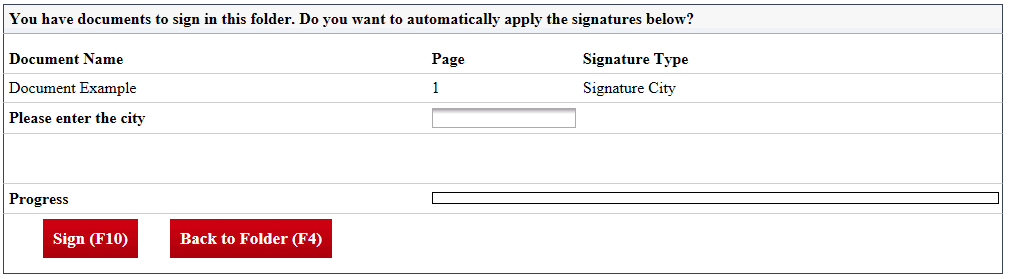
* Fill in the **Please enter the city** field.
- Click on Sign and this message will appear: "X signatures have been automatically applied".
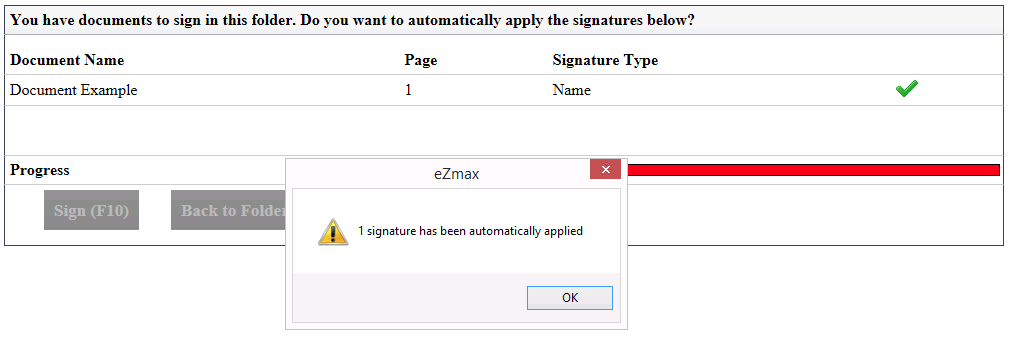
- Click on OK to return to the eZsign folder.
**
Sign the Document Later - From eZsign Folder**
When sending documents, after clicking Send:
- For electronic signature fields "Initials", "Name" and "Signature City", click on Back to Folder.
- For all other electronic signature fields, the message "The documents have been sent successfully." will appear and you will be automatically in the eZsign folder.
In the "Signatures Status" section of the eZsign folder, from the Actions menu of the desired document:

- Select "Sign Document" to display the document to sign.
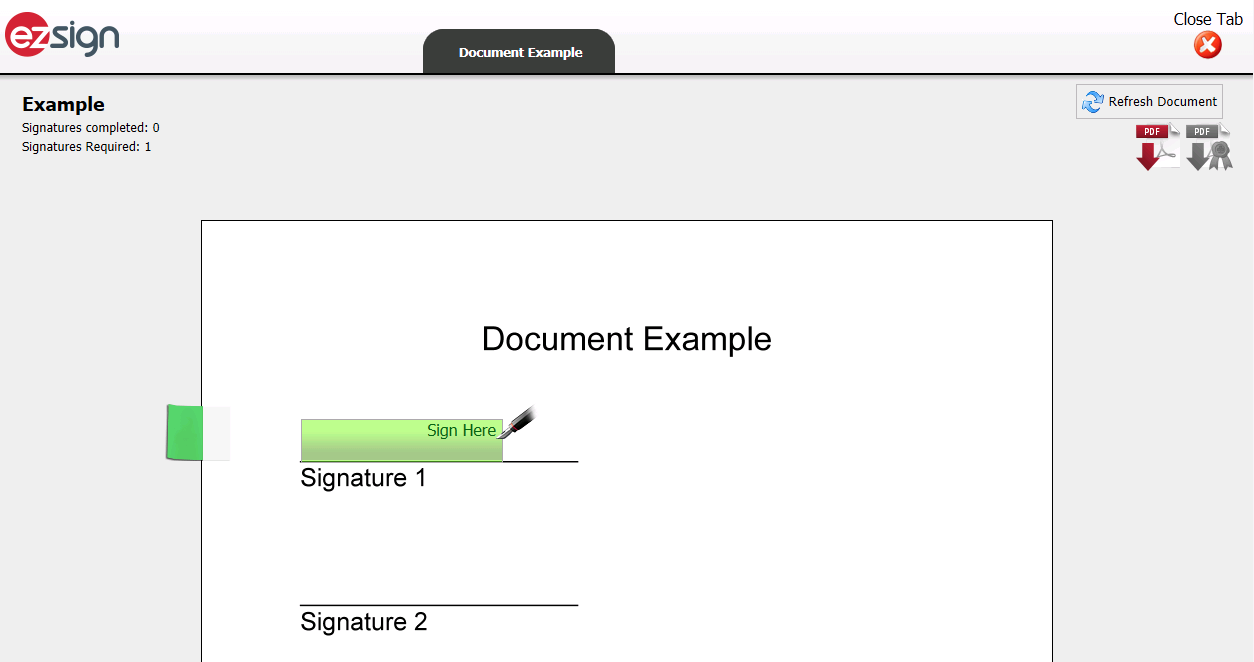
- Sign the document where indicated by clicking on Sign Here.
NOTE: If the field that was added in the document is "Signature City", click on Enter the city here. Enter the name of the city from which you are signing in the window that will appear and click on Send. The system will ask you to confirm then click on Yes to confirm.
Sign the Document Later - Pending Signatures
When sending documents, after clicking Send:
- For electronic signature fields "Initials", "Name" and "Signature City", click on Back to Folder.
- For all other electronic signature fields, the message "The documents have been sent successfully." will appear and you will be automatically in the eZsign folder.
Click on the House icon

to open the home page and look for the message "You have pending signatures.".
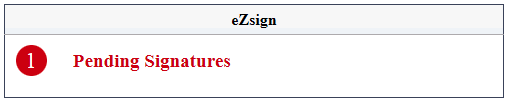
- Click on the number to the right of the message to access the pending signatures.
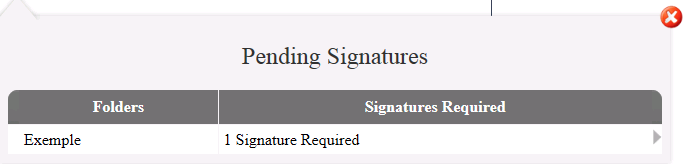
- Click on the folder name or the number of signatures required to display the document to sign.
- Sign the document where indicated by clicking on SignHere.
NOTE: If the field that was added in the document is "Signature City", click on Enter the city here. Enter the name of the city from which you are signing in the window that will appear and click on Send. The system will ask you to confirm then click on Yes to confirm.