

English
Upgrade to an eZsign Pro Account - The Benefits
Upgrade to an eZsign Pro Account - The Benefits
This article presents some of the benefits of eZsign Pro when creating an eZsign folder.
View Your eZsign Subscription
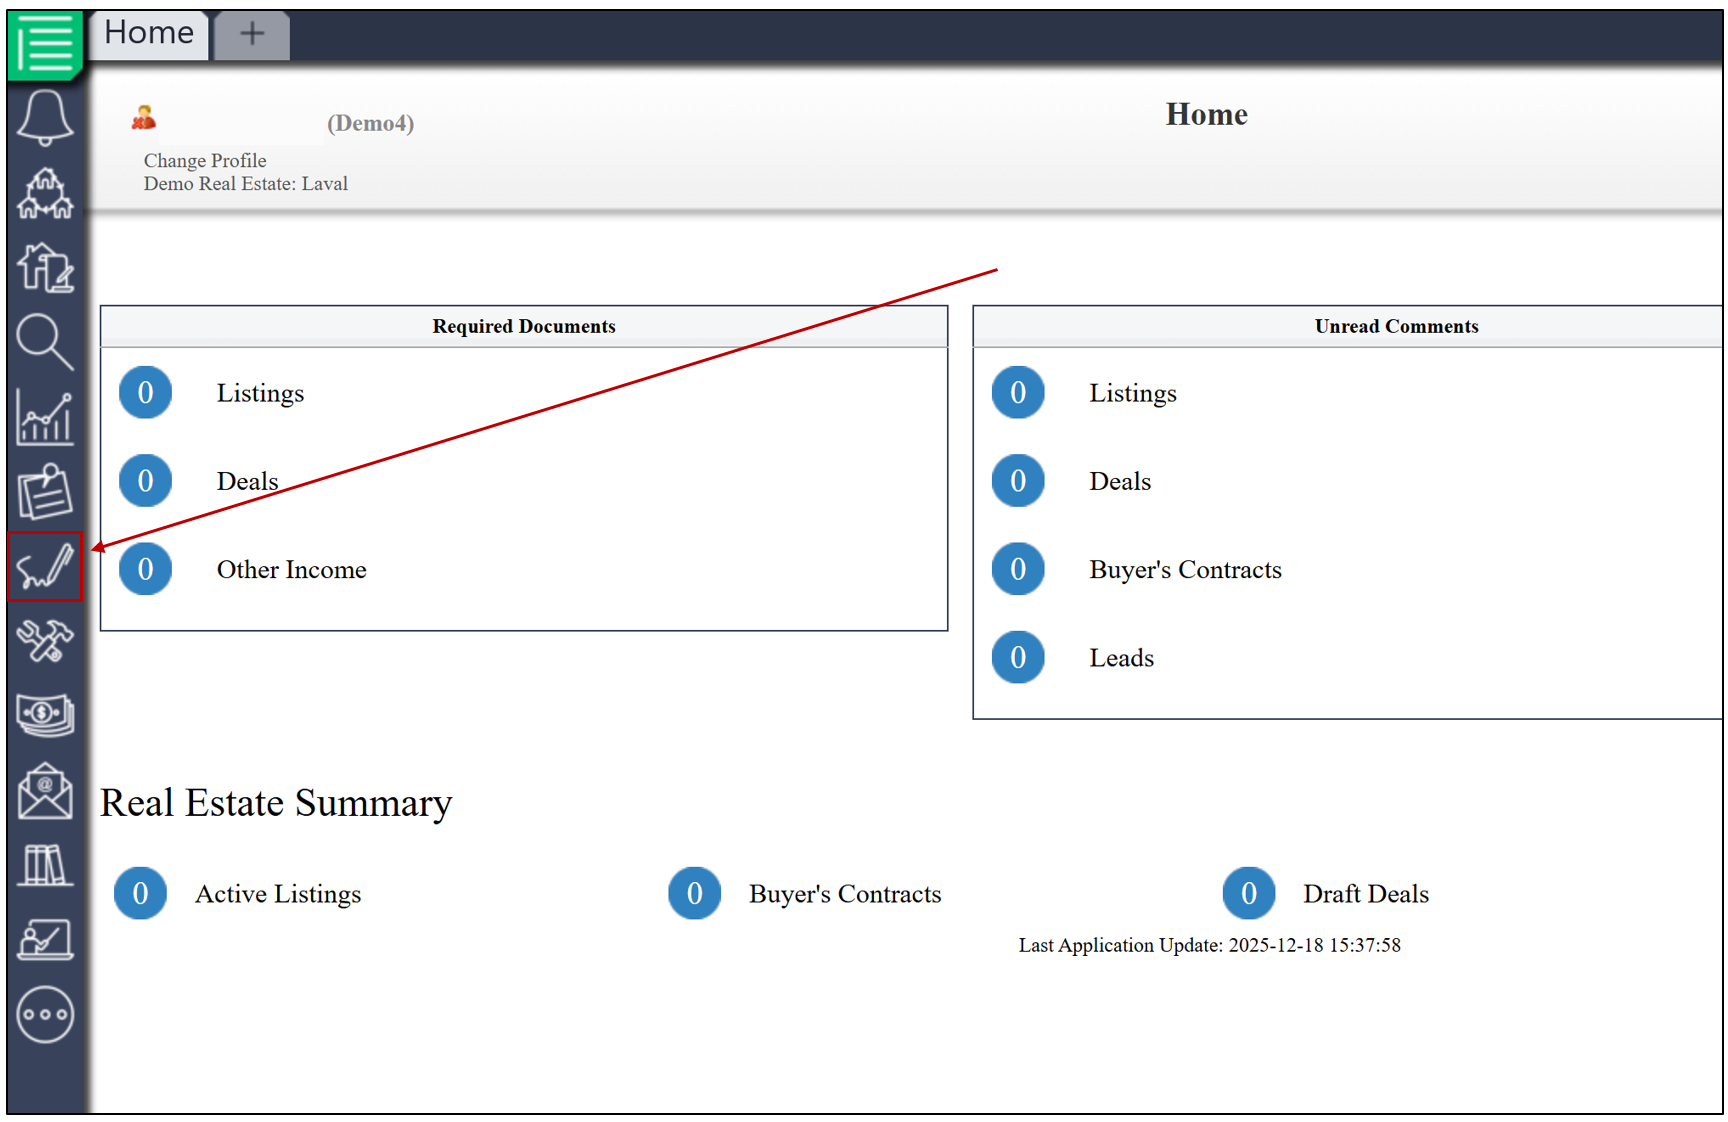
From your home menu in eZmax, click the

icon to access eZsign.
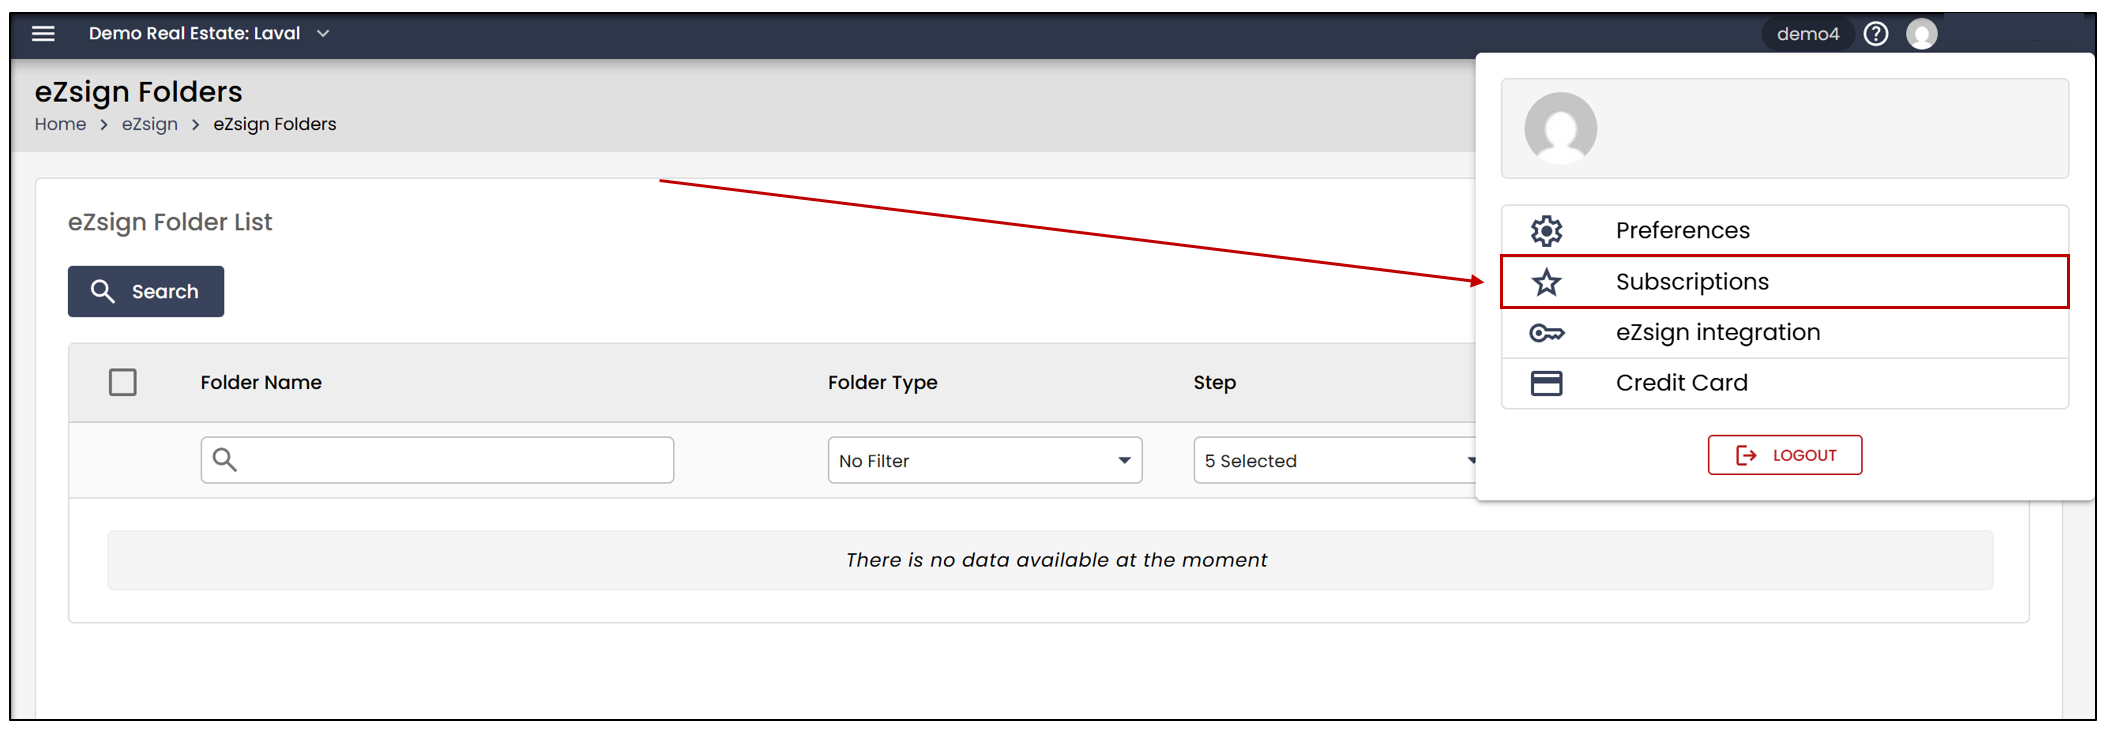
- To view your subscription, click your profile picture, then click Subscriptions.
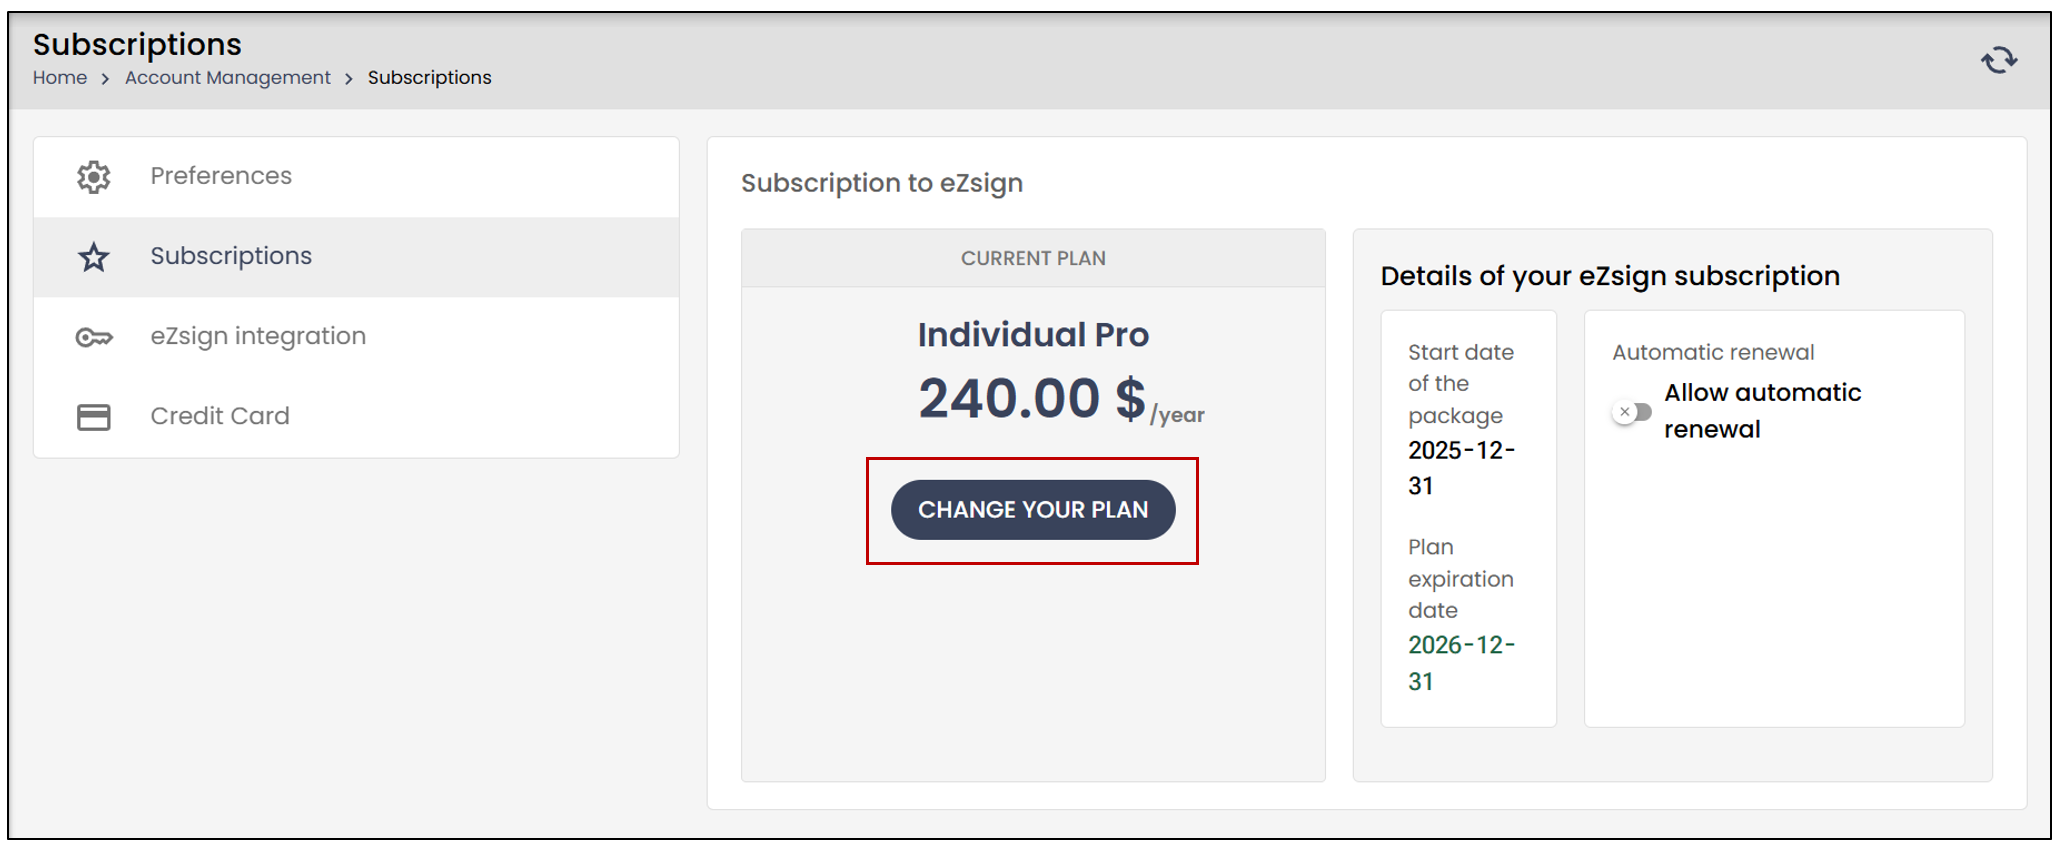
- To view the available plans, click Change your plan.
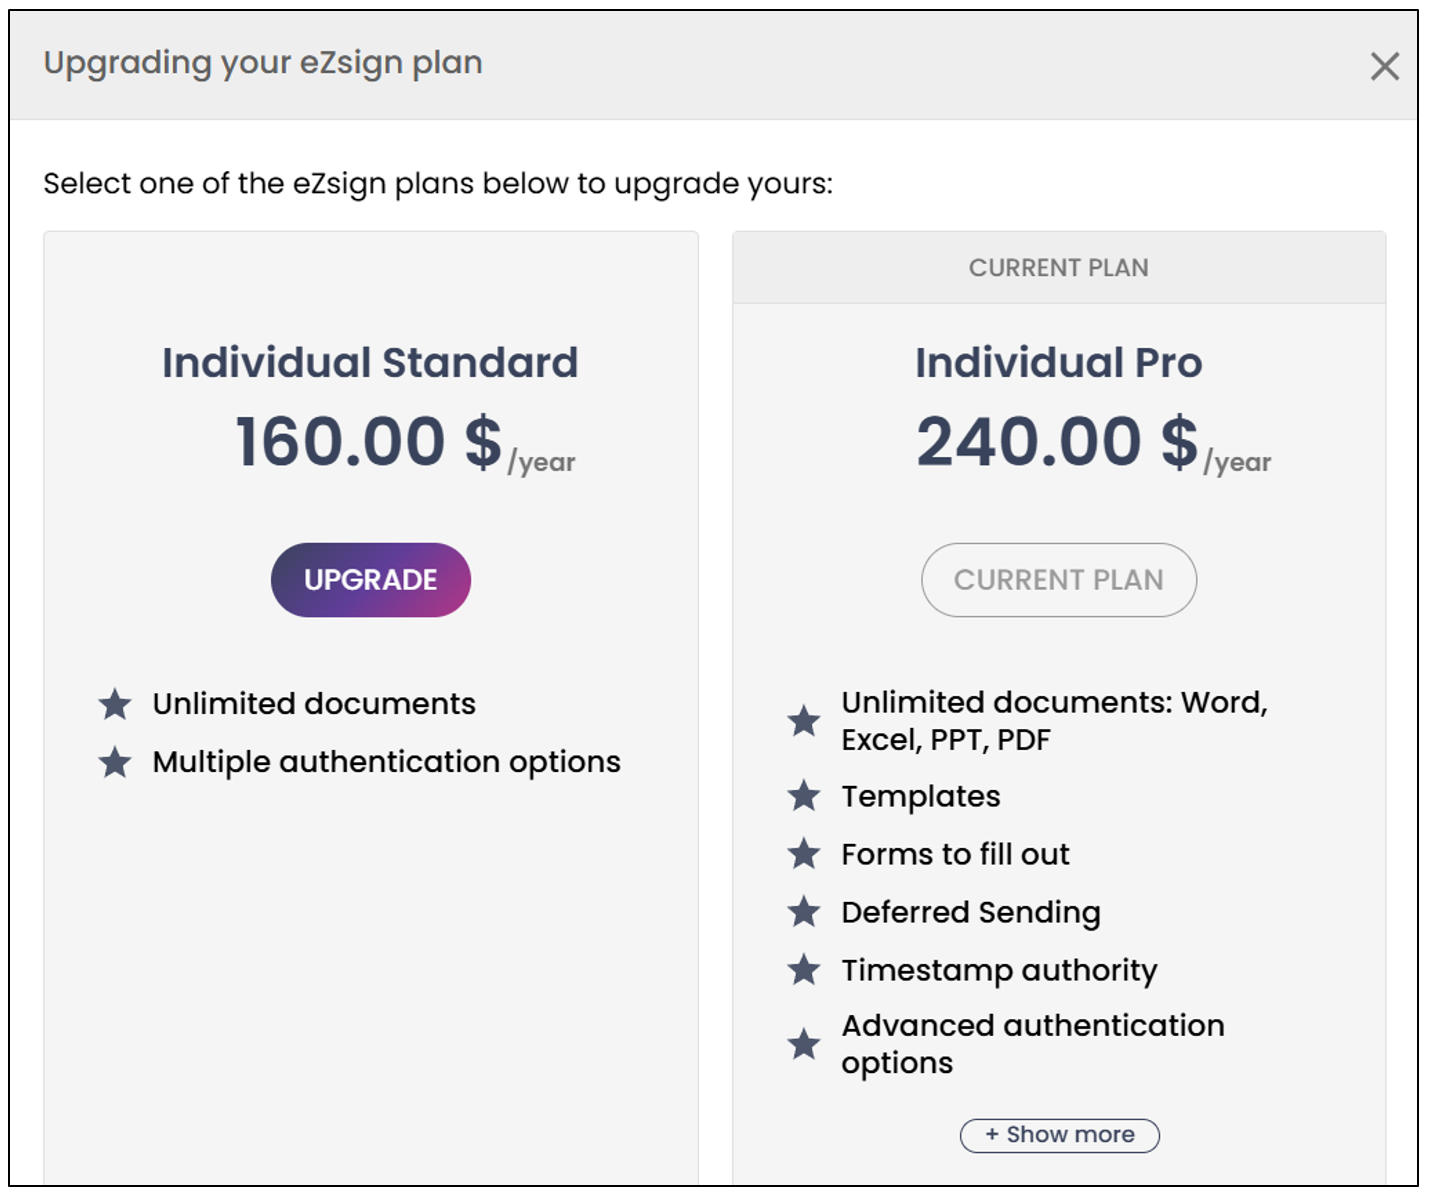
- If you want to upgrade from a Standard account to a Pro account, click Upgrade.
Date Field
One of the benefits of eZsign Pro when creating an eZsign folder is the ability to modify the date field associated with a signature field.
When adding a signature field, the date appears outlined with a dotted line.
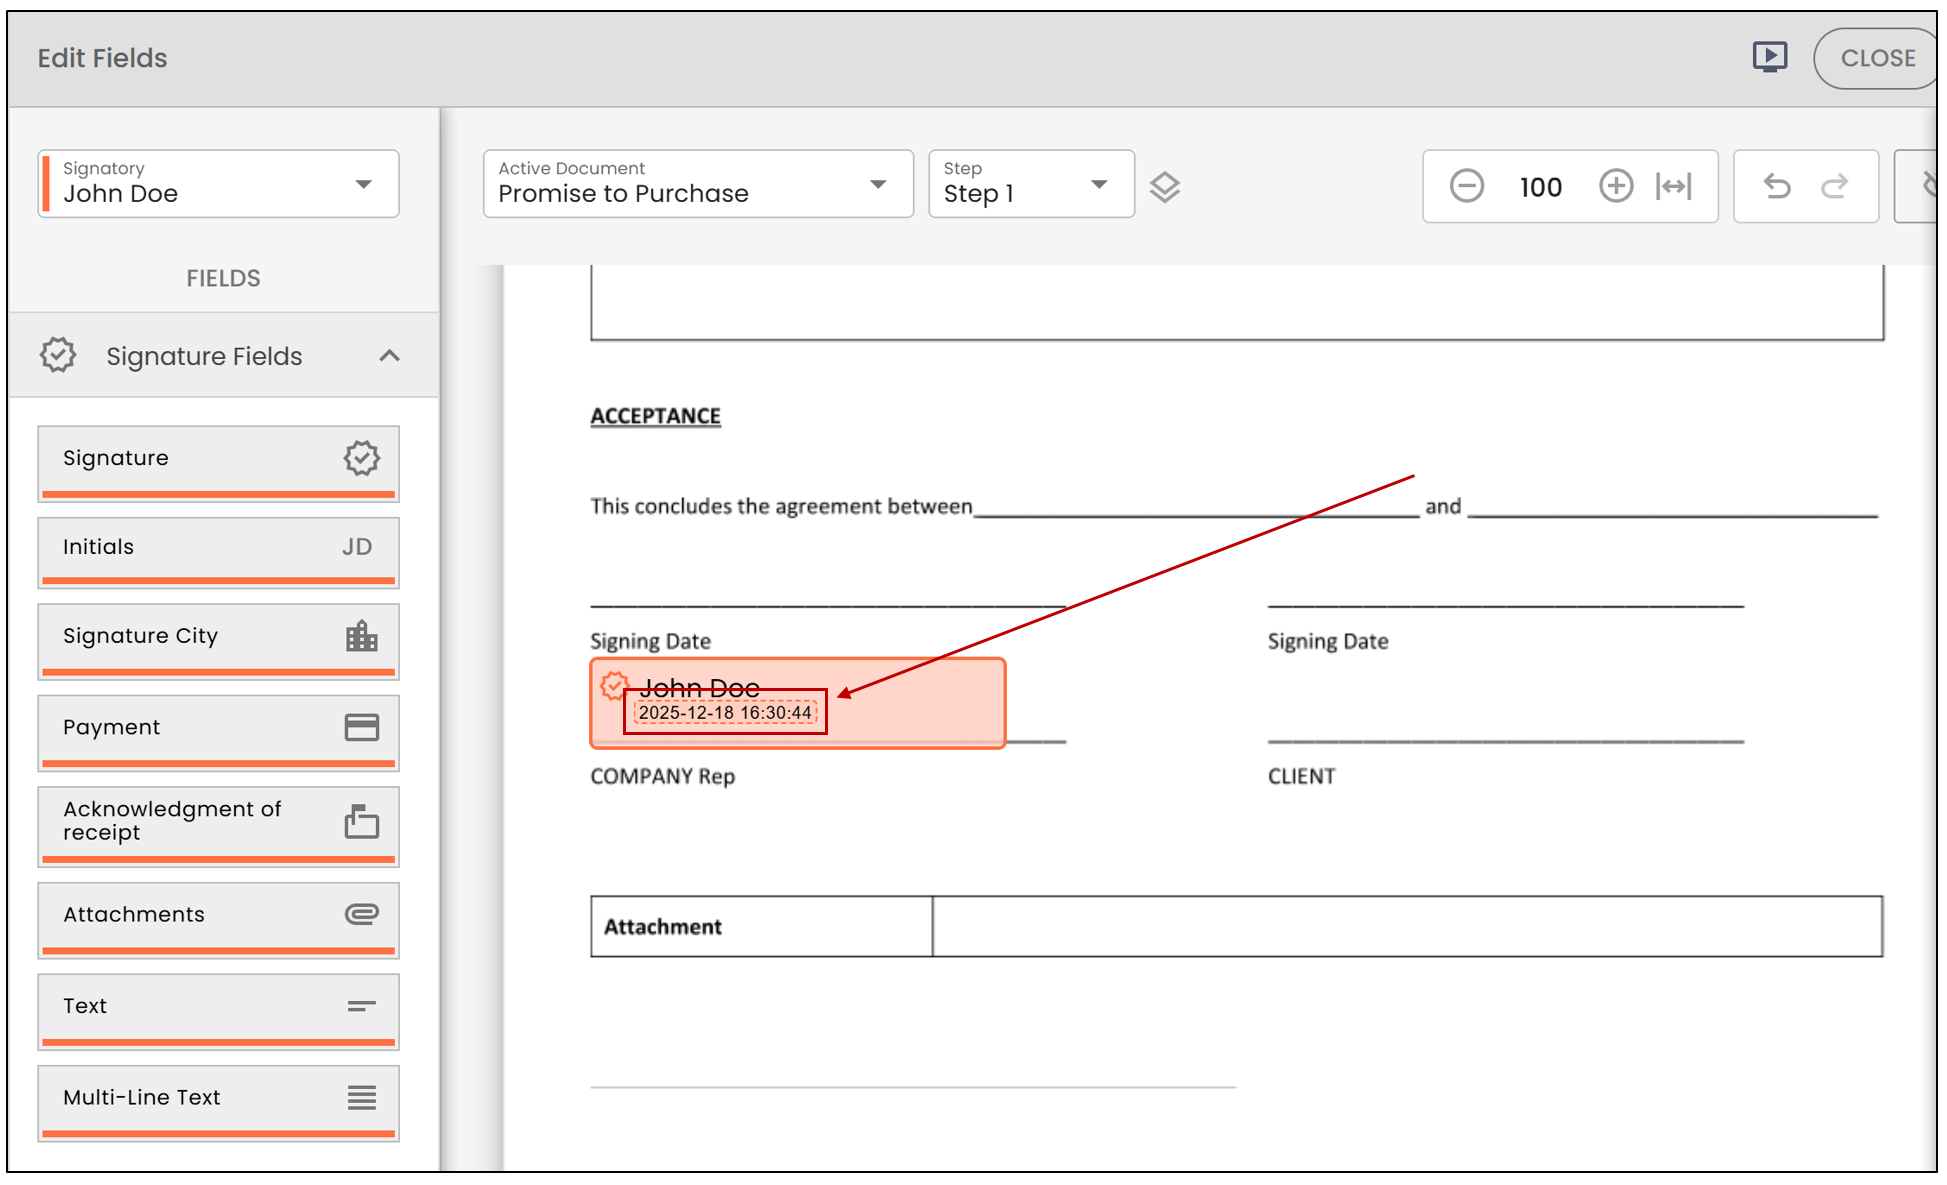
With a Pro account, it is possible to move the date to the desired location on the document. You can then customize the date format.
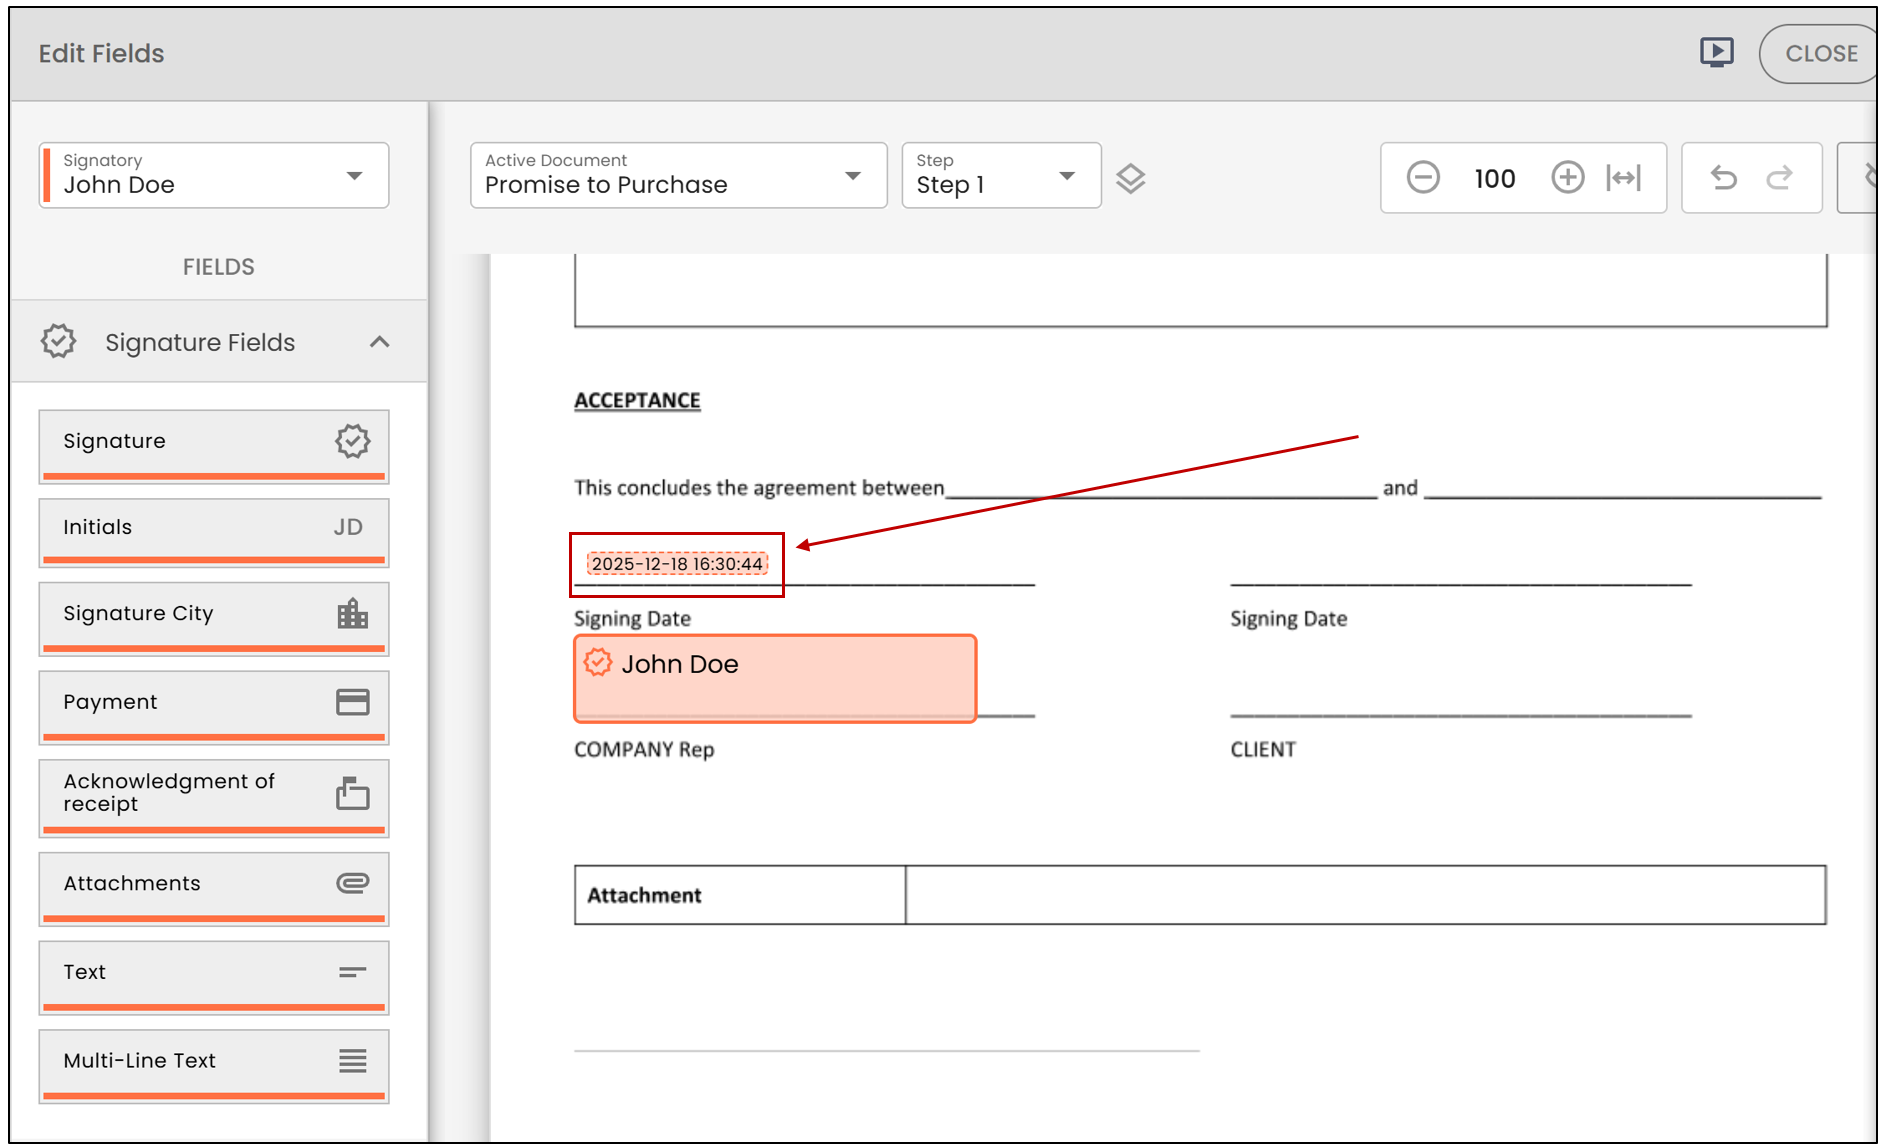
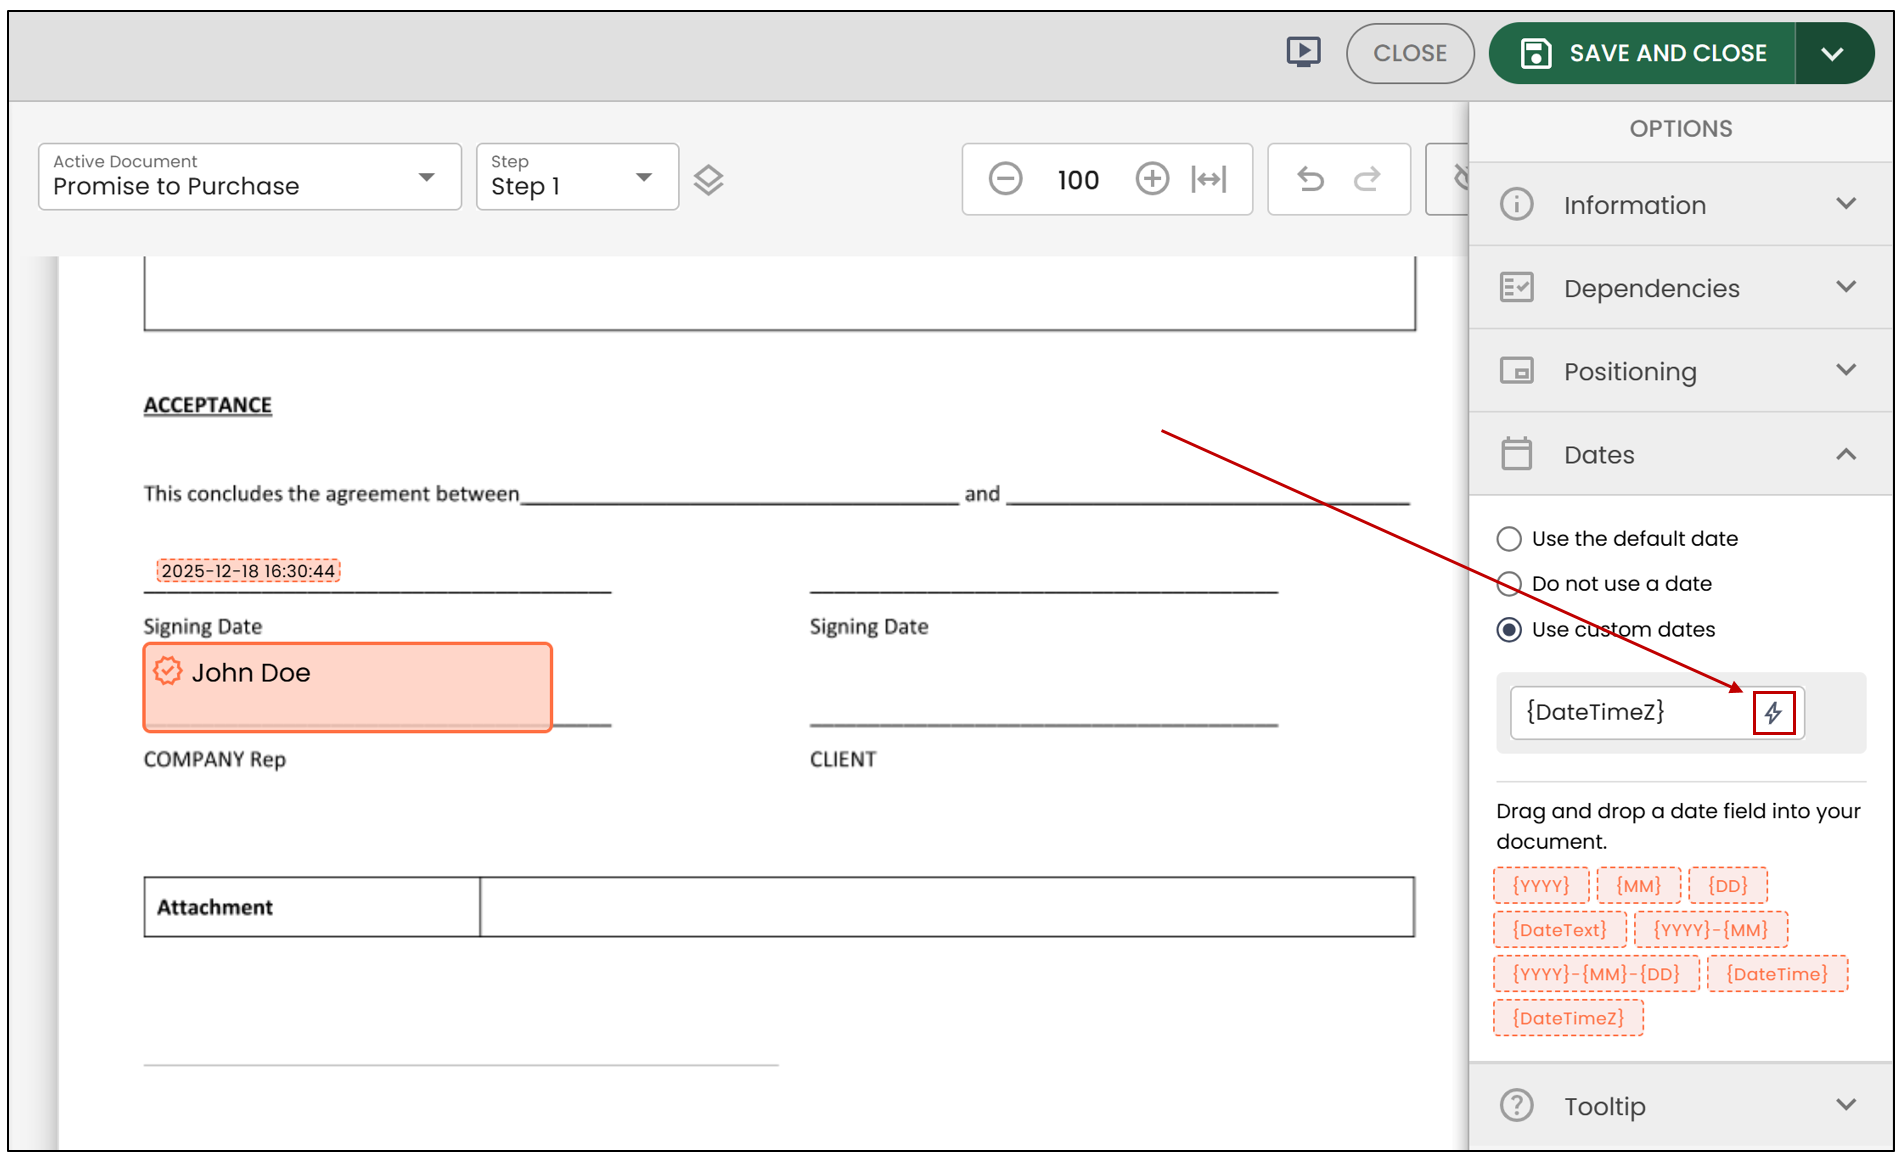
Customize the Date Format
To customize the date format, go to the field’s Dates section, then click the

icon.
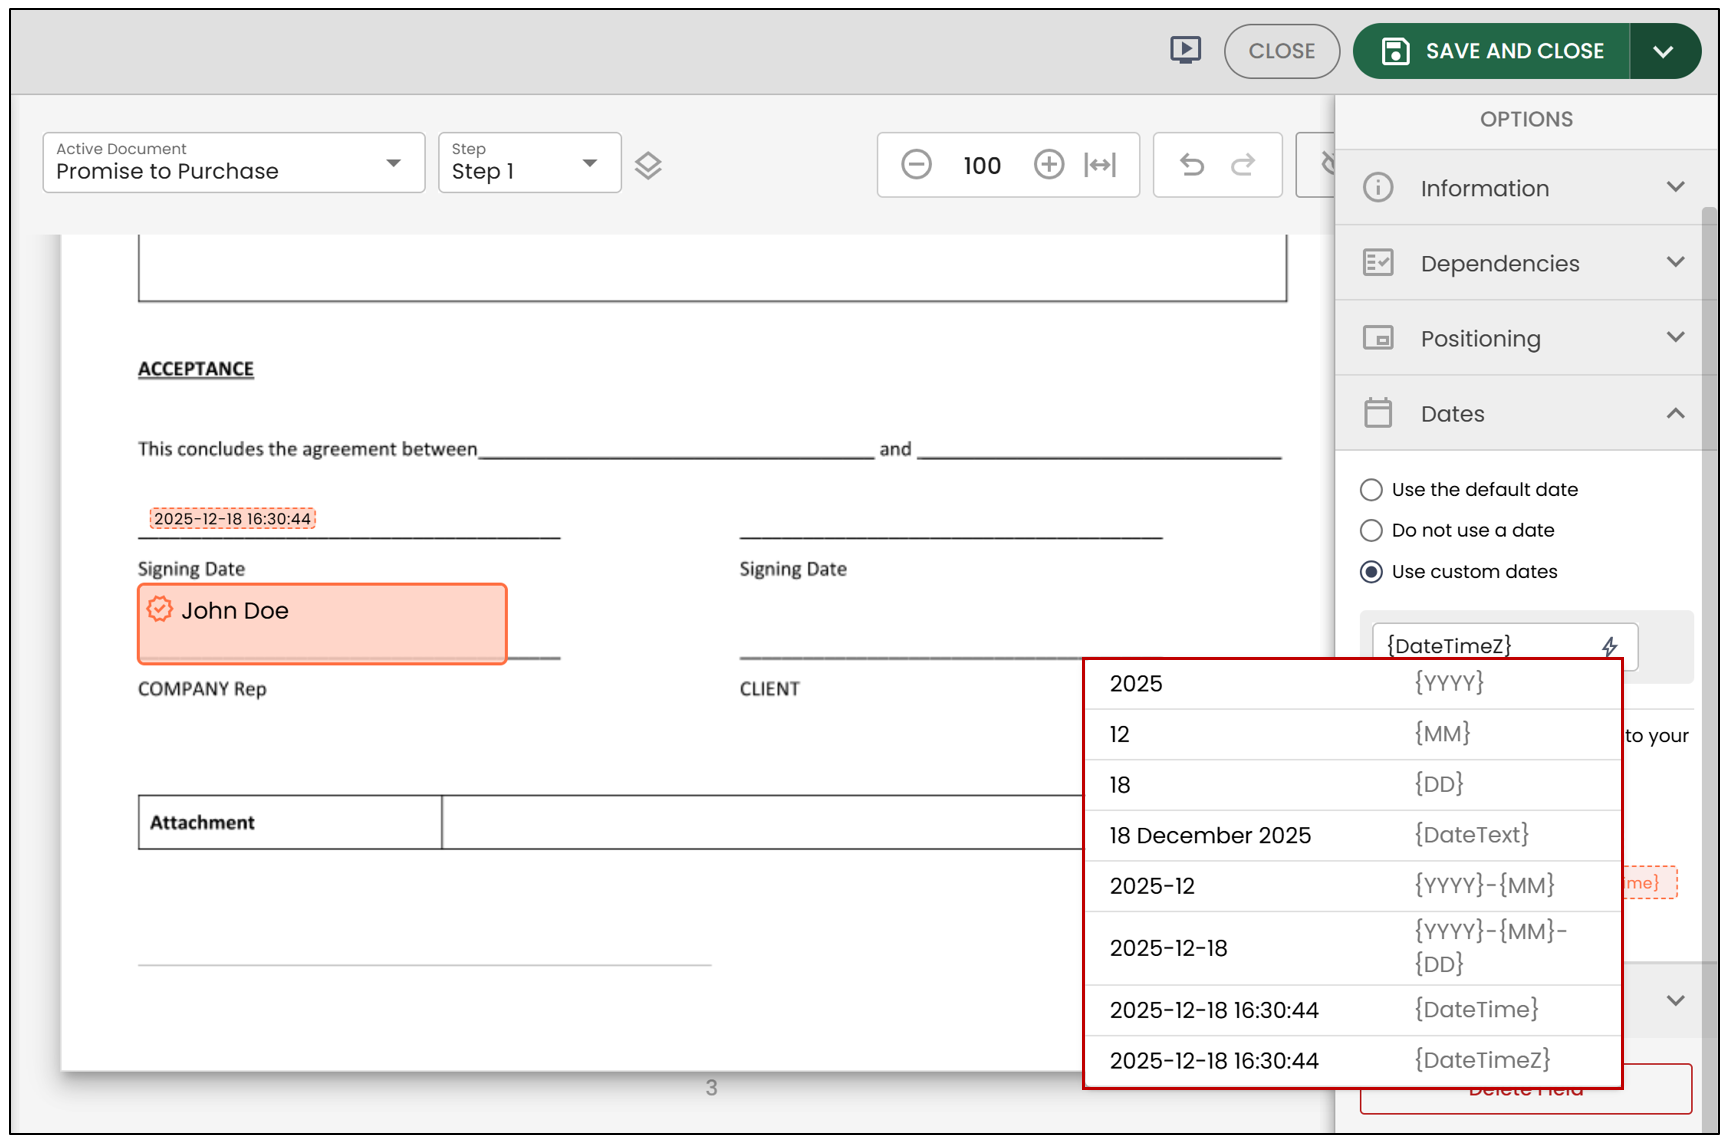
- You will then be able to select the desired format.
- To insert a new date field into the document, drag it to the desired location.
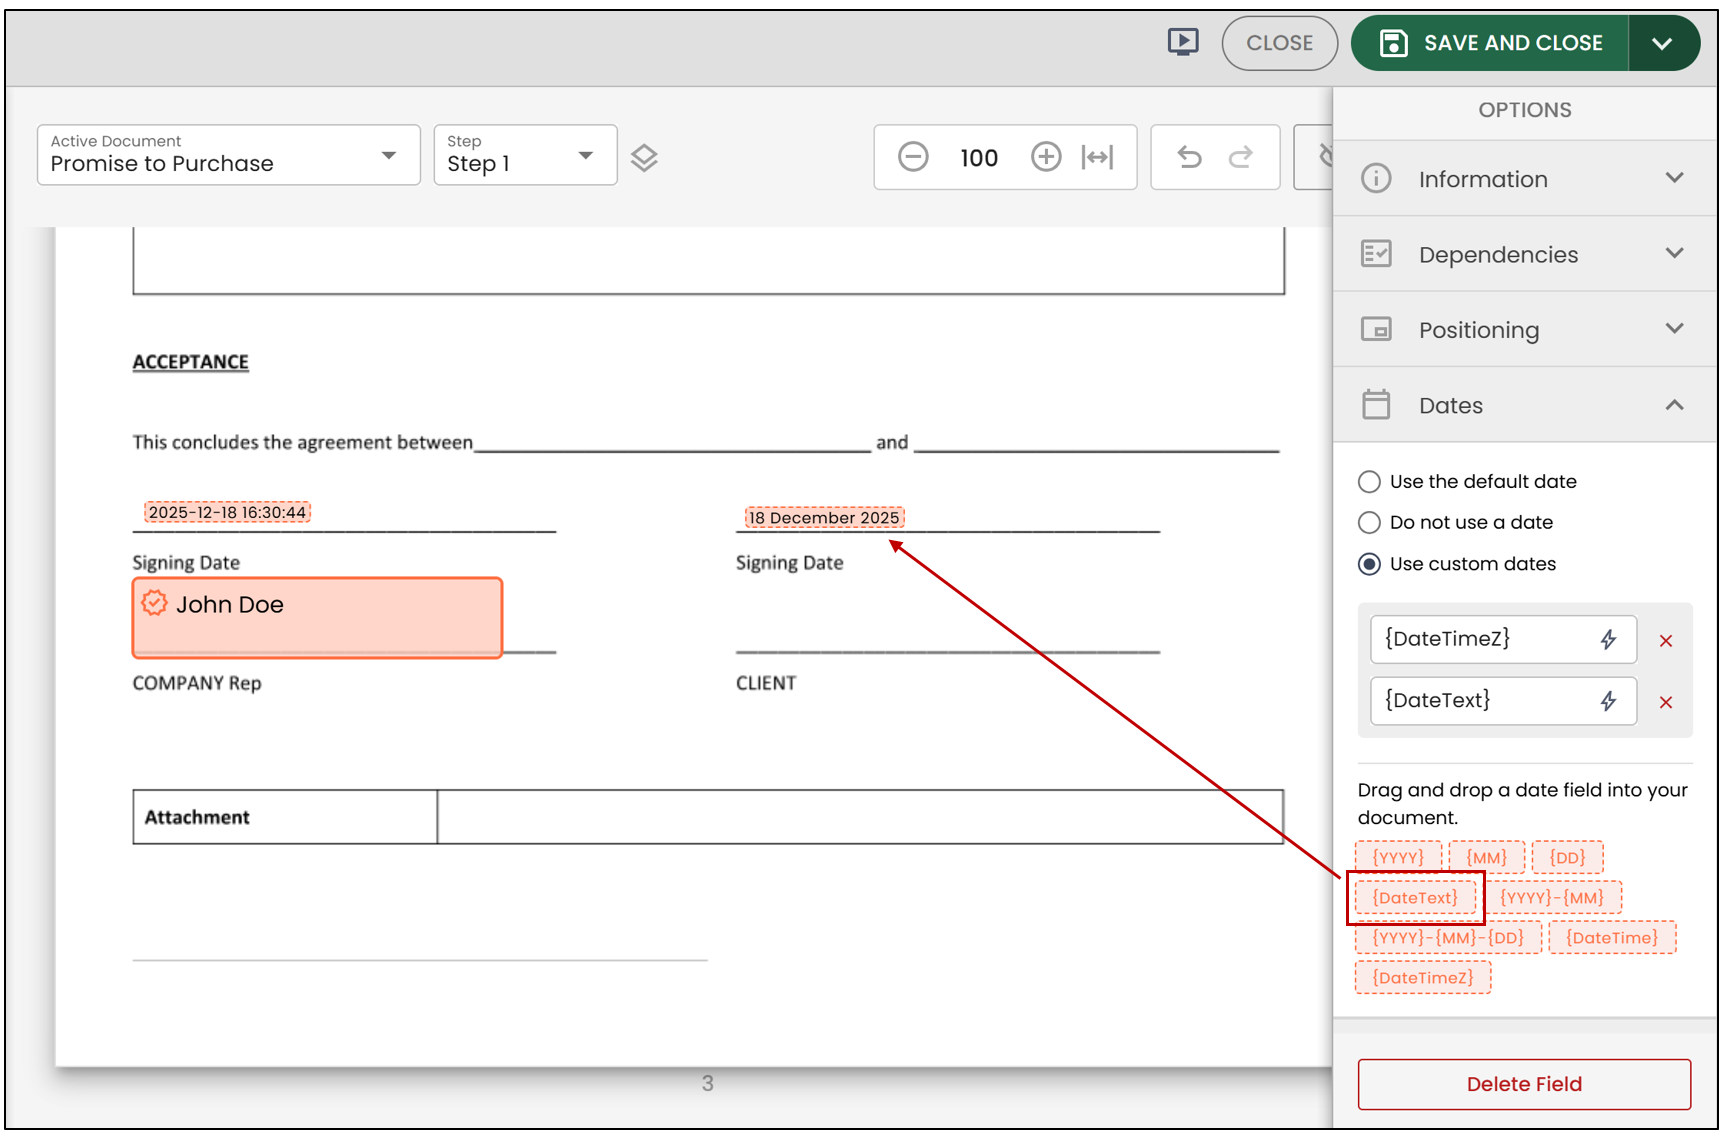
NOTE: With a Standard account, the date remains associated with the signature and is displayed below it.
Document Viewing
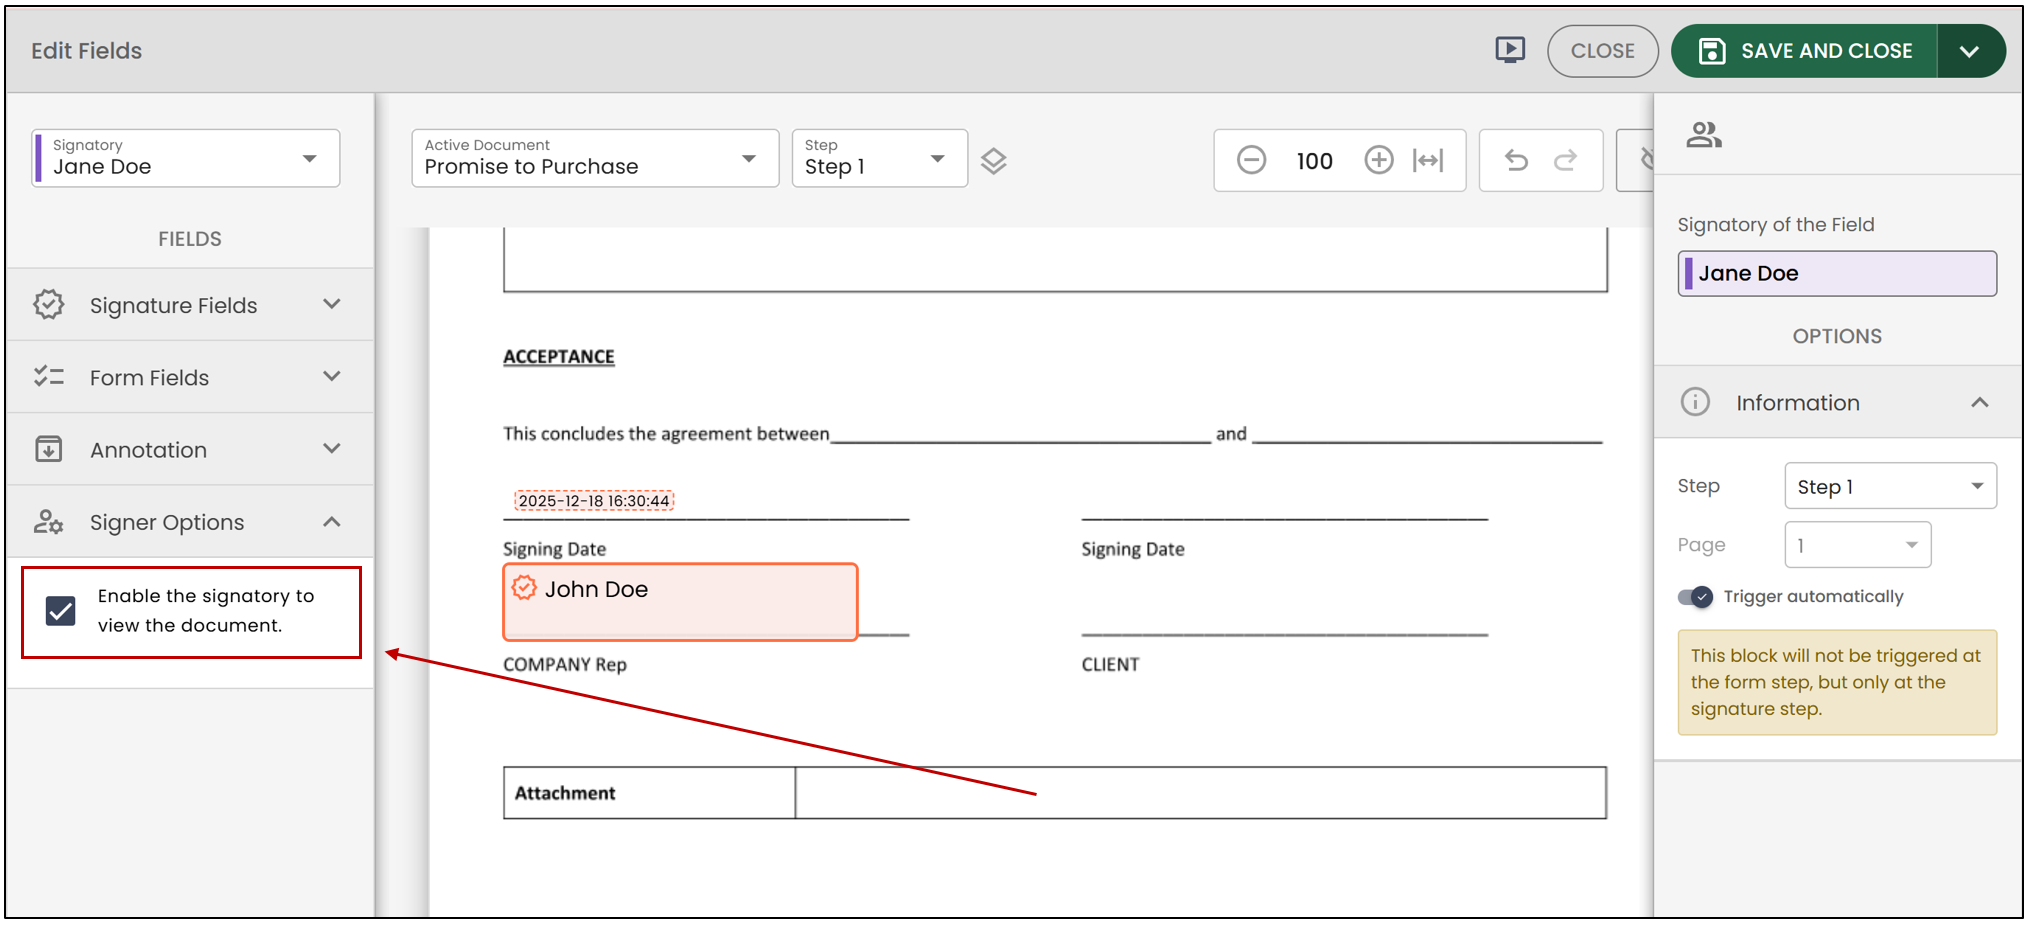
Another benefit of the eZsign Pro account is the document viewing option. You can send a document to someone who does not need to sign it, but only to view it.
- Select the desired recipient, then enable document review in the Signer Options section.
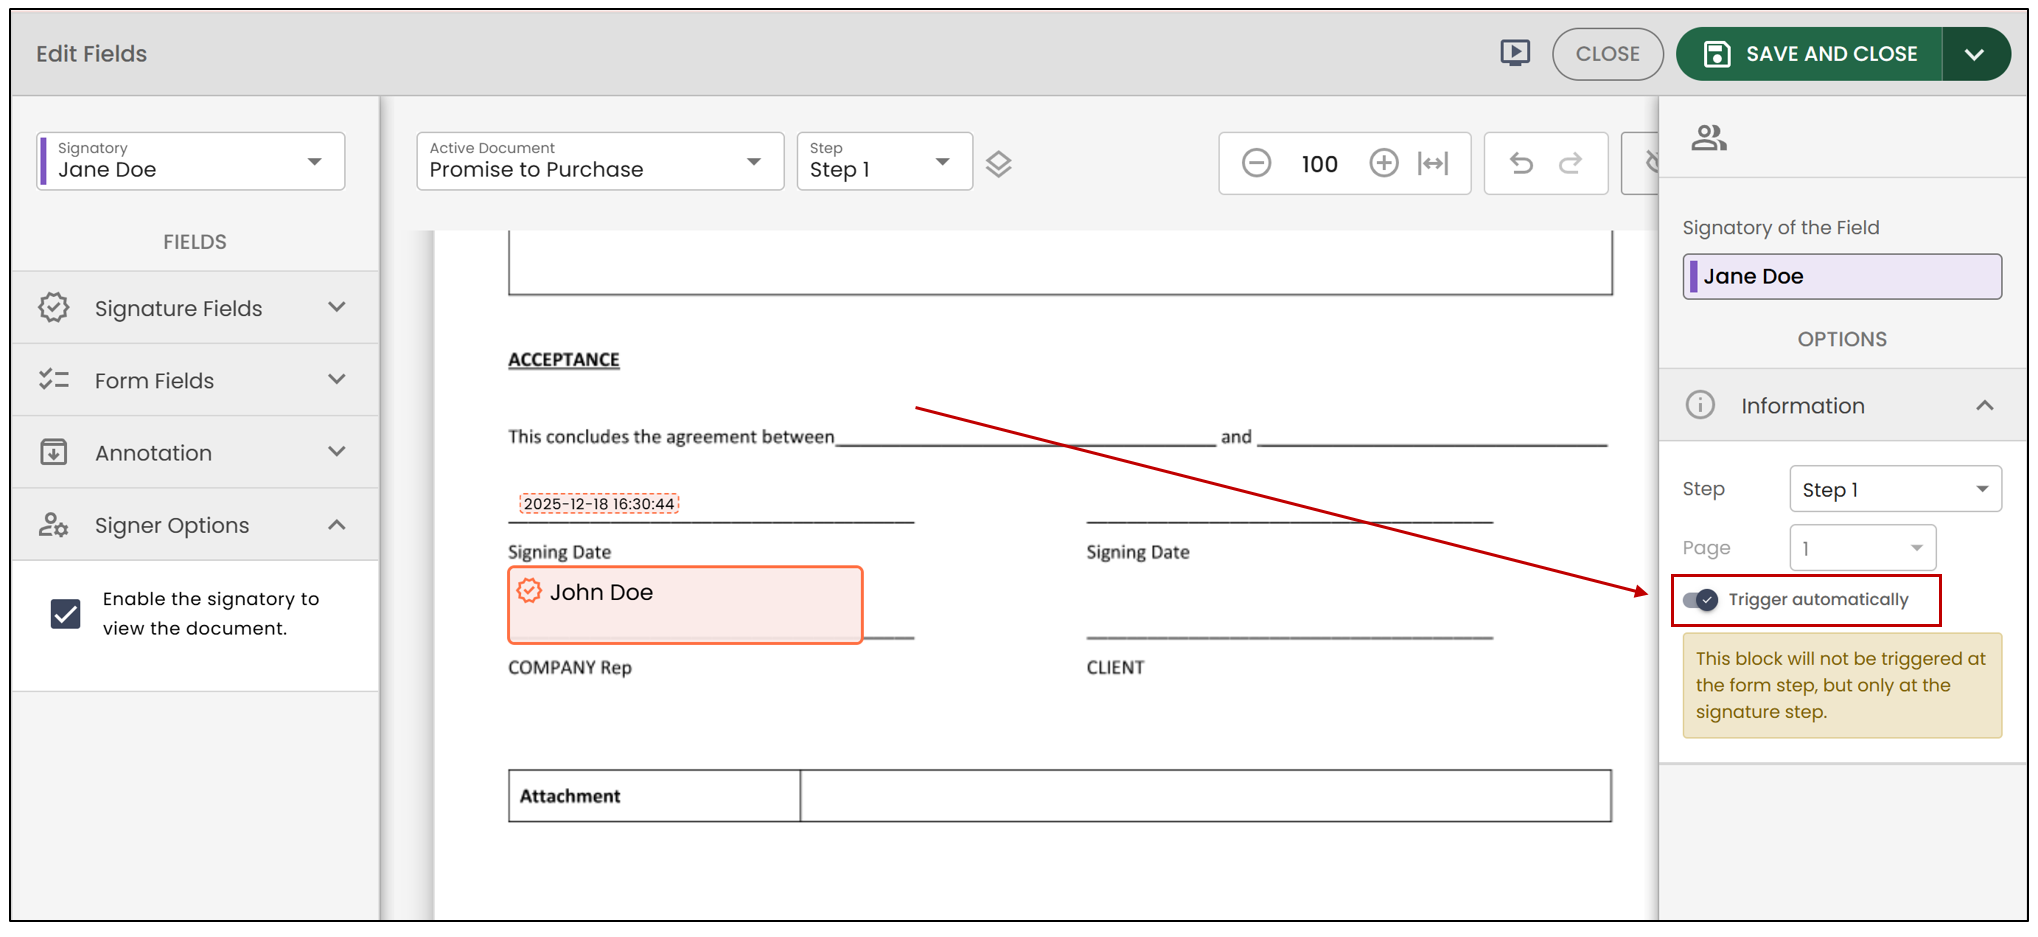
- You can then choose whether the review occurs automatically when the document is opened, or if the person must click a button to confirm they have viewed it.
Content Templates
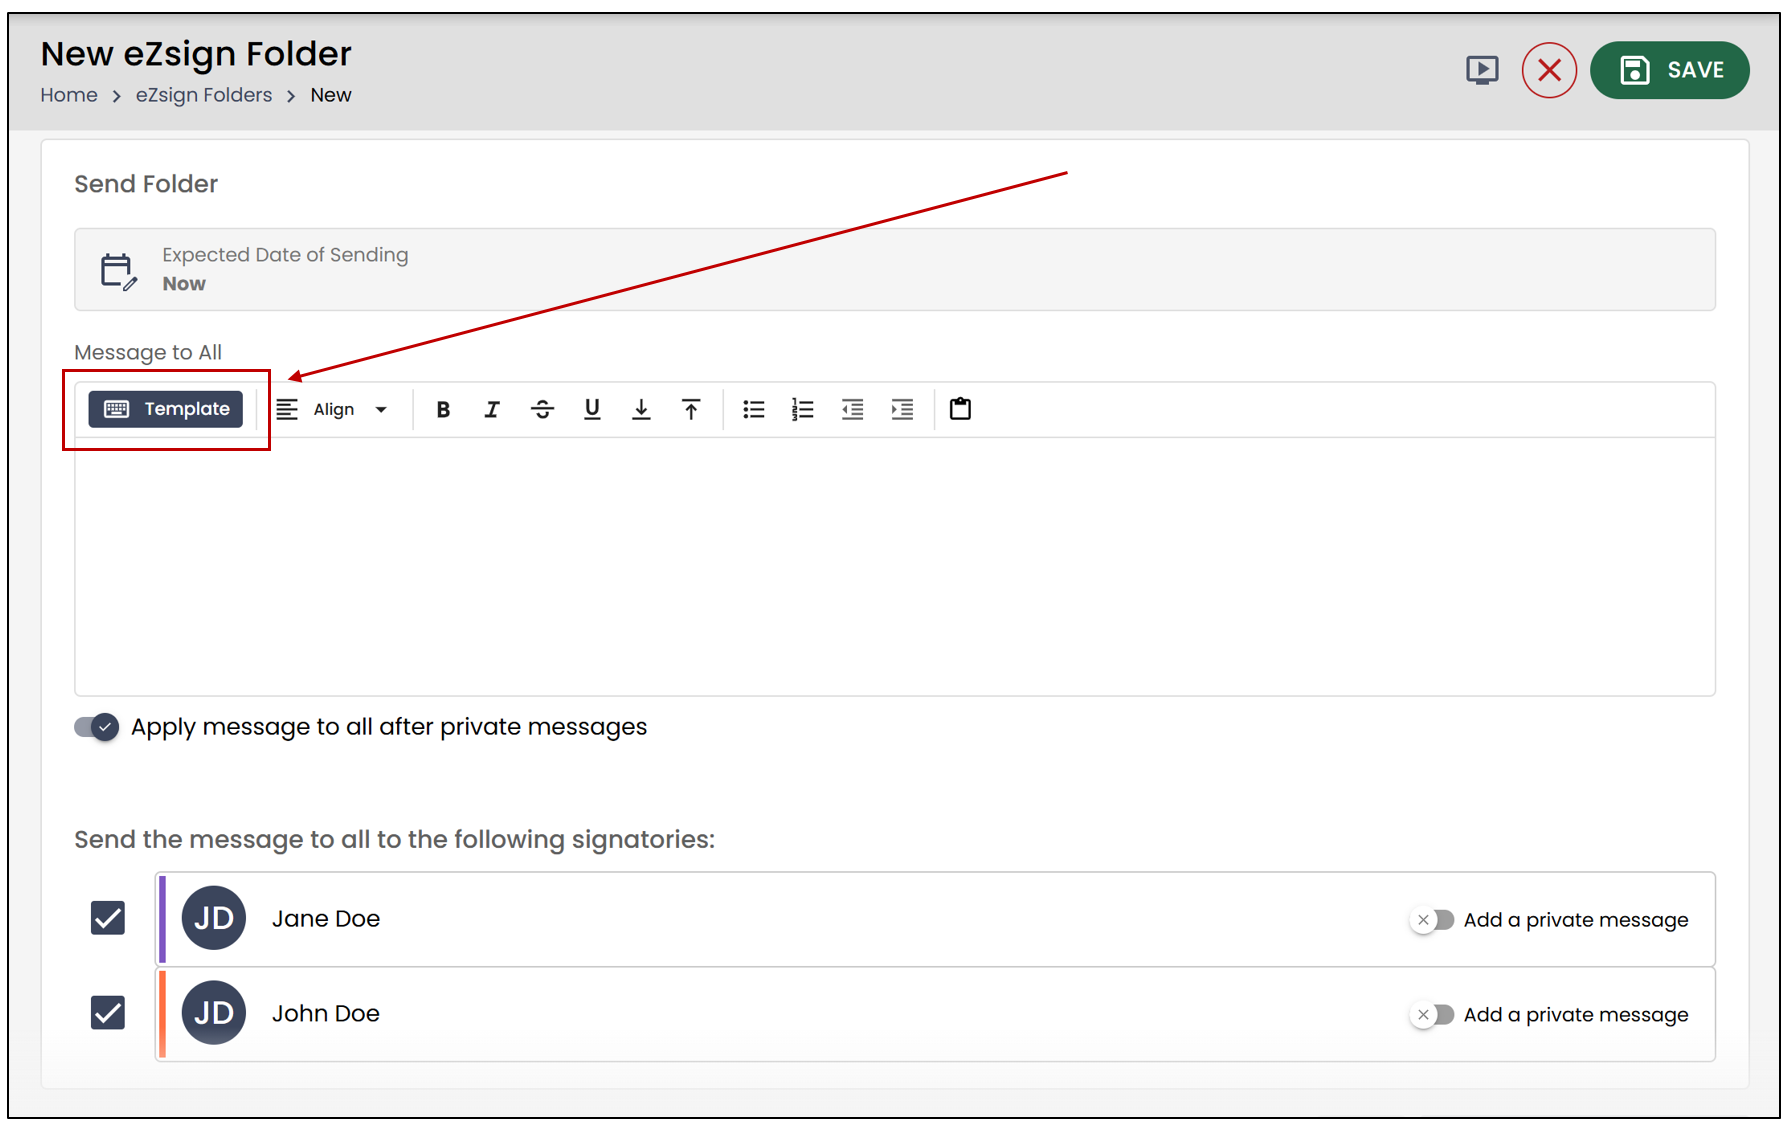
When sending a document, a user with a Standard eZsign account can send a message to all signers or a private message to a single signer. However, the Pro account offers the ability to create and use content templates to streamline message sending. This option allows you to save messages in advance for reuse with each sending.
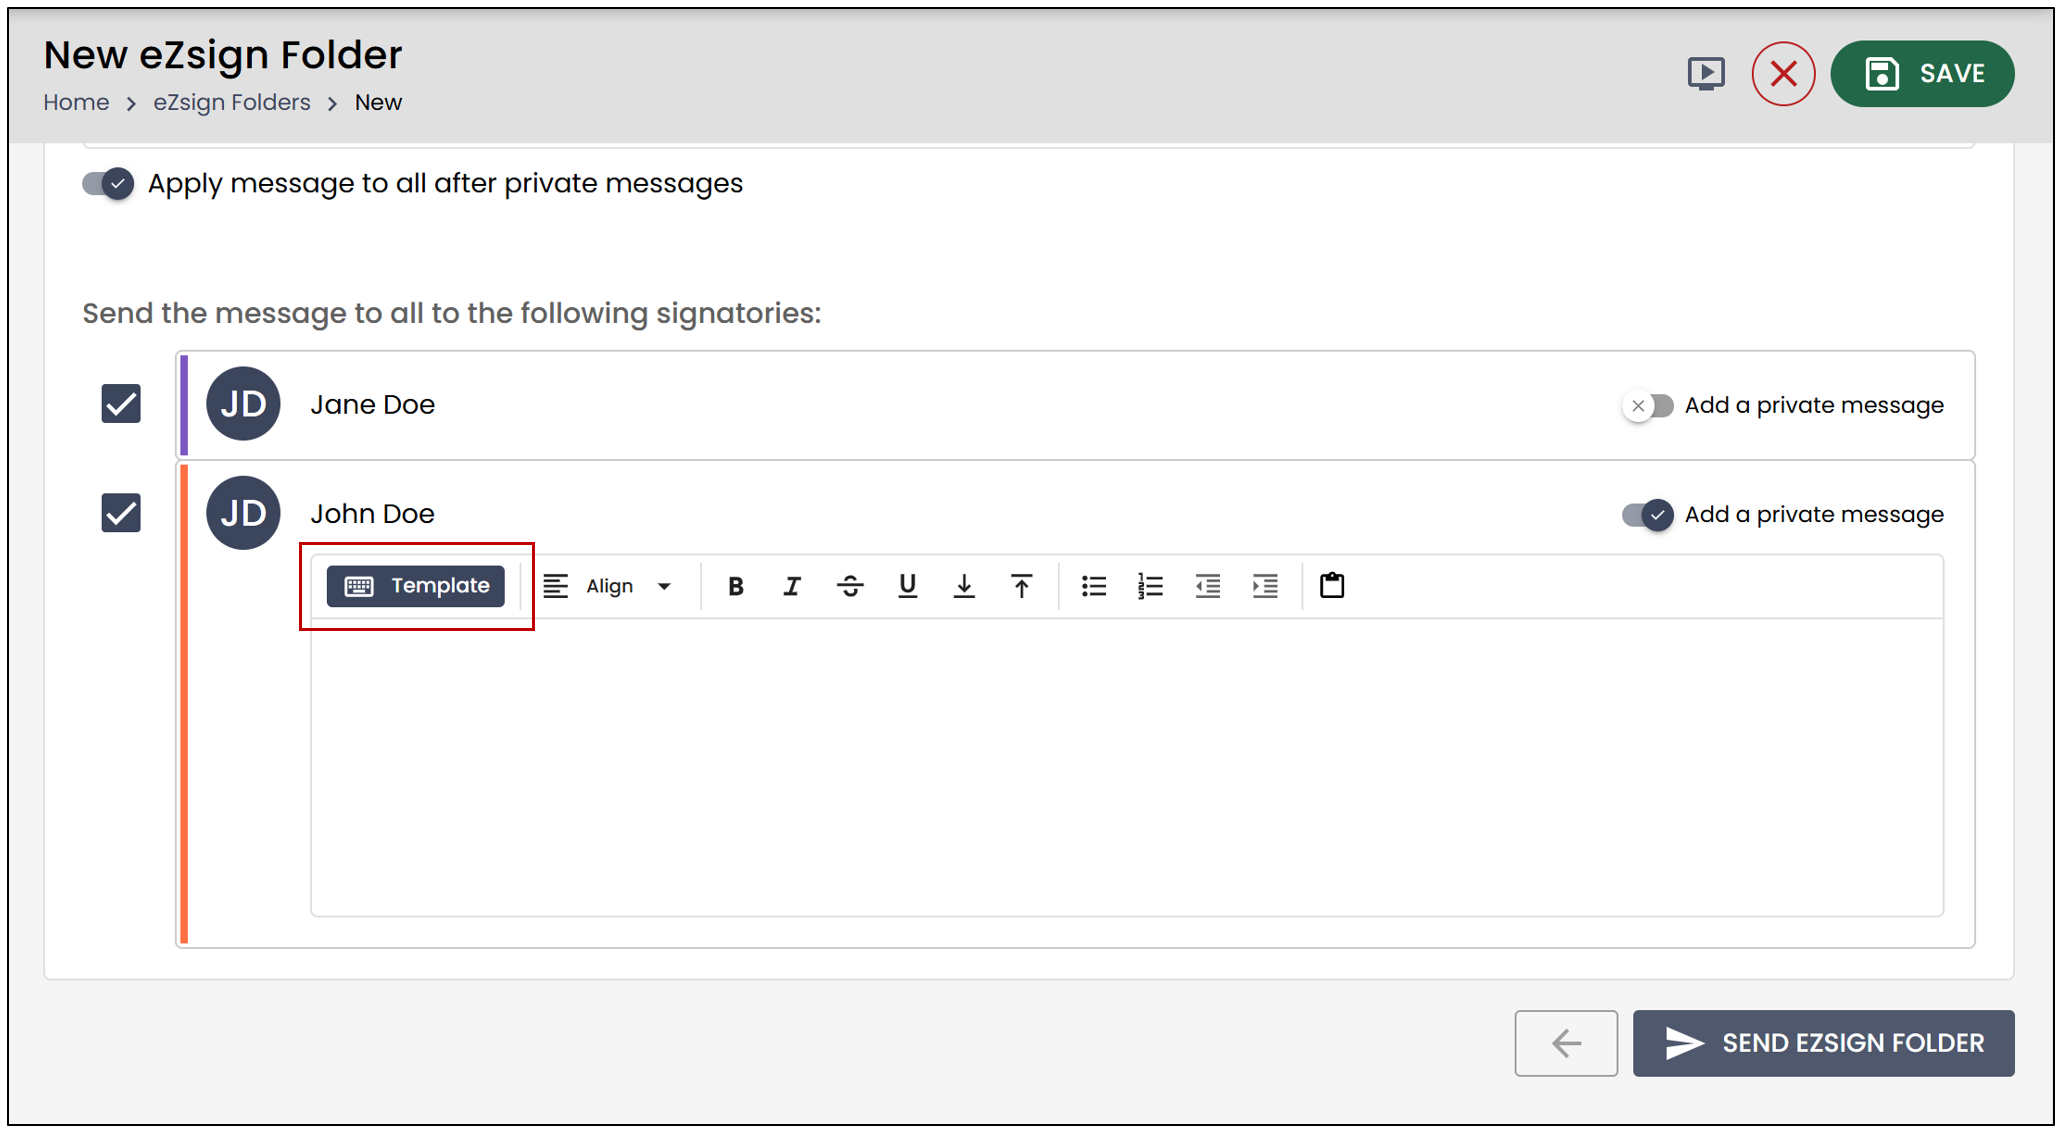
- To create a content template, click Template.
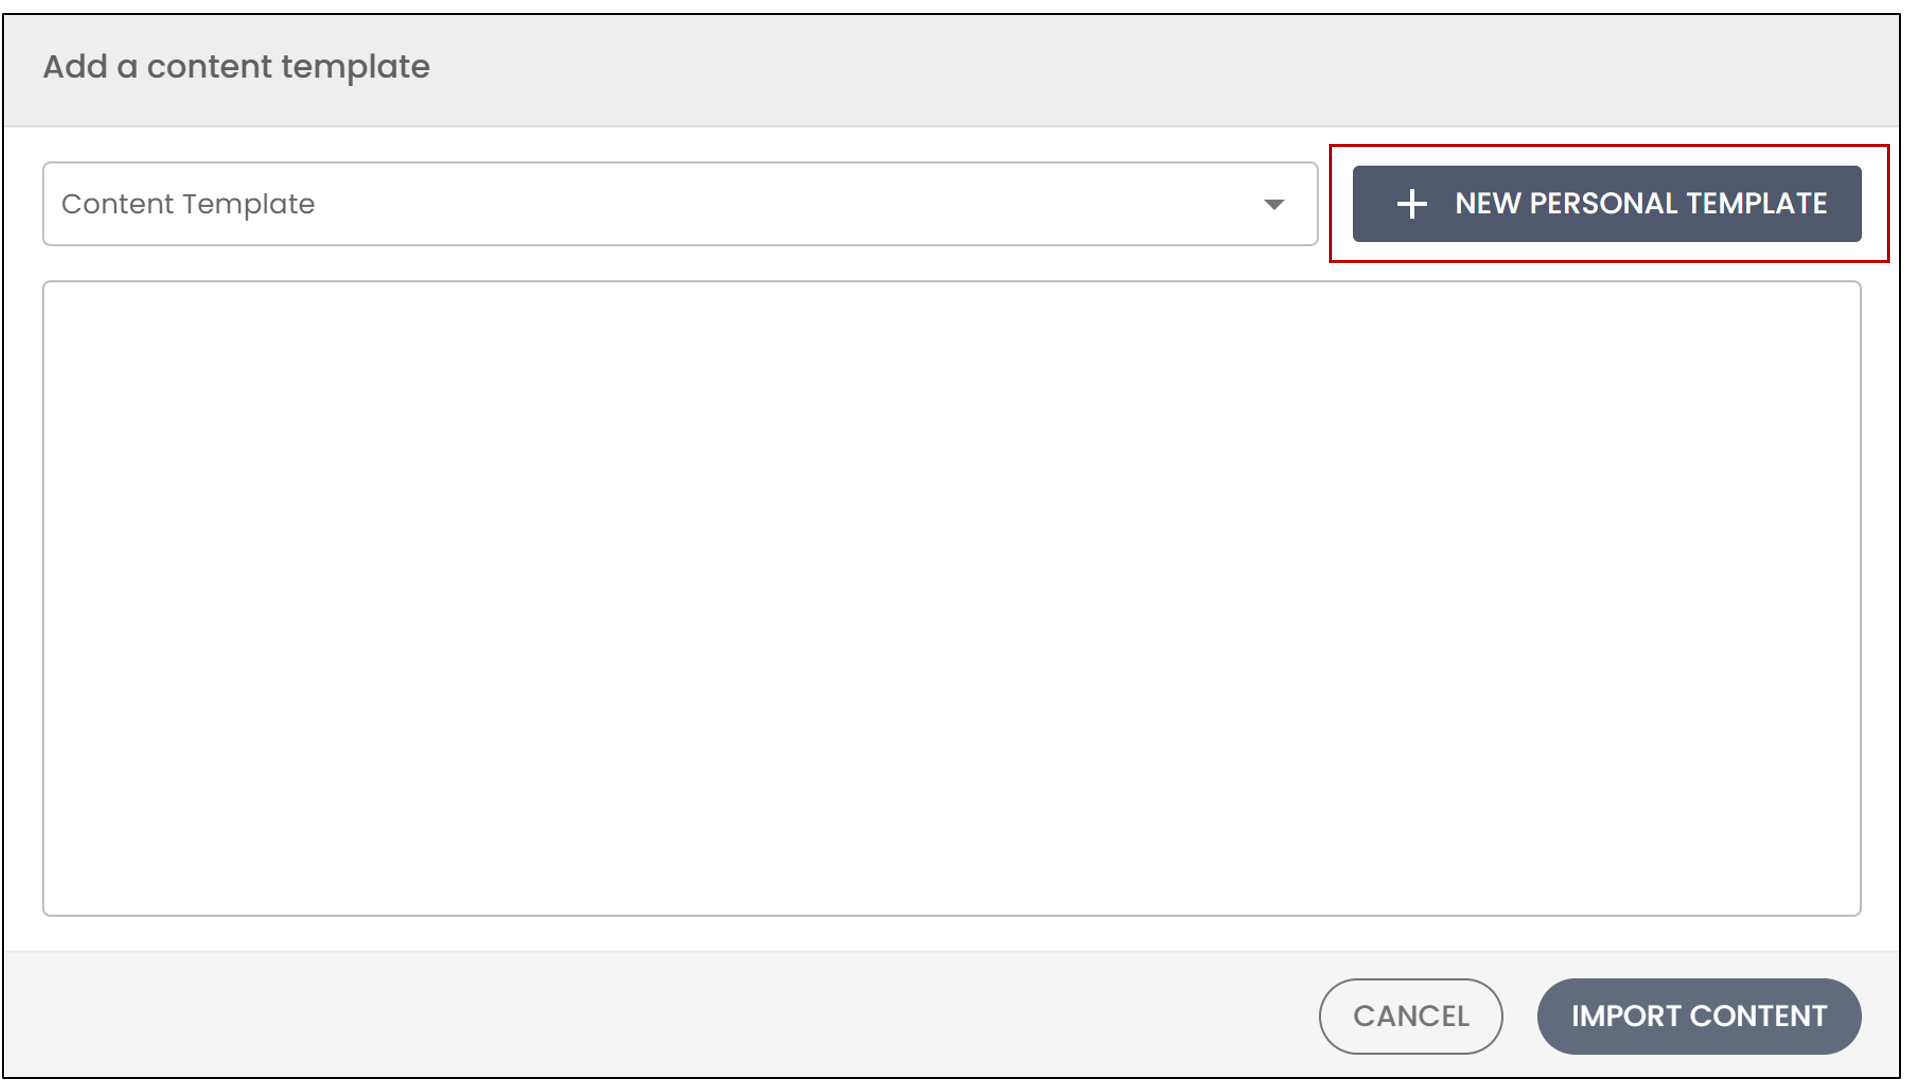
- Click New Personal Template.
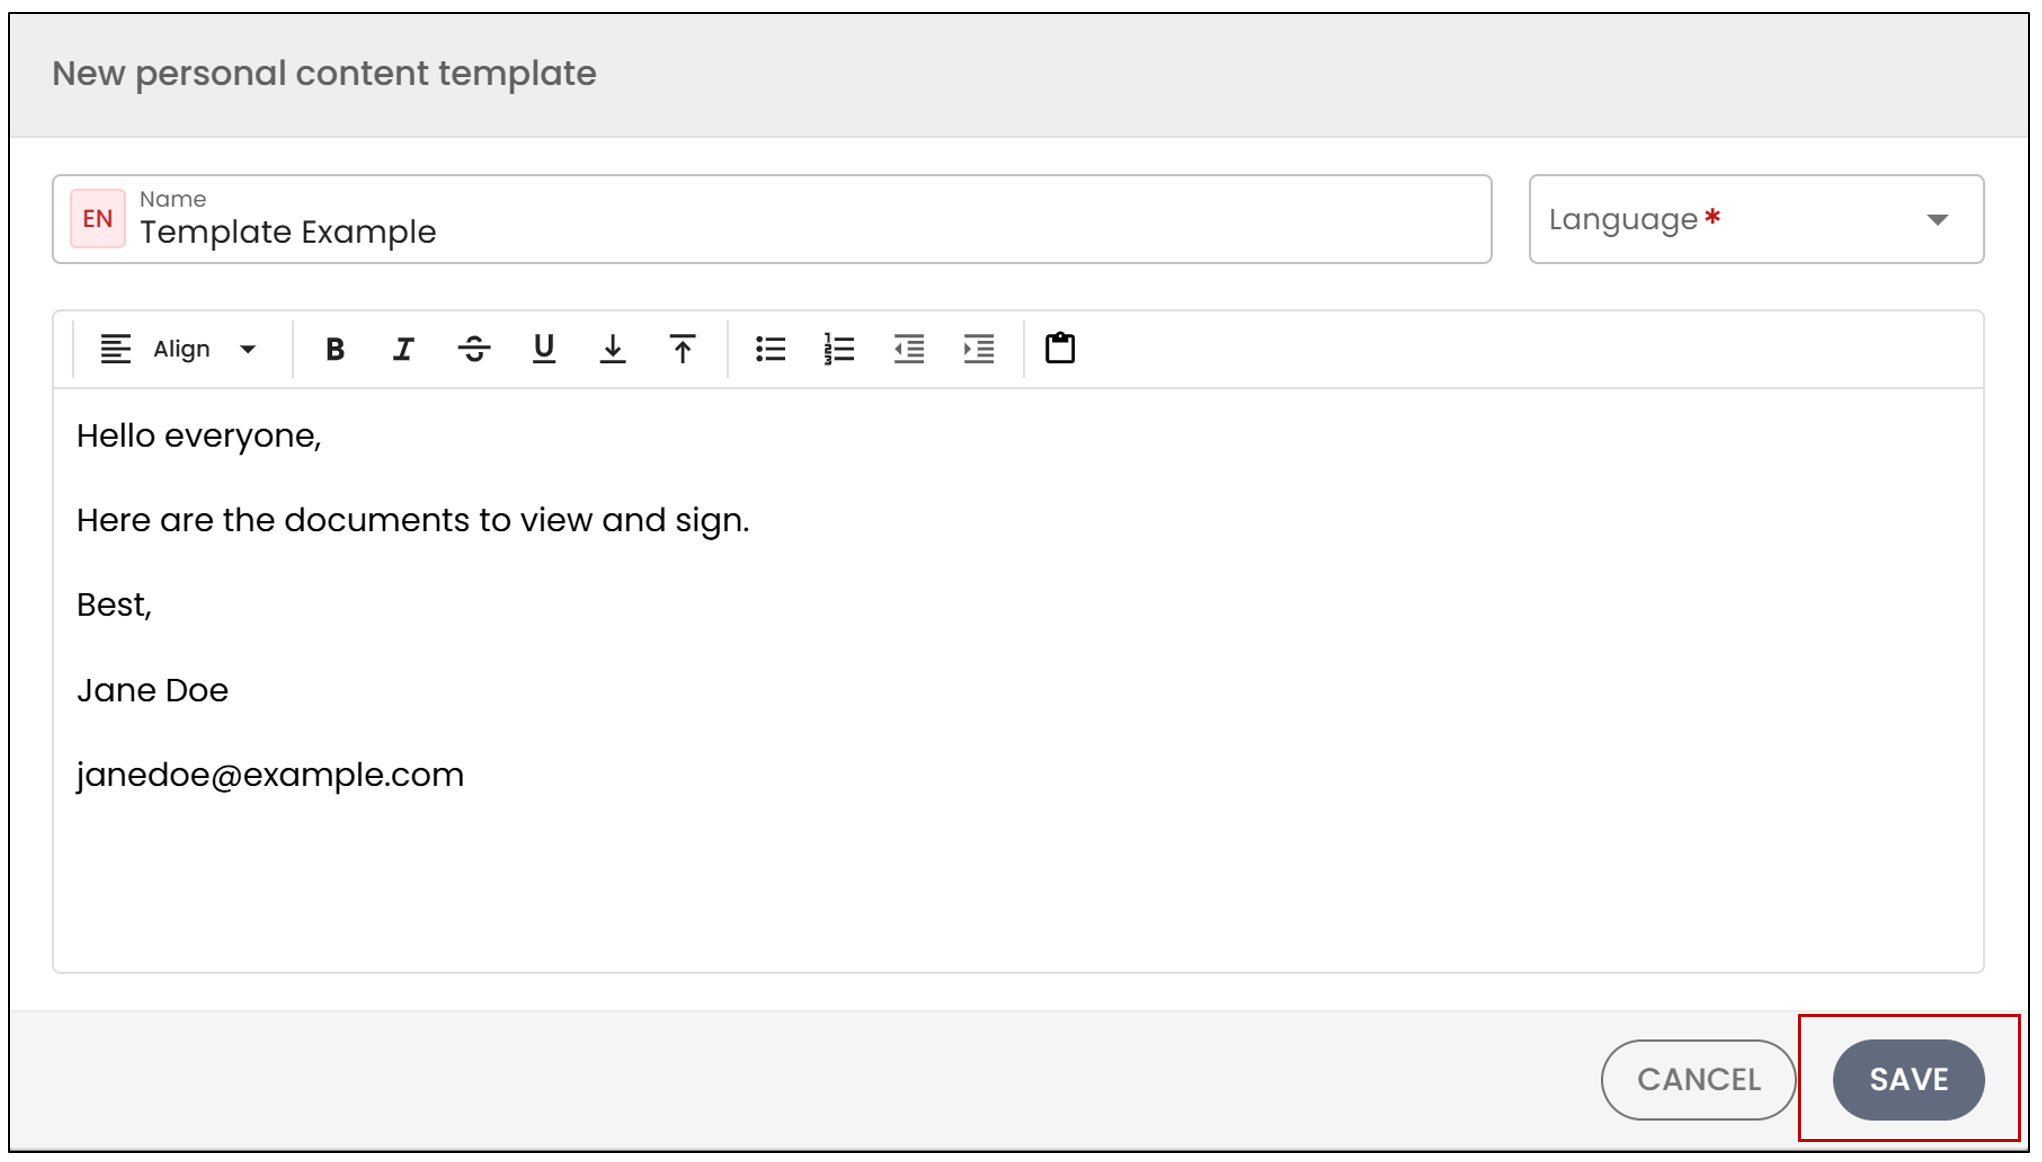
- Enter the template name and message. When you are finished, click Save.
- You can also add messages directly from the drop-down list.
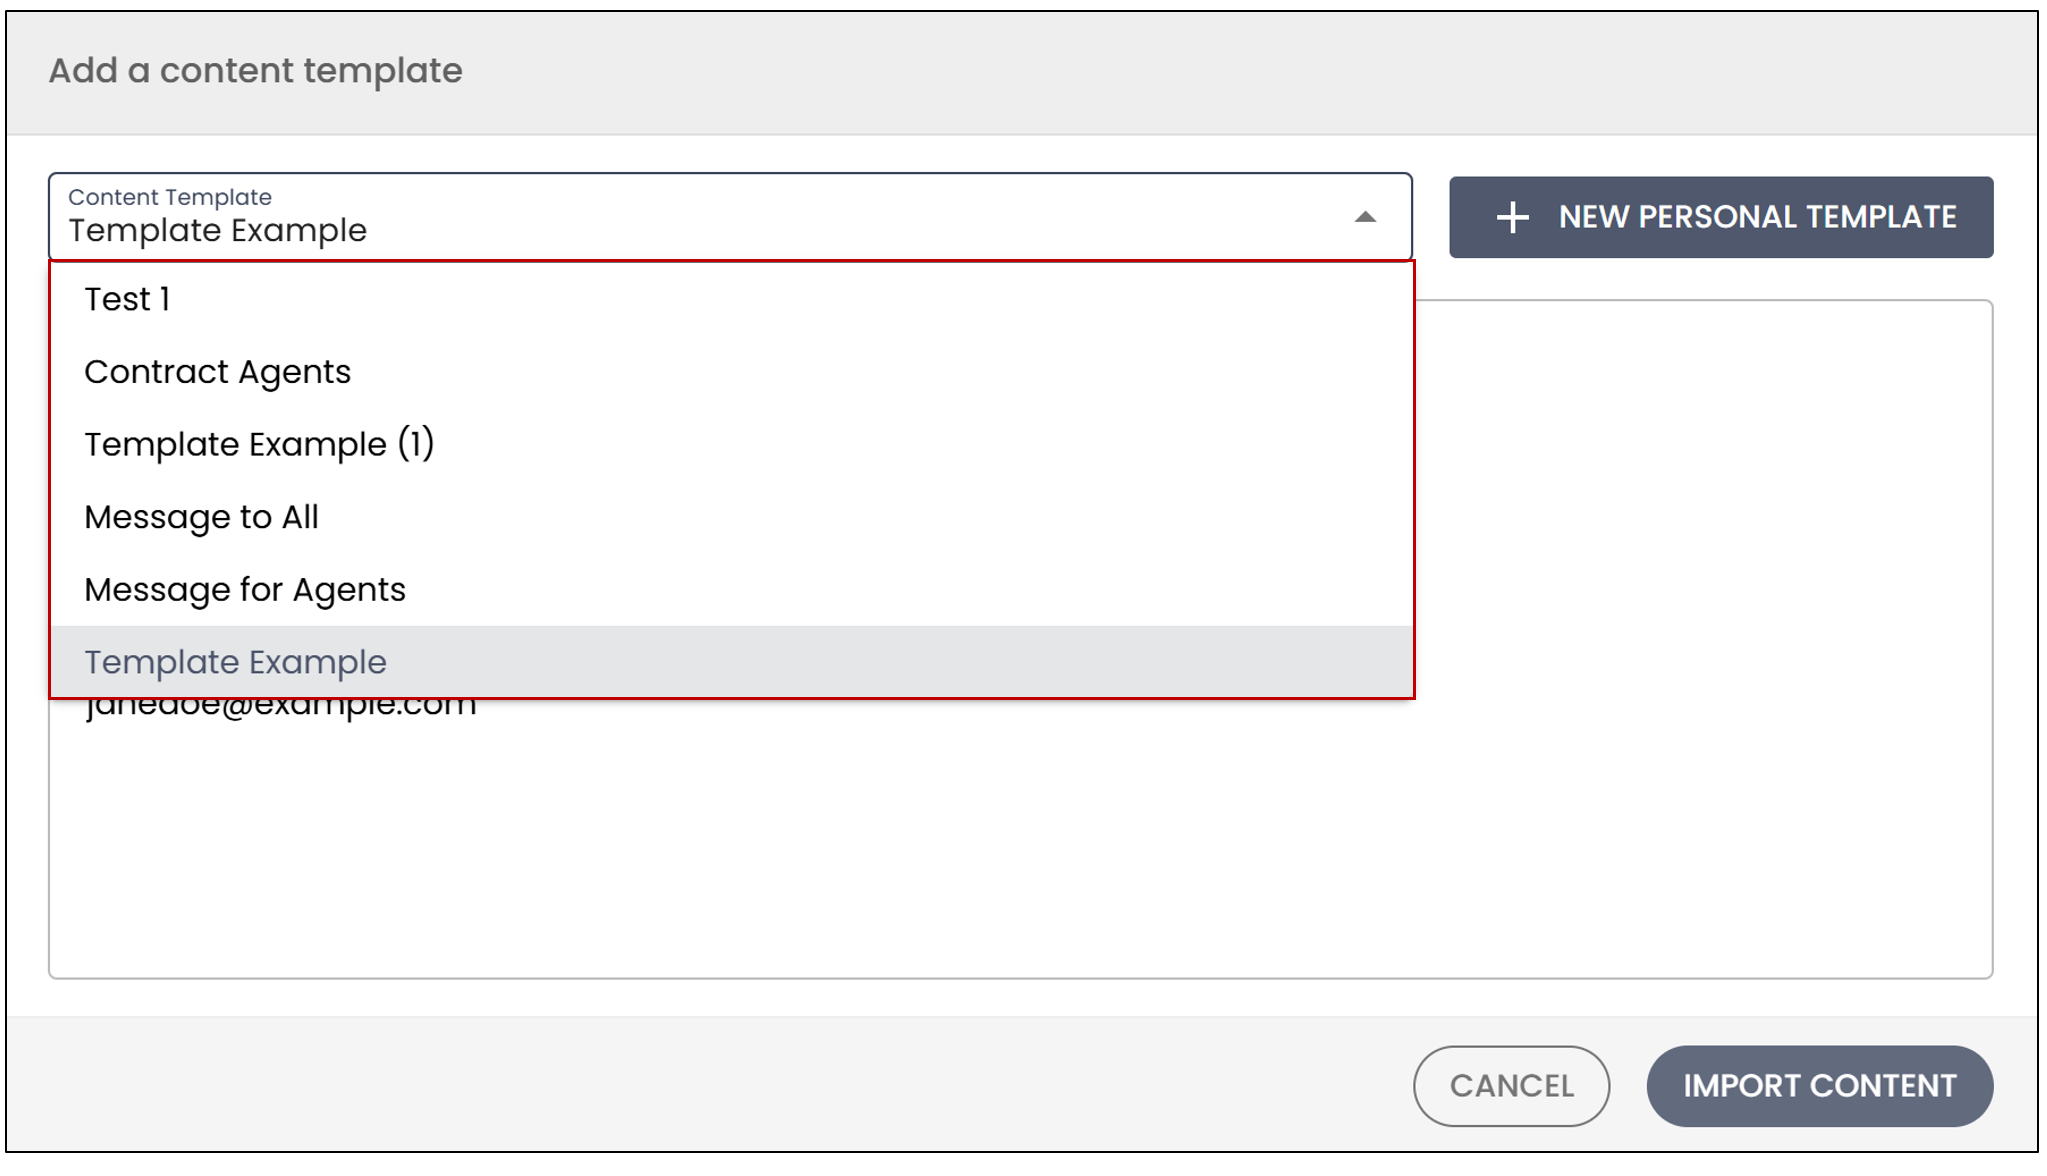
- After selecting the desired template, click Import Content. You will then be able to make changes to the text.
You will also have the option to add content templates for individual signers.
Managing Content Templates
- To manage your content templates, go to the List of Content Templates , then select the desired template.
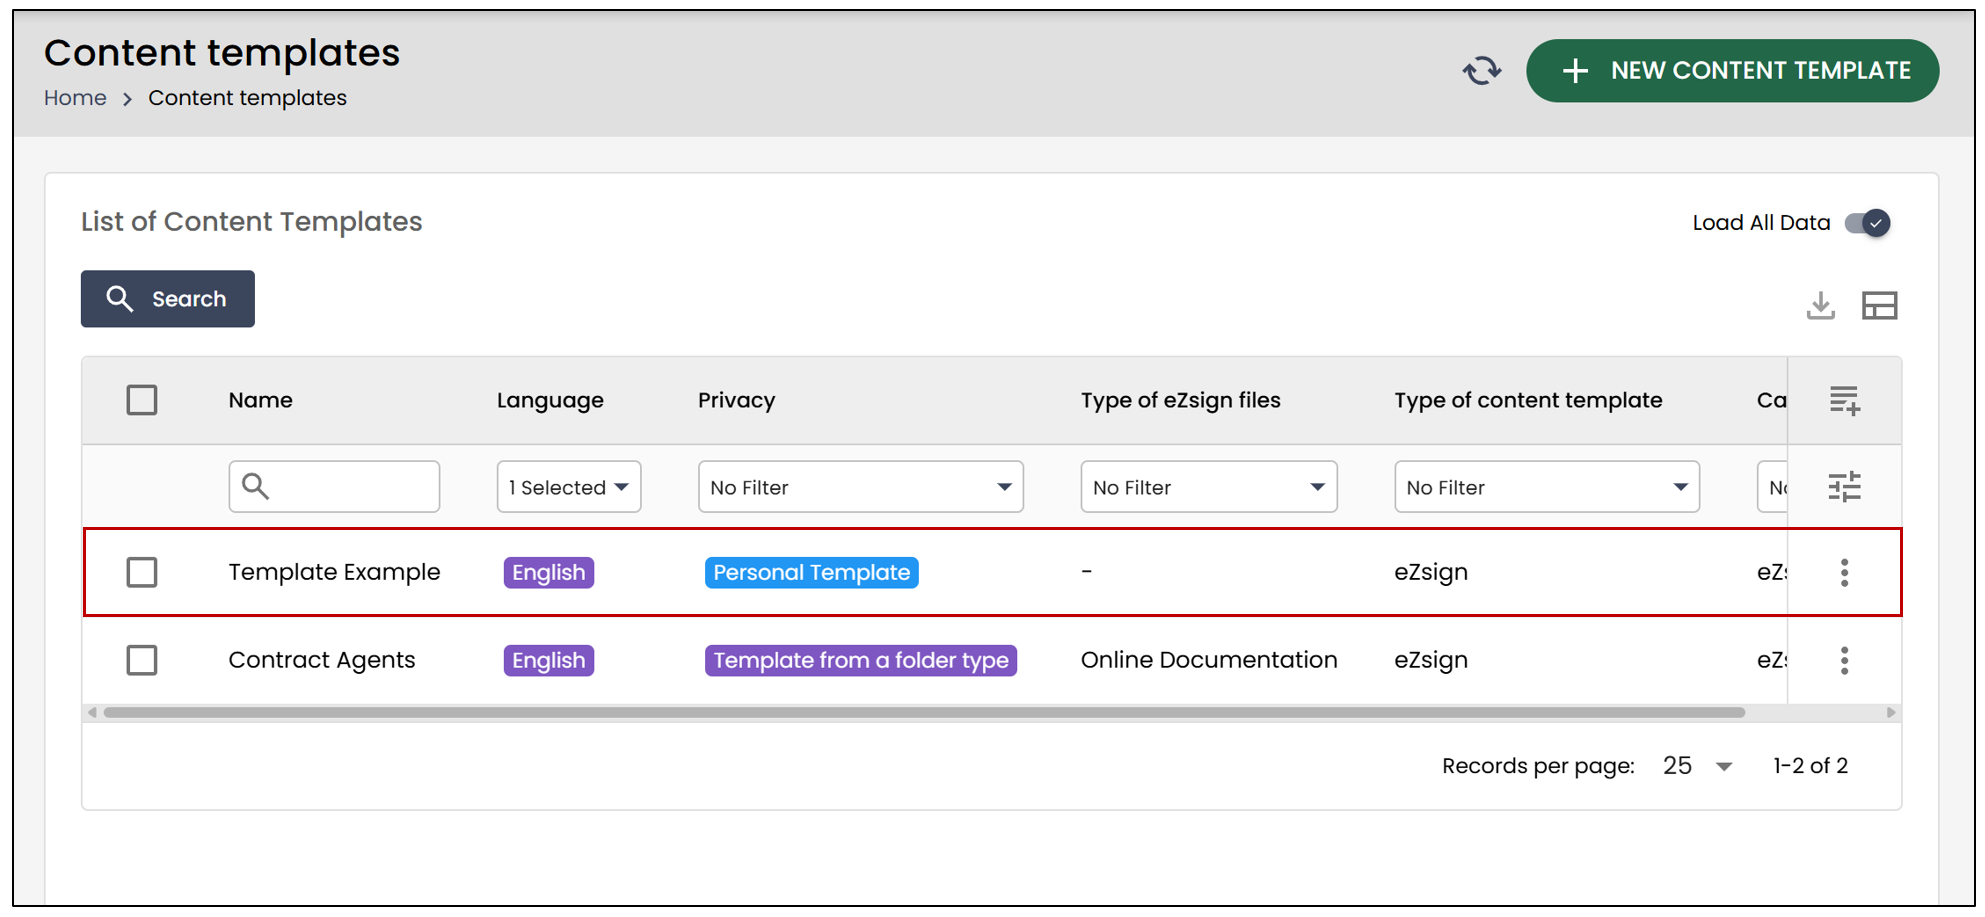
- You can then Edit the content template.
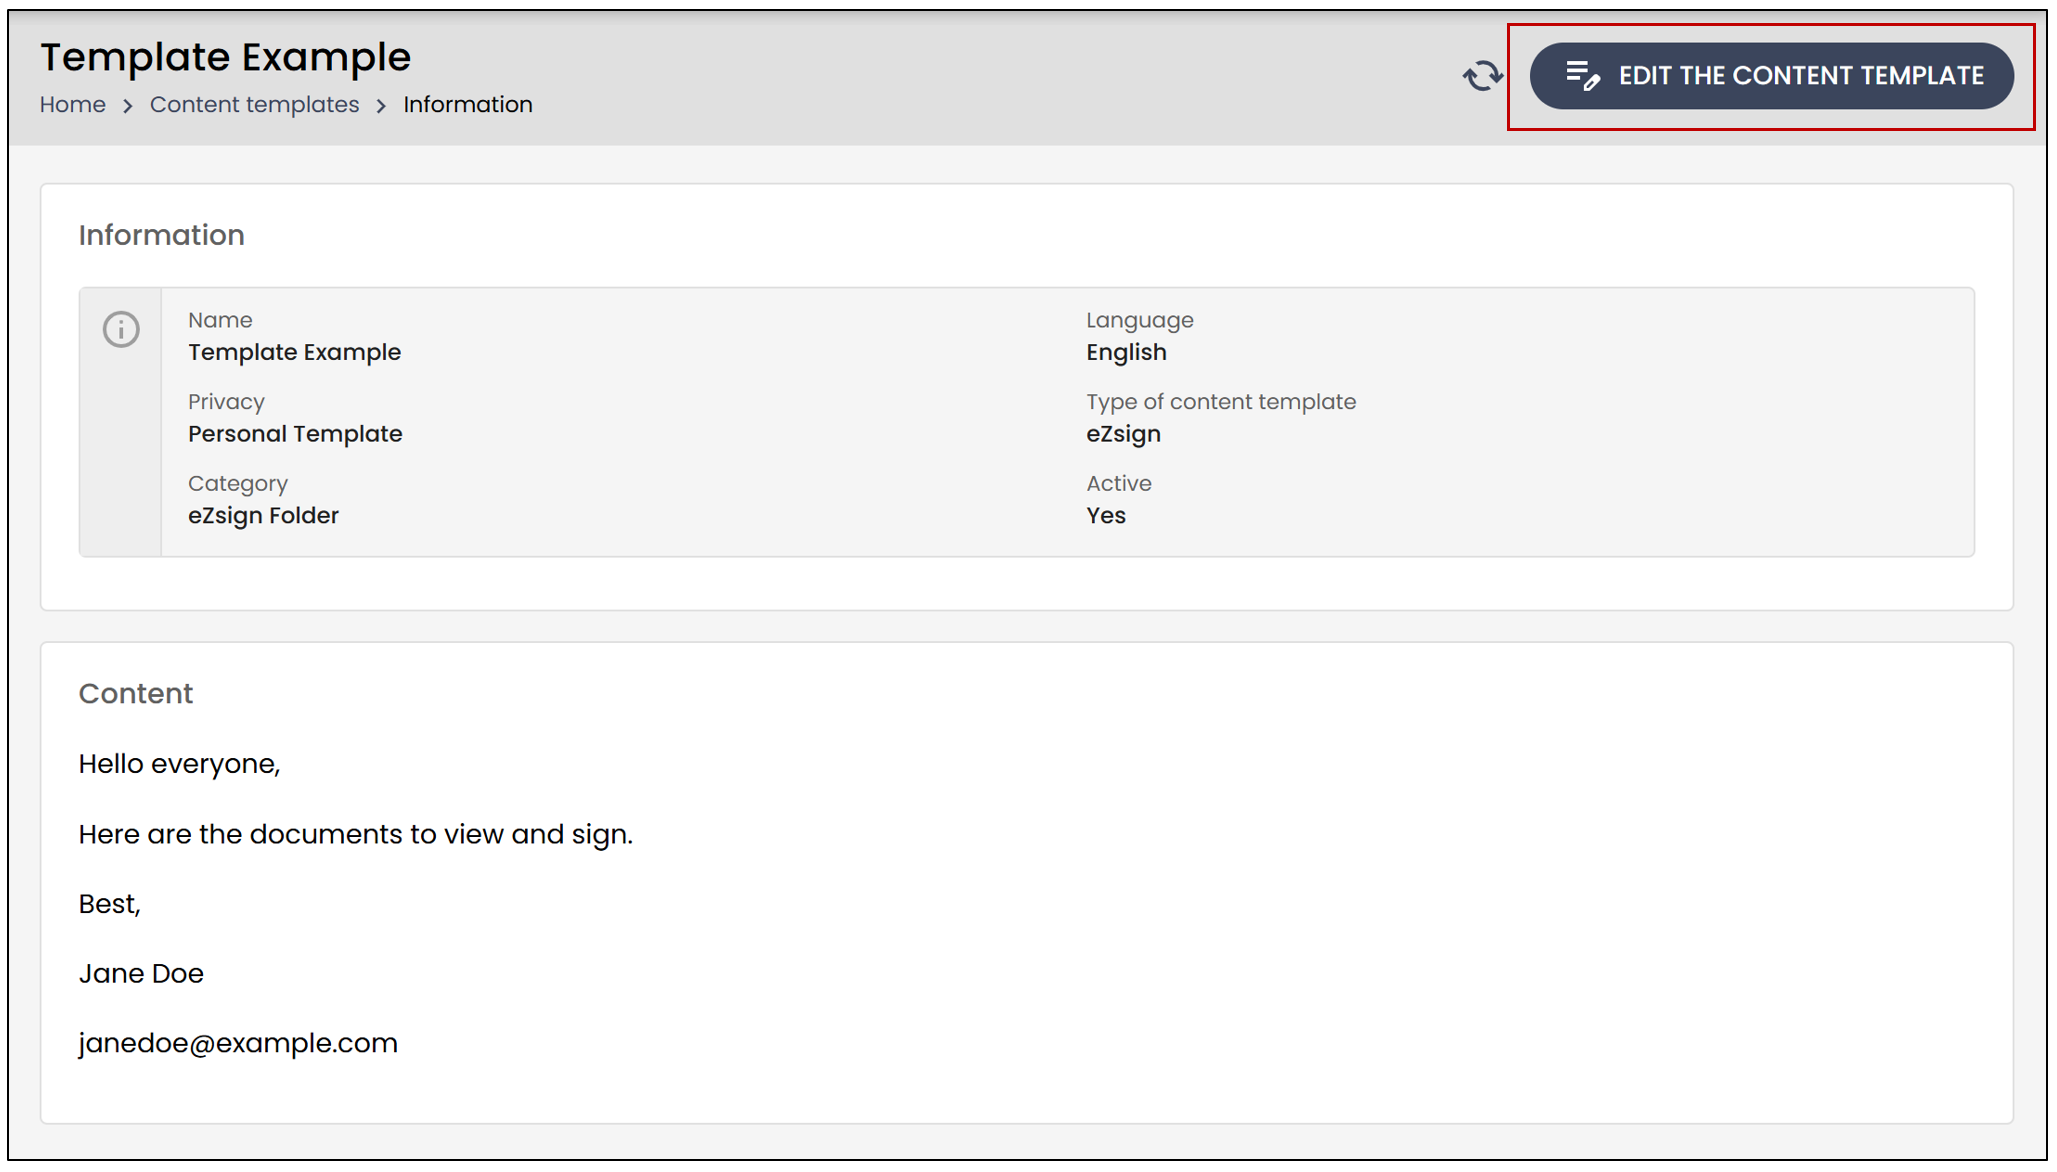
- Make the desired changes, then click Save.