

English
Adding/Using/Editing a Standard Document
In case you have a particular document in which the information will be fixed and the fields will always be of the same type and in the same places (only the names of the signatories will change), you have the option to create a standard document (which will contain fields and a document). Simply manually add, only for the first time, the desired document in a folder and the fields in that document, and save this template in the list of templates. You can then use it later in a folder to speed up the process of adding documents and fields. This could be, for example, an agent having a commitment form (with the same information for all clients) to be signed electronically by all his clients and who must acknowledge receipt.
Adding a Standard Document
Before you can use a standard document in an electronic signature folder, it must be added to the list of templates.
Create an eZsign folder in your personal folders. In this example, the folder is named: "Commitment - Client 1". For more information, please see the articleCreating an eZsign Folder.
Add the signatory in the "List of Signatories" section. In this example: "Client One". For more information, please see the articleAdding/Editing/Deleting a Signatory in an eZsign Folder.
NOTE: The user who created the folder is automatically added to the signatories.
- Add the PDF document in the "List of Documents" section. In this example: "Client Commitment". For more information, please see the article Adding/Editing/Deleting a Document in an eZsign Folder.
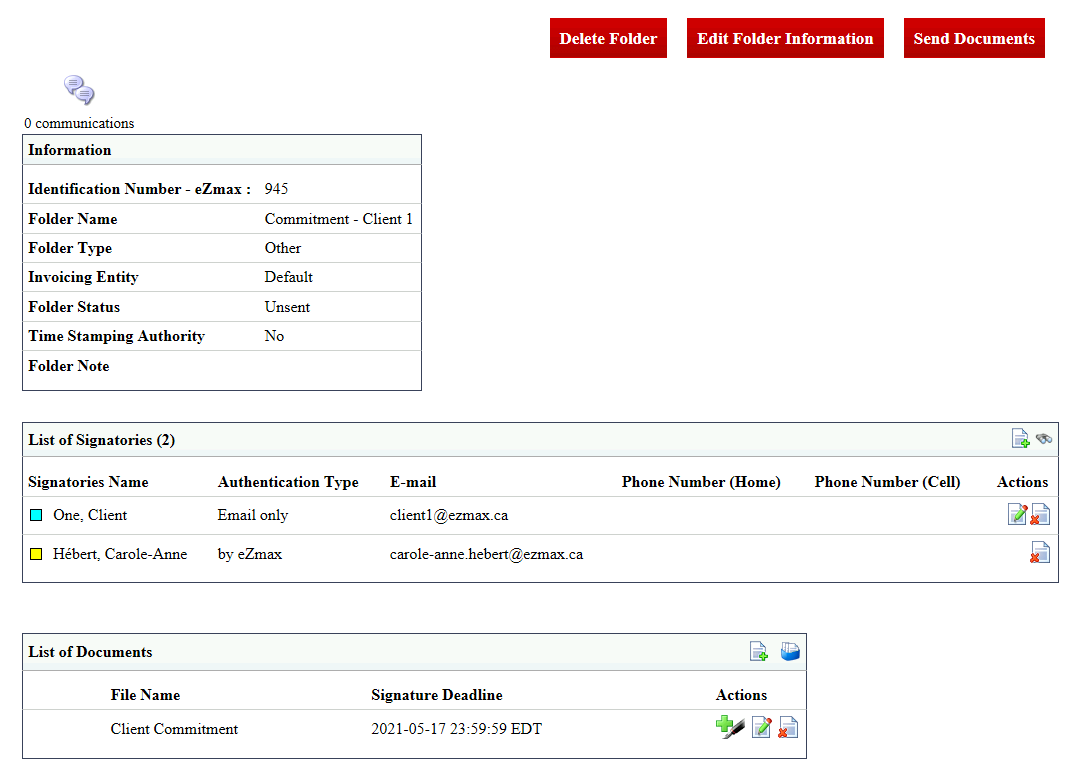
Click on thefile name or the** Fountain Pen icon to display the document.**
Add the desired fields in the document. In this example: "Client Name" (Client One) and "Acknowledgment of Receipt - Agent" (Carole-Anne Hébert). For more information, please see the article Manually Adding/Editing/Deleting a Field in a Document.
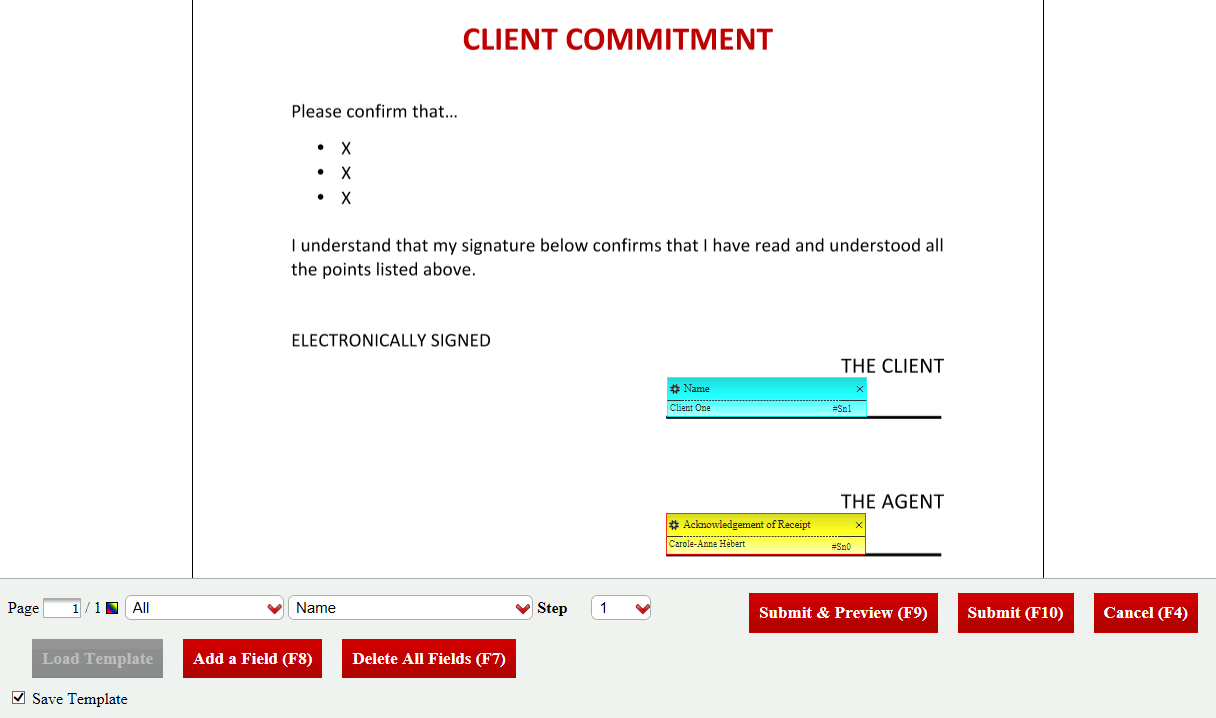
When all the desired fields are added, check the Save Template box.
Click on Submit.
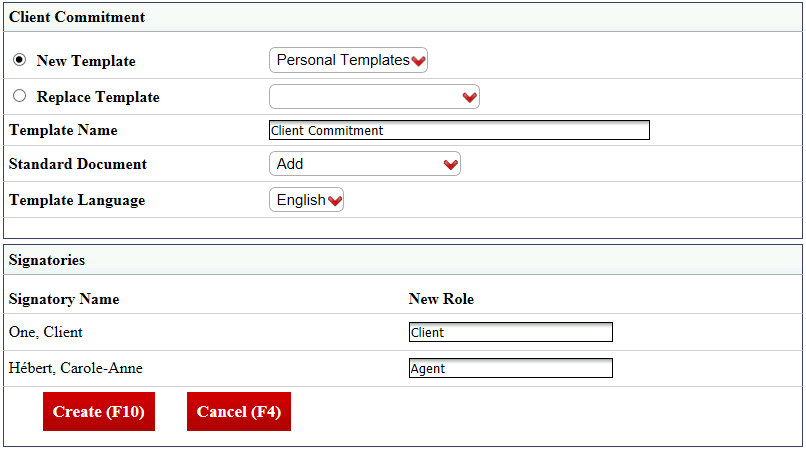
New Template : "Personal Templates" will be selected by default.
Enter the Template Name, i.e. the name of the document/form. In this example: "Client Commitment".
Document Type : Select "Add".
Select the appropriate Template Language.
New Role : Assign a role to the signatories of this document. In this example: Client One (turquoise field) is the client and Carole-Anne Hébert (yellow field) is the agent.
Click on Create and the standard document will be added to the list of templates.
You can now proceed to the next steps, which are:
- Send the documents to sign. For more information, please see the article Sending Documents to Sign.
- Sign the documents. For more information, please see the articles Signing a Document as a User and Signing a Document as an External Signatory.
- Send the signed documents by e-mail. For more information, please see the article Sending Signed Documents by E-mail.
**
Using a Standard Document in an eZsign Folder**
Once a standard document has been added to the list of templates, it is possible to use it in an eZsign folder to quickly add a document with the appropriate fields.
Create an eZsign folder in the same folder type as when creating the standard document. In this example, the folder is named: "Commitment - Client 2" and the folder type is "Other". For more information, please see the articleCreating an eZsign Folder.
Add the signatory in the "List of Signatories" section. In this example: "Client Two". For more information, please see the articleAdding/Editing/Deleting a Signatory in an eZsign Folder.
NOTE: The user who created the folder is automatically added to the signatories.
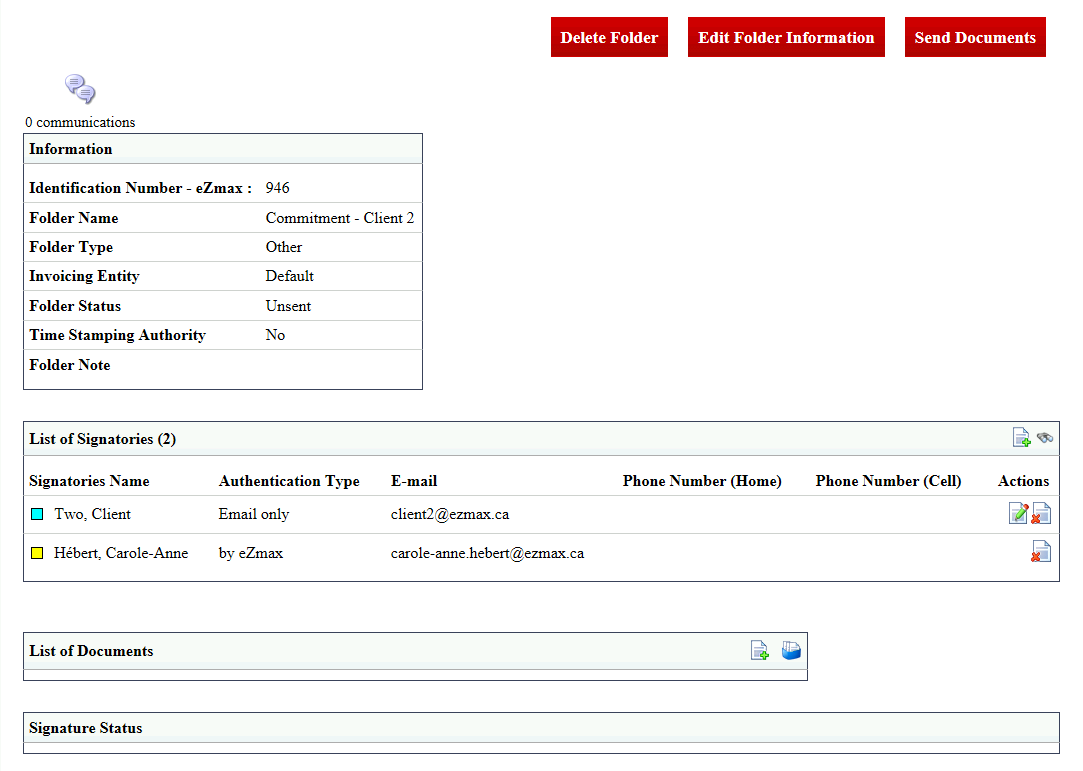
- In the "List of Documents" section, click on this icon

(Add Standard Documents).
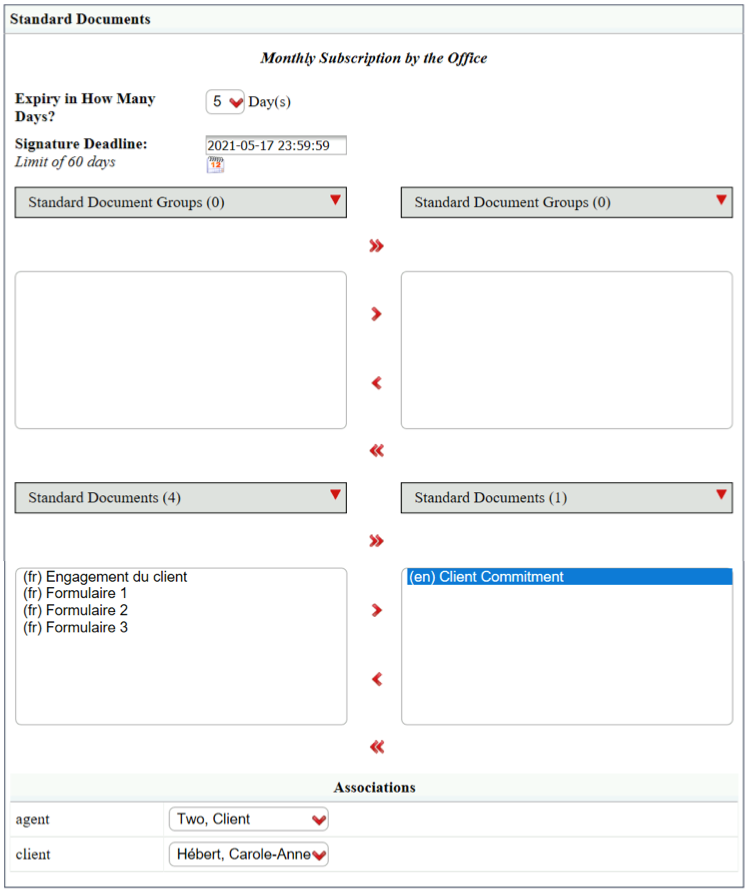
Select the desired number for theExpiry in How Many Days?** field (1 to 30) and the Signature****Deadline of the document will be automatically entered. You can also manually enter the Signature****Deadline (30-day limit). The link sent by e-mail will no longer be valid after this date.**
Select the desired Standard Document using the single green arrow or by double-clicking on it. In this example: "(en) Client Commitment".
In the "Associations" section, assign the appropriate role to each of the signatories of this document. In this example: Client Two (turquoise field) is the client and Carole-Anne Hébert (yellow field) is the agent.
Click on Submit.
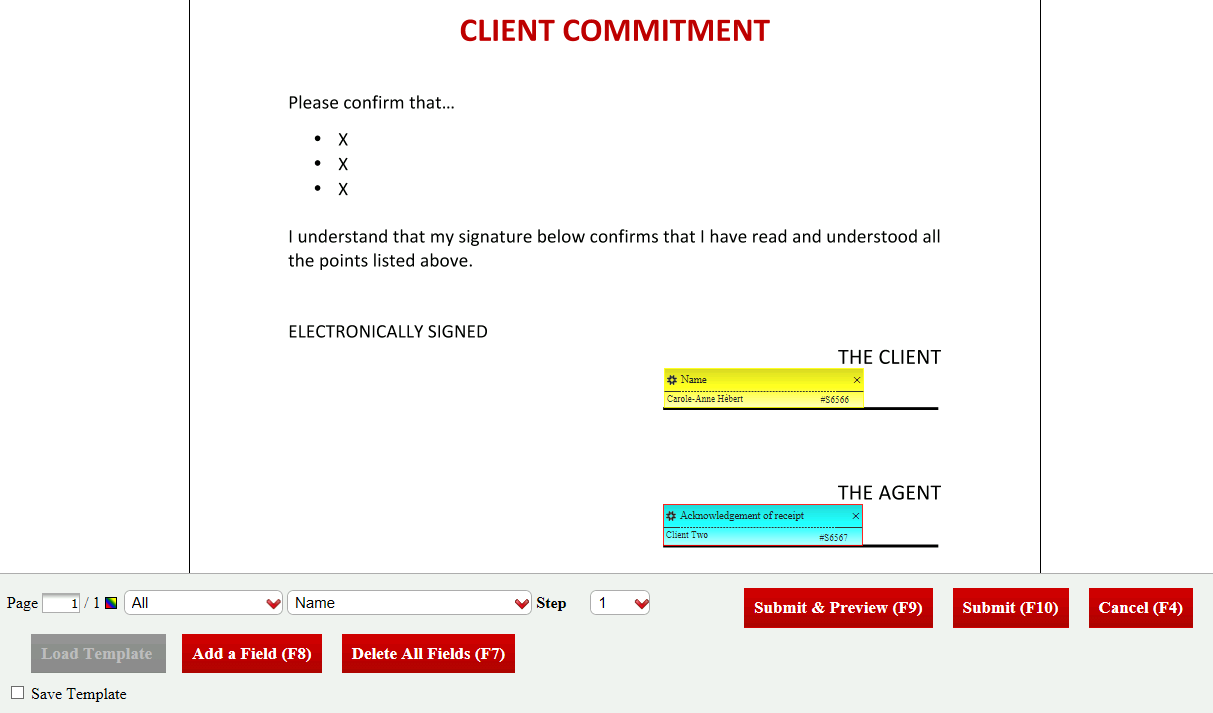
The PDF document and the fields were automatically added to the folder.
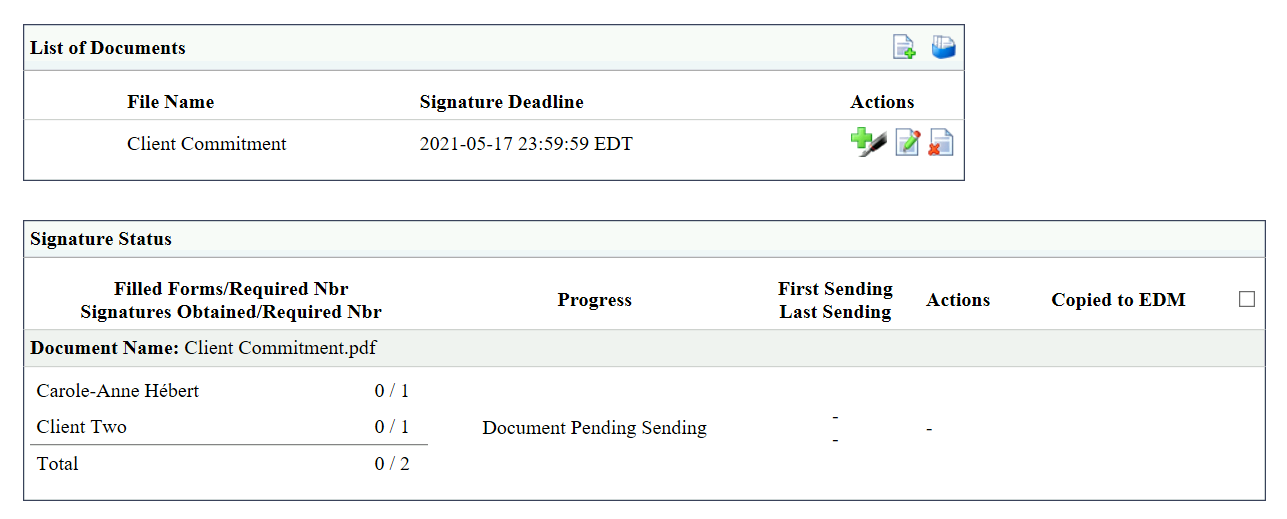
NOTE: You can verify the fields by clicking on the Fountain Pen icon in the "List of Documents" section. Click on Submit when you have completed the verification and changes (if applicable).
- You can now proceed to the next steps, which are:
- Send the documents to sign. For more information, please see the article Sending Documents to Sign.
- Sign the documents. For more information, please see the articles Signing a Document as a User and Signing a Document as an External Signatory.
- Send the signed documents by e-mail. For more information, please see the article Sending Signed Documents by E-mail.
Editing a Standard Document
If the document used in a standard document has been modified, such as an additional paragraph, it is possible to change the standard document of the old version by replacing it with the new version.
Create an eZsign folder in the same folder type as when creating the standard document. In this example, the folder is named: "Commitment - Client 3" and the folder type is "Other". For more information, please see the articleCreating an eZsign Folder.
Add the signatory in the "List of Signatories" section. In this example: "Client Three". For more information, please see the articleAdding/Editing/Deleting a Signatory in an eZsign Folder.
NOTE: The user who created the folder is automatically added to the signatories.
- Add the new version of the PDF document in the "List of Documents" section. In this example: "Client Commitment - New Version". For more information, please see the articleAdding/Editing/Deleting a Document in an eZsign Folder.
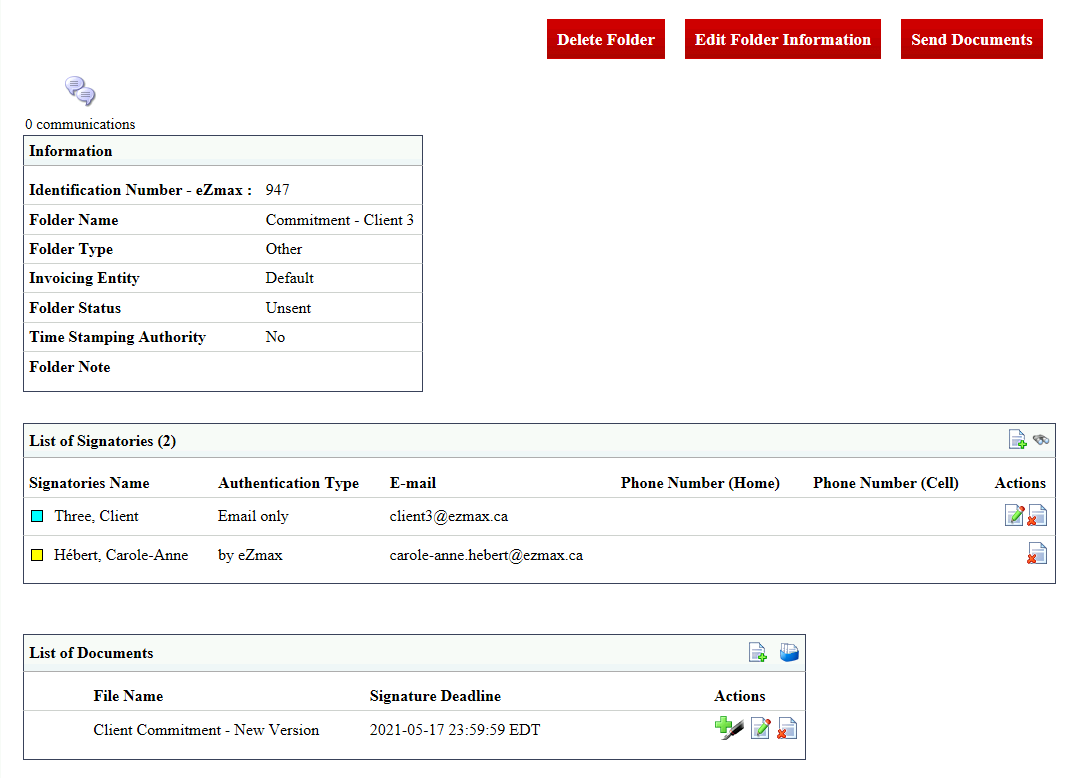
- In the "List of Documents" section, click on thefile name or the** Fountain Pen icon.**
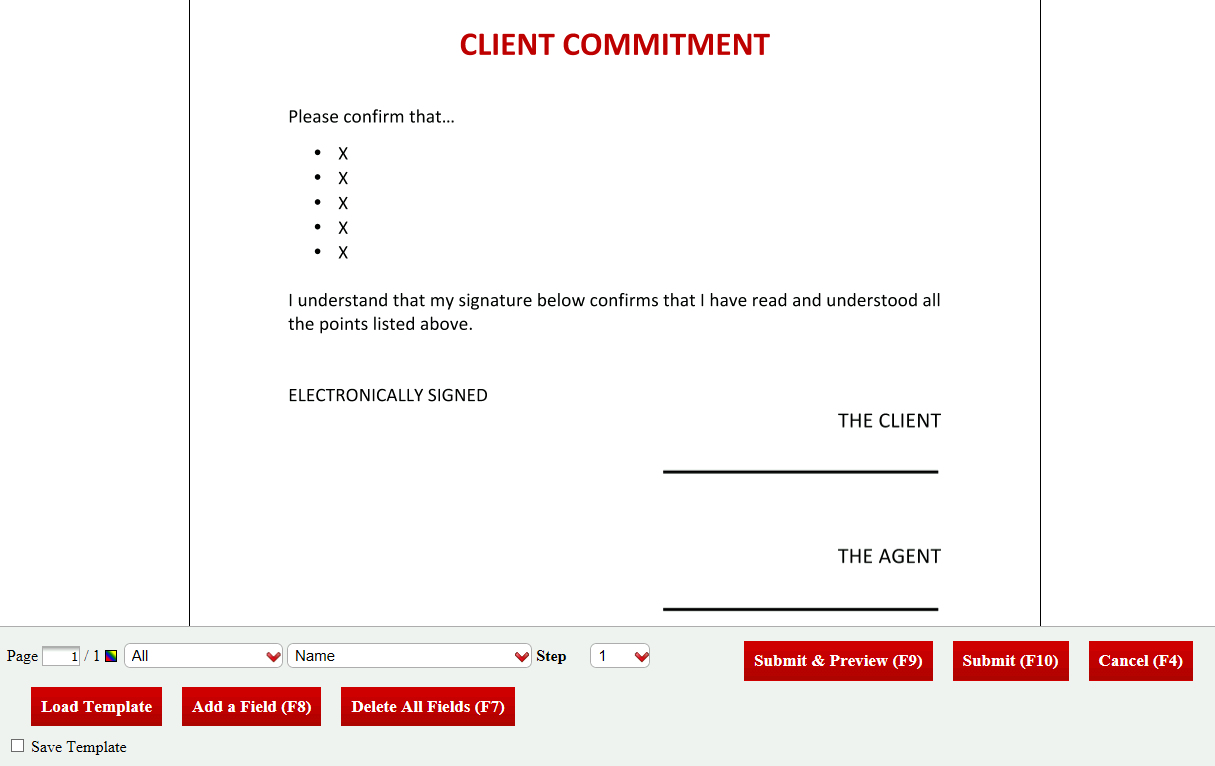
- Click onLoad Template**.**
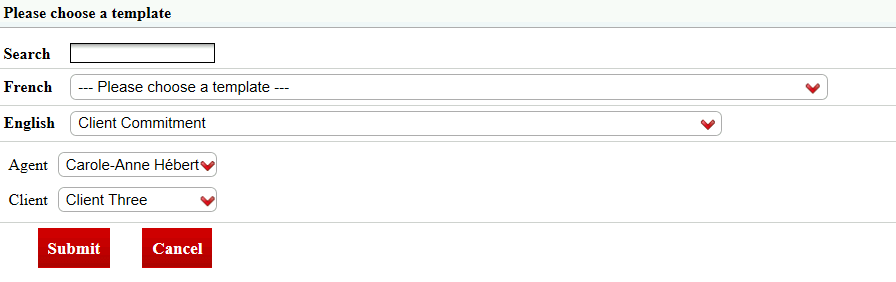
You canSearch** for the template by writing its name in this field or you can select it from the drop-down list of templates in French or English. In this example: "Client Commitment".**
Assign the role of each of the signatories. In this example: Client Three (turquoise field) is the client and Carole-Anne Hébert (yellow field) is the agent.
Click on Submit and the fields will automatically appear in the document in the same places as in the template you selected.
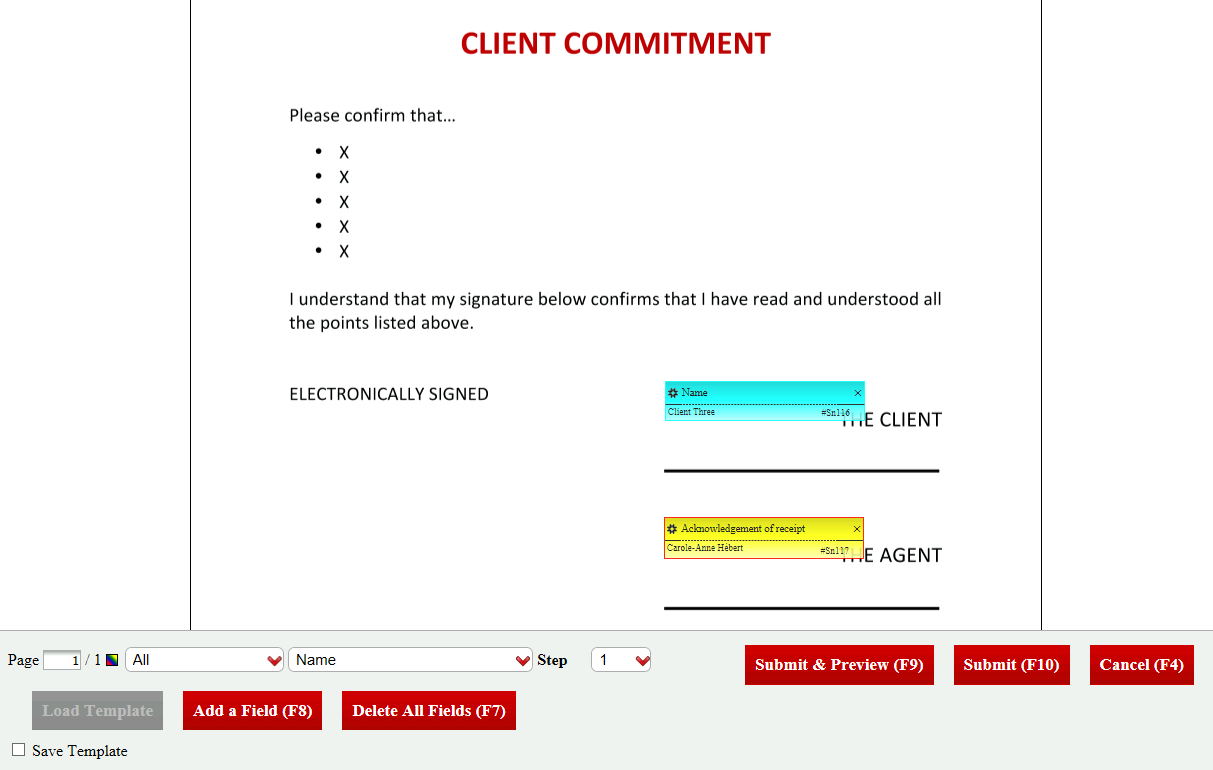
If necessary, edit the fields. If you have added or removed text in the document, the fields may no longer be positioned in the correct places. In this example, text has been added so the fields must be moved down.
When you have completed the changes, check the Save Template box.
Click on Submit.
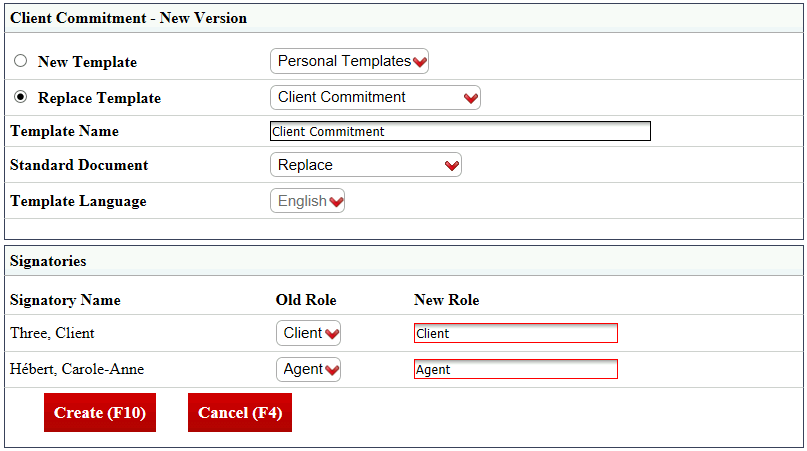
Check the Replace Template box and select the desired template from the drop-down list. In this example: "Client Commitment".
In the Template Name , enter the same name to avoid having multiple versions of the same document. In this example: "Client Commitment".
Docu ment Type: Select "Replace".
Template Language : Cannot be changed.
Old Role and New Role : Assign the roles to the signatories of this document. In this example, the roles remain the same: Client Three (turquoise field) is the client and Carole-Anne Hébert (yellow field) is the agent.
Click on Create and the template will be replaced in the list of templates.
The next time you click this icon
(Add Standard Documents) in an eZsign folder, you will be able to select the new version of this standard document.