

English
Adding/Editing an Employee
Adding an Employee
From Main menu >> Payroll >> List of Employees.
Click on Actions >> New Employee.
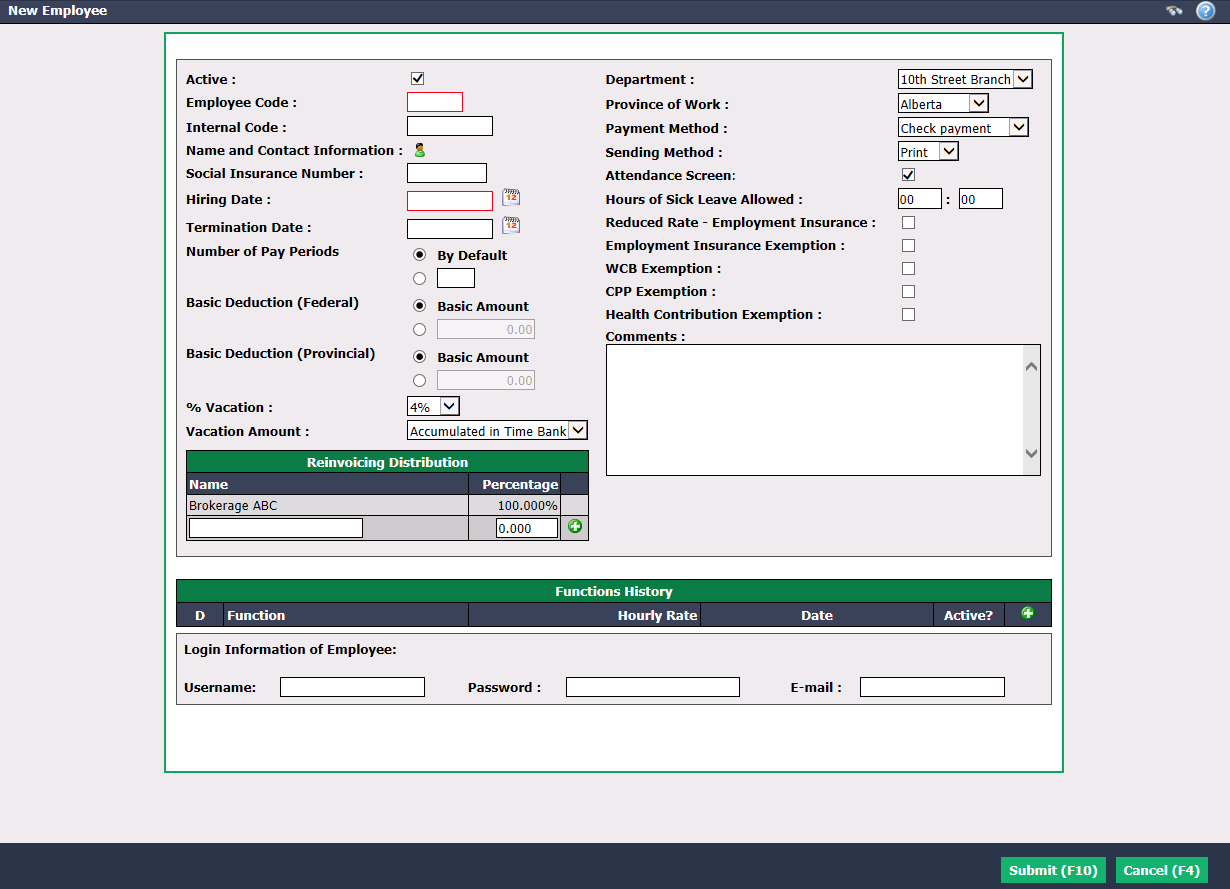
- Assign an Employee Code. Suggestion: First 4 letters of last name followed by first letter of first name, for example: SAMPS for Susan Sample.
- You can enter an Internal Code. This code is not mandatory. If you have employee codes in the company, this is where you could enter it.
- Name and Contact Information : Click on Name and Contact Information icon

to create a new contact file for the employee.
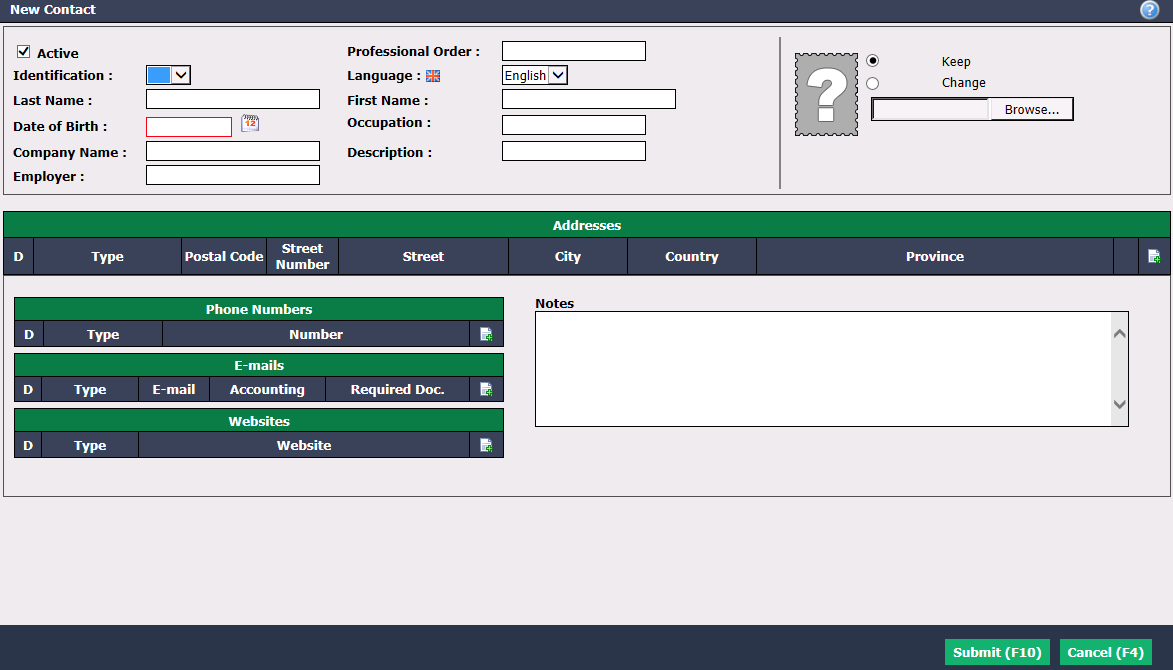
- You must enter the Last Name , First Name and Date of Birth of the employee. The other fields are not mandatory.
NOTE: The date of birth is mandatory when an employee is created so that the deductions are calculated correctly on the payroll.
The employee’s photo can be added by clicking the Browse button, then selecting and uploading the desired file.
Addresses , Phone Numbers , E-mails and Websites can be added by clicking on + icon.
Notes can also be entered.
Once all the contact information is entered, click on Submit.
Then enter the Social Insurance Number and the Hiring Date.
The Number of Pay Periods by default will be automatically selected. If the number of pay periods of the company is 26, but this number is different for that particular employee, check the box below and enter the number of periods desired for that employee.
The annual Basic Deductions**(Federal and Provincial)** will be selected by default at: Basic Amount. If the employee has a different deduction amount than the basic one, check the box below and enter the desired amount.
Select the % Vacation for the employee. The Vacation Amount can be Accumulated in Time Bank or Paid at Each Pay.
Assign the employee to the appropriate Department and Province of Work.
Select a default Payment Method each time you will pay that employee.
Warning
If you choose an electronic transfer as Payment Method , you must save the employee information at least once and then go add a bank account.
- Select a Sending Method of the pay slip:
- Print: Hard copy
- E-mail: Attached file
NOTE: If you choose the e-mail Sending Method , make sure you add an e-mail address to the employee’s contact information.
Make sure you select the appropriate tax configuration for your province in Taxable.
Attendance Screen : If this module is available in your agency, you can check this box to activate it.
Enter the Hours of Sick Leave Allowed.
Check the boxes Reduced Rate - Employment Insurance , Employment Insurance Exemption , WCB Exemption , CPP Exemption and Health Contribution Exemption , if applicable.
Comments can be added in this field.
Reinvoicing Distribution of the salary to a person other than the company directly: If this employee of the company works for a particular agent/client, you can reinvoice this agent/client. You just have to select their Name from the list, enter the Percentage that this agent/client will pay and click on the + icon. When processing the pay preparation for this employee, an invoice will be created automatically for this agent/client.
Functions History : If the employee does not earn a fixed salary, you can indicate an Hourly Rate , its Function and the Date (hiring date by default) by clicking on the + icon. You can add multiple functions/hourly rate for a single employee.
Login Information of Employee : This module is not yet in operation.
Click on Submit and the employee will be added in the system.
Editing an Employee
- When an employee is created, you have several options by clicking on Actions:
- Edit Employee: You can change the employee’s information.
- Edit Bank Account: If the current payment method is "Check Payment" and you want to change it to "Electronic transfer", you must check the Direct Deposit box and enter the appropriate Transit , Institution and Bank Account numbers. If the current payment method is "Electronic transfer", you can modify the bank account information for EFT (electronic funds transfer).
NOTE: Add "0" before the 3-digit institution number.
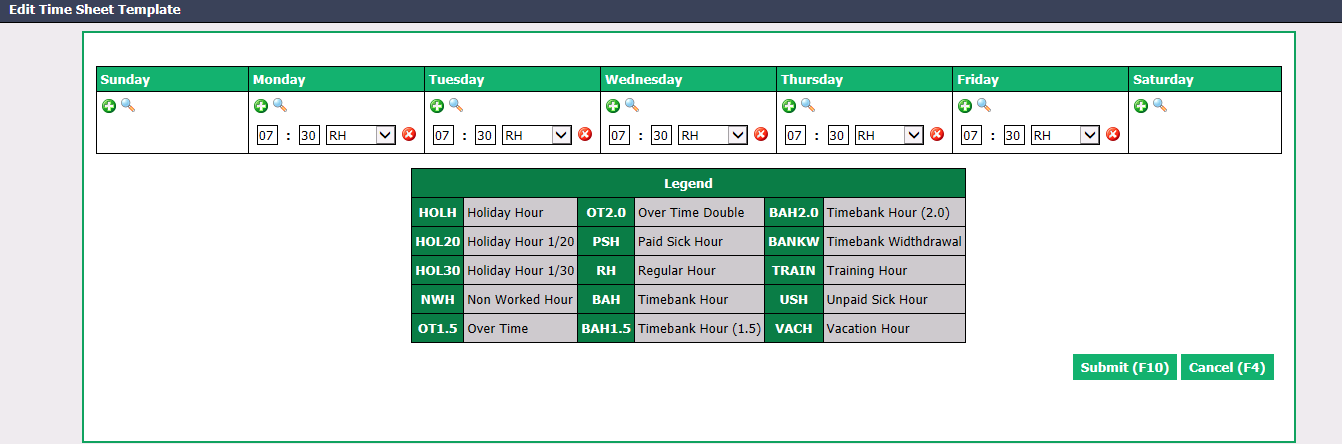
- Edit Time Sheet Template: In the case where an employee has a fixed schedule per week, instead of manually entering that employee’s hours into the schedule at the time of pay preparation, you can preset his/her hours in a time sheet template. To do this, enter the number of hours and the category of hours desired (see legend below) for each day of the week.
- Edit List of Benefits: You can add a benefit by clicking on the + icon or change an existing benefit for that employee by clicking on the Sheet with a Pencil icon. (Example: Dental Insurance)
- Edit List of Deductions: You can add a deduction by clicking on the + icon or change an existing deduction for that employee by clicking on the Sheet with a Pencil icon. (Example: Federal Tax Extra)
- Edit List of Earnings: You can add earnings by clicking on the + icon or change the existing earnings for that employee by clicking on the Sheet with a Pencil icon. (Example: Bonus)
- Edit Time Sheet: You can make adjustments in the time sheet of a given month for that employee by clicking on the + icon (number of hours) and the Magnifying Glass icon (function and department).
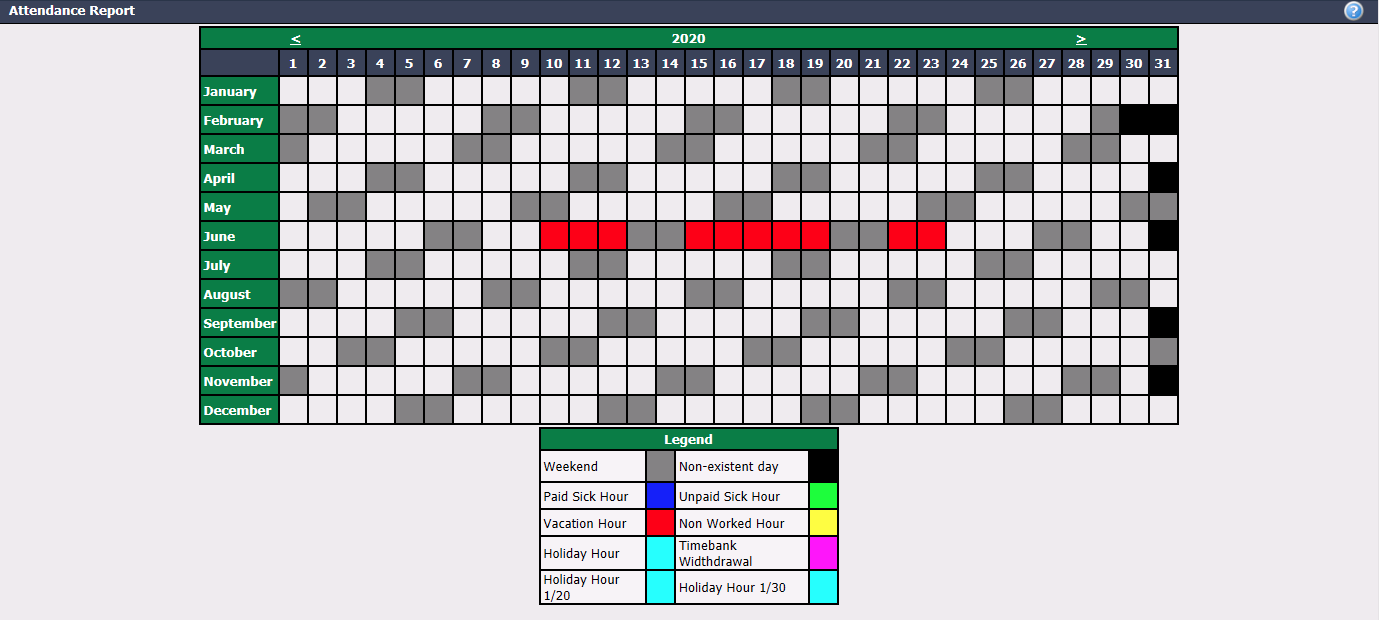
- Display Attendance Report: Allows you to view the different categories of hours that were entered (see the legend below) in a given year for that employee.
- Display Attendance Status History: Applicable when the attendance screen module is available in your agency.
- Display Last Pay Slip: Allows you to view and print the last pay slip for this employee.