

English
Adding/Editing/Deleting a Field in a Document
Once the folder is created, here are, in order, the next steps:
- Add the signatories. For more information, please see the article Adding/Editing/Deleting a Signatory in an eZsign Folder.
- Add the documents. For more information, please see the article Adding/Editing/Deleting a Document in an eZsign Folder.
- Add the fields.
- Send the documents to sign. For more information, please see the article Sending Documents to Sign.
- Sign the documents. For more information, please see the articles Signing a Document as a User and Signing a Document as an External Signatory.
- Send the signed documents by e-mail. For more information, please see the article Sending Signed Documents by E-mail.
Adding a Field in a Document
You must add signature fields in a document to indicate where the signatories must sign.

- **In the "List of Documents" sectio n of your folder, click on the file name or the **Fountain Pen icon to display the document.
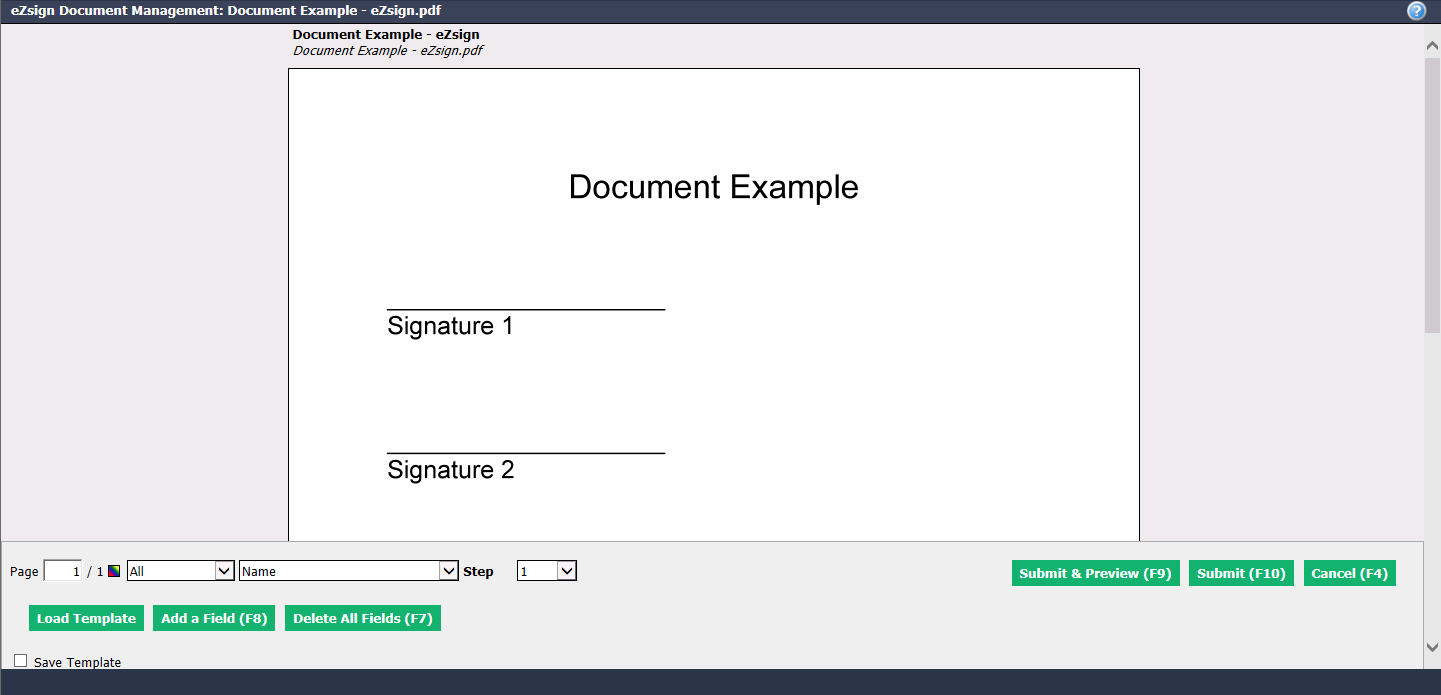
Page : Indicates the page of the document on which the field will be added.
From the drop-down list, select the desired signatory. Each of the signatories will have a different field colour (the same as the one in the "List of Signatories" section of the folder).
- "All": A field will appear for each of the signatories in the folder.
- "Name of the signatory": A field will appear for this signatory only.
Using the drop-down list, select the desired type of field from the form and the electronic signature fields. For more information, please see the article Types of Fields. For each type, a field will appear on the document page.
NOTE: When you have added your form fields and you add electronic signature fields, the form fields will be transparent on the document.
From the drop-down list, select the Step , i.e. the order in which the signature must be applied. For more information, please see the article Order in Which Signatories will Sign.
Click on Add a Field and the field will appear on the document.
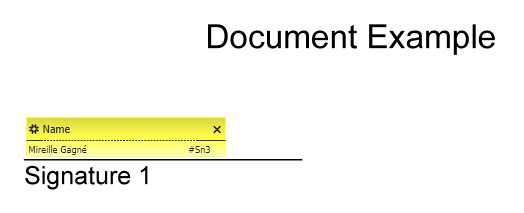
- You can move the field to the desired location on the same page of the document. To do this, bring your cursor near the field and when the cursor changes to a four-pointed arrow, drag it to the new location.
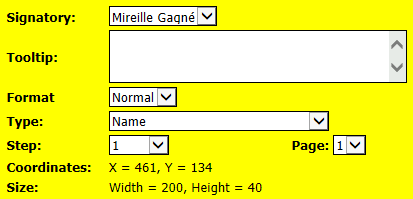
If you want to move a field to another page, you can change the Page number from the field menu (Gear Wheel icon).
- By clicking on the Gear Wheel icon (Menu), you can, for example, add information in the Tooltip field. For more information on everything that can be added/changed depending on the field type, please see the article Types of Fields.
Information
What is entered in the Tooltip field will appear when the document is electronically signed by clicking on this icon

(Information).
Check the Save Template box to add it to the list of your templates. For more information, please see the articles Types of Templates, List of Templates and Adding/Loading/Editing a Template.
When all the desired fields are added, you can click on Submit & Preview to verify the appearance of the final document or you can click on Submit to confirm the location of the fields.
You can also click on Cancel to return to the folder without saving the changes made to the document.
Editing a Field in a Document**
It is possible to modify a field in a document, but only if the document has not yet been sent.
- **In the "List of Documents" sectio n of your folder, click on the file name or the **Fountain Pen icon to display the document.
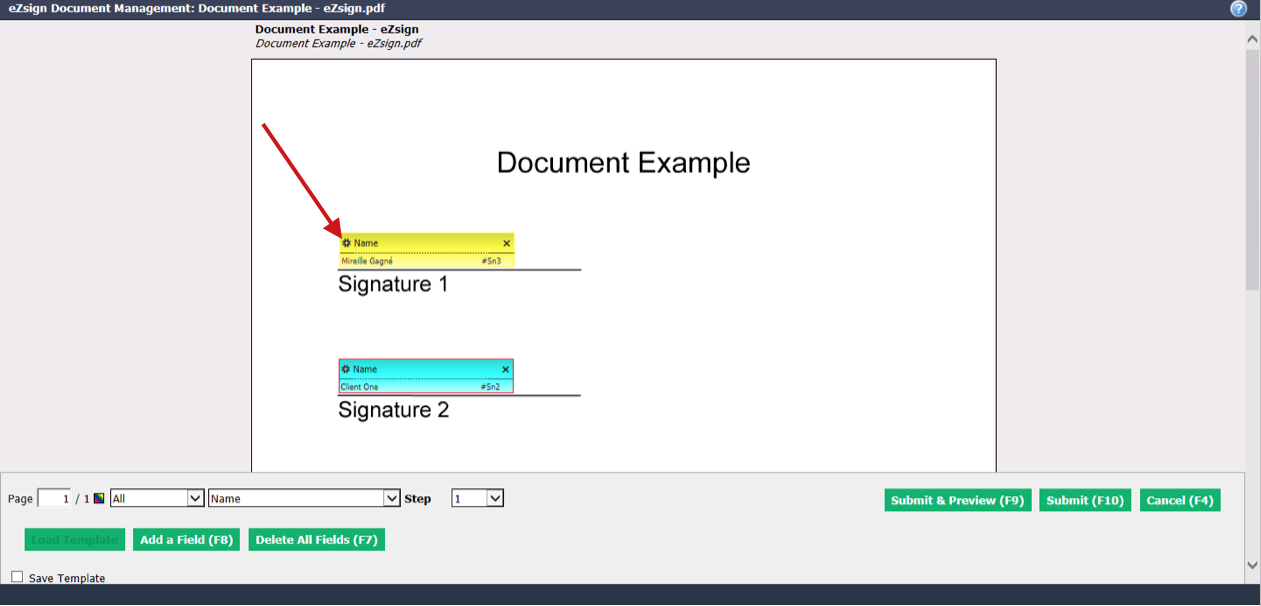
- ****Click on the Gear Wheel icon (Menu) of the desired field to display its information including itsCoordinates and Size.
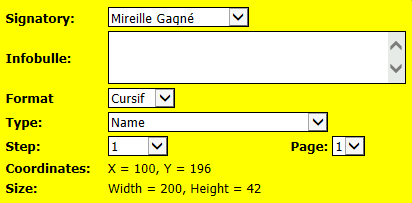
Infobulle = Tooltip
Make the desired changes. For more information about everything that can be added/edited depending on the field type, please see the article Types of Fields.
Click on Submit & Preview or Submit.
Deleting a Field in a Document**
It is possible to delete a field in a document, but only if the document has not yet been sent.
- **In the "List of Documents" sectio n of your folder, click on the file name or the **Fountain Pen icon to display the document.
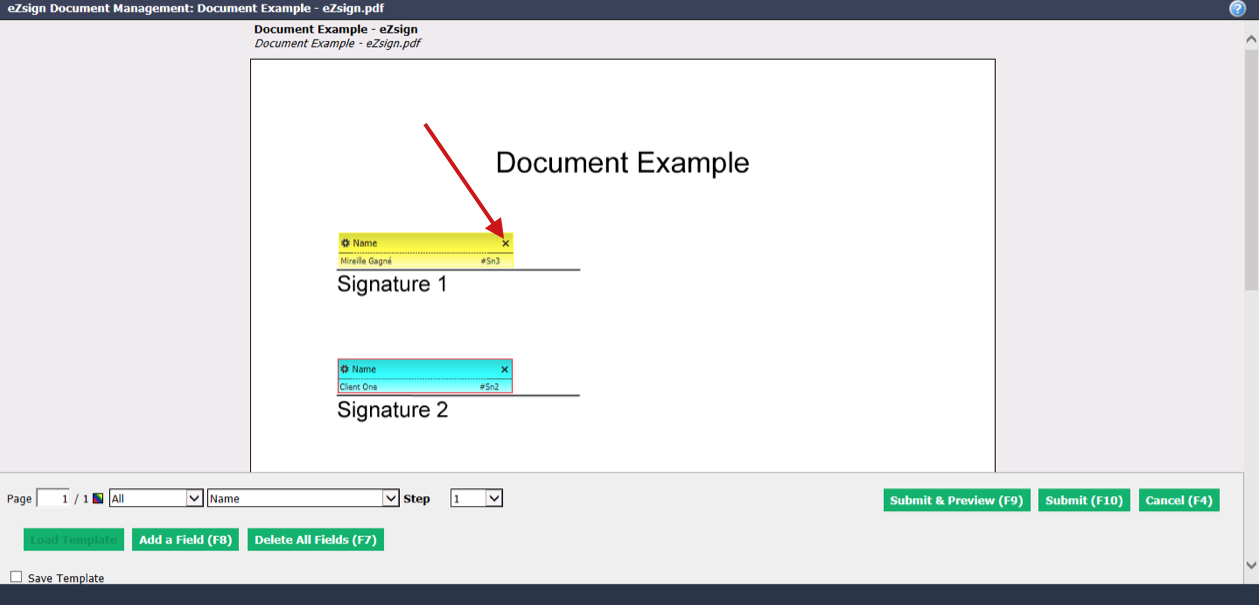
You can click the X at the top right of a field to delete it.
If you want to remove all fields in the document at once, click on Delete All Fields.
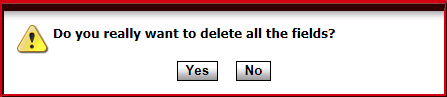
- Click on Yes to confirm and continue the document.