

English
Adding/Editing an Account Reconciliation - Current + In trust
When you receive a bank statement from your accounts, you can compare the transactions (withdrawals and deposits) of the statement with those of eZmax to ensure that they are consistent and to find justifications for any differences between the two balances.
Adding an Account Reconciliation
From Main menu >> Accounts Payable >> List of Account Reconciliations.
Click on Actions >> New Account Reconciliation.
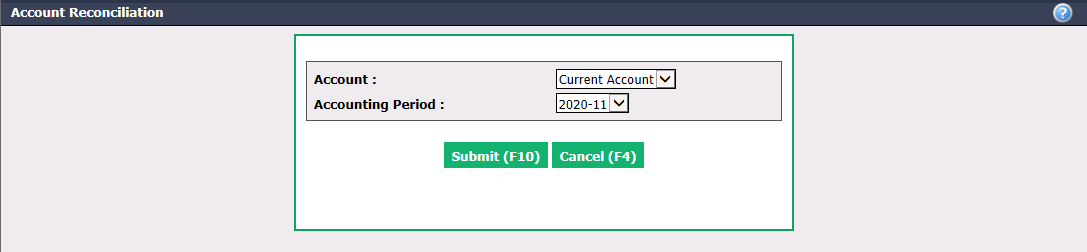
From the drop-down lists, select the bank Account you want to reconcile (Current, commission or in trust account. For more information, please see the article Adding/Editing a Bank Account.) and the desired Accounting Period.
Click on Submit.
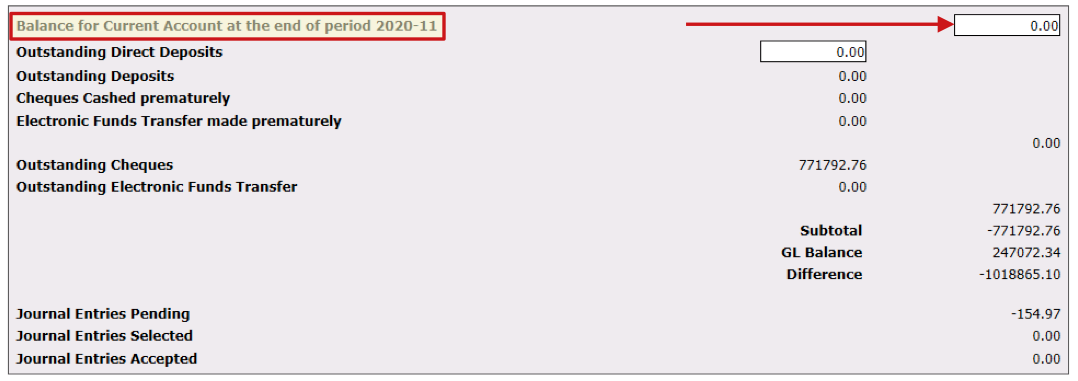
- The first step is to enter the Balance for "Account Name" at the end of period YYYY-MM.
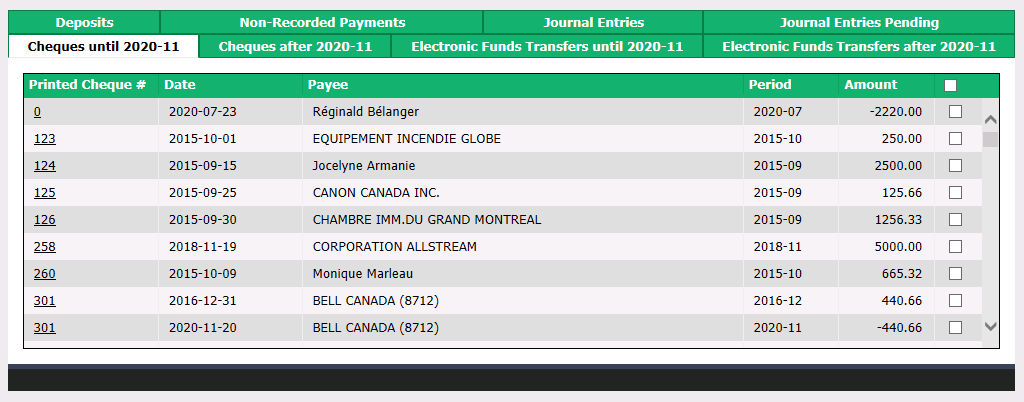
- Then, for each tab, verify and check the amounts that appear in the eZmax list and highlight those amounts on your printed account statement.
We recommend that you regularly click on Submit to save your selections (such as checked cheque boxes). You can come back and edit the reconciliation of the account you just created from the Actions menu >> Edit Account Reconciliation.
Cheques
"Cheques until YYYY-MM" tab: List of all cheque withdrawals made before and during the selected accounting period (in this example, until November 30, 2020).
"Cheques after YYYY-MM" tab: List of all cheque withdrawals made after the selected accounting period (in this example, after November 30, 2020).
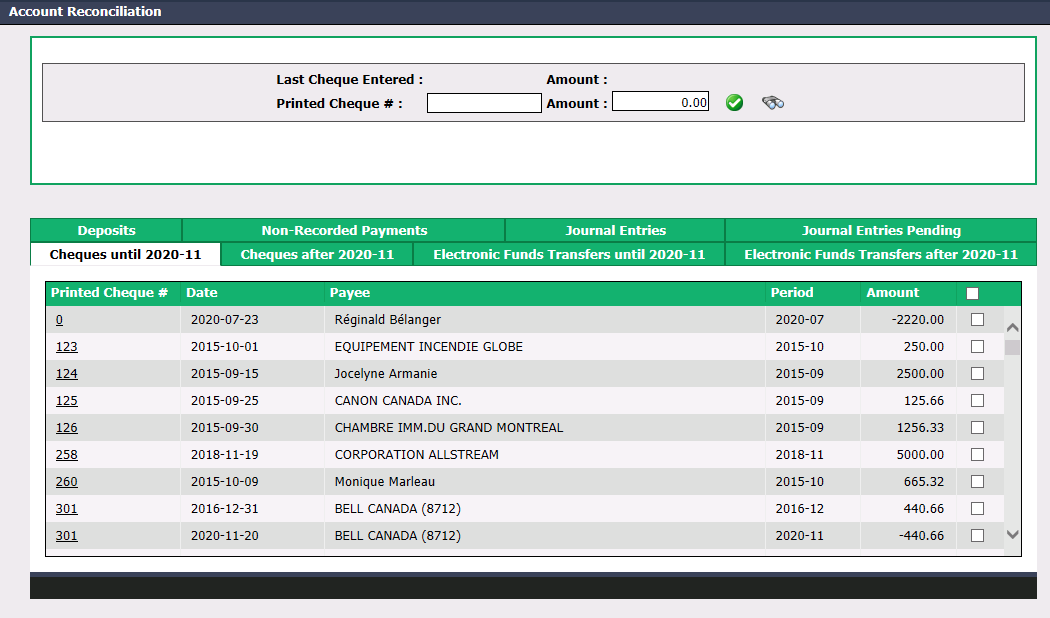
It is possible to search for a particular cheque by entering only its Printed Cheque # or by entering its Printed Cheque # AND its Amount (to refine the search if there is more than one cheque with this number). Click on the Check Mark button or press the Enter key on your keyboard to automatically check the found cheque in the list. The result of your last search appears above in the Last Entered Cheque and Amount fields.
You can also search for a cheque by amount by clicking on the Binoculars icon.
- Enter Cheque Amount to Search and click on the Check Mark button or press the Enter key on your keyboard.
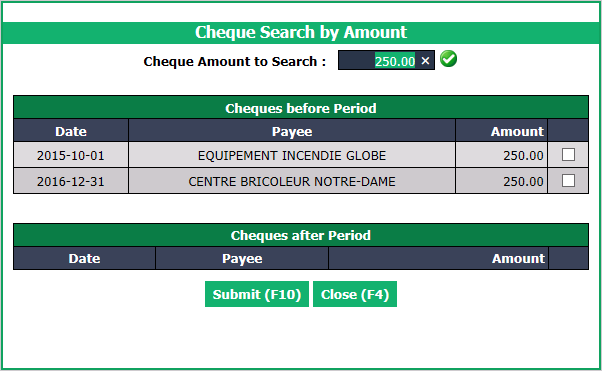
* The results obtained will appear in the section "Cheques before Period" and/or "Cheques after Period" (selected period).
* Check the box of the result that matches what you were looking for and click on **Submit**.
* This cheque will now be checked on the "Account Reconciliation" page.
* Repeat these steps for all desired cheque amounts.
Electronic Funds Transfers
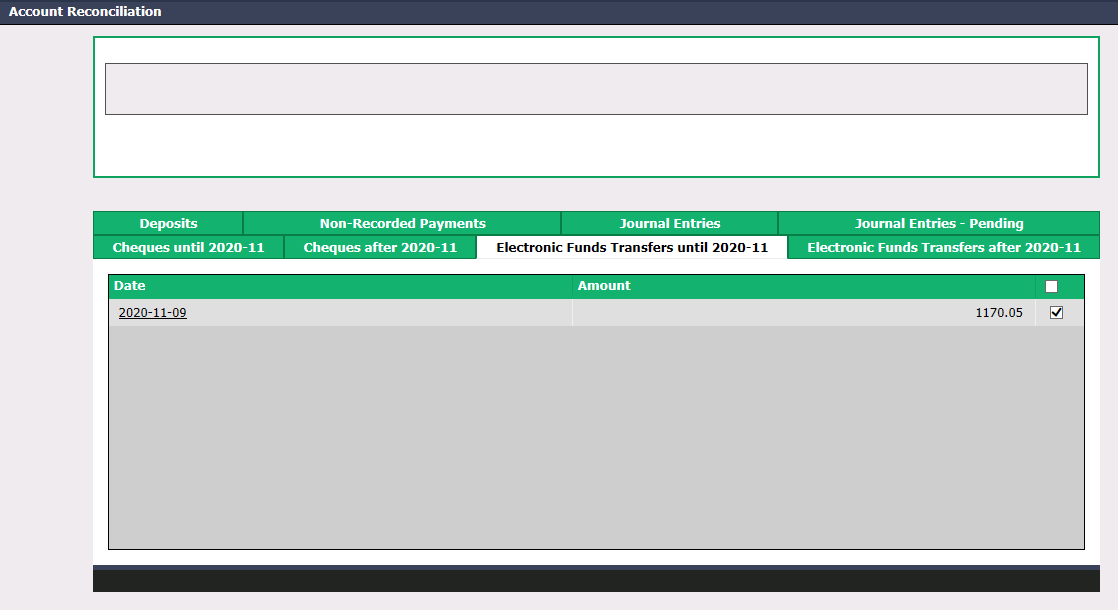
"Electronic Funds Transfers until YYYY-MM" tab: List of all electronic funds transfers made before and during the selected accounting period (in this example, until November 30, 2020).
"Electronic Funds Transfers after YYYY-MM" tab: List of all electronic funds transfers made after the selected accounting period (in this example, after November 30, 2020).
NOTE: EFTs are all selected by default but you can uncheck them manually.
Deposits
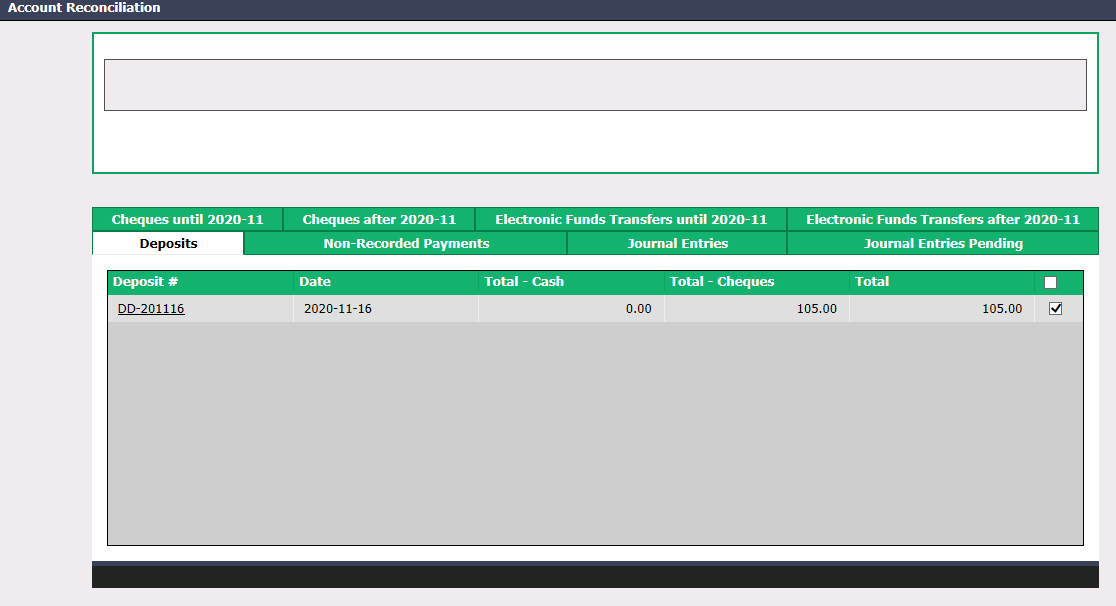
- "Deposits" tab: List of all regular and automatic deposits, individual and grouped. Deposits are all selected by default but we strongly suggest that you uncheck them all to complete the verification.
Non-Recorded Payments
- "Non-Recorded Payments" tab: List of payments that have been made in the bank account but have not been entered into eZmax as a deposit, purchase or payment. Example: Bank fees (withdrawal) and credits (deposit).
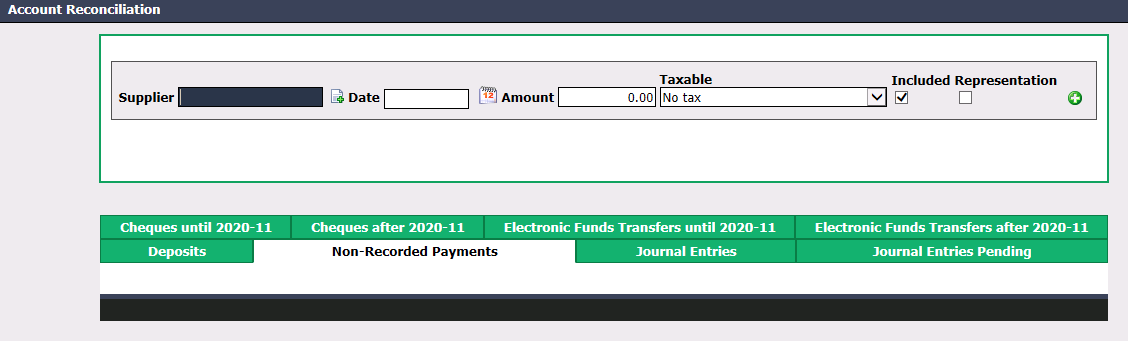
- Enter the Supplier name (for example, the name of your bank), the Date the payment was made and Amount.
Warning
In the case of a withdrawal, the Amount entered must be positive and when it is a deposit, the Amount entered must be negative.
NOTE: For the same type of payment (example: several bank fees), if you have had multiple payments on an account statement (and therefore multiple dates), you can enter only one date in the Date field and the total amount of those payments in the Amount field.
Indicate whether the payment is Taxable or not. If so, make sure you select the appropriate tax configuration.
Included : Check this box if the amount entered includes taxes.
Representation : Check this box only if the payment includes a representation fee (e.g. restaurant).
Click on the Green + icon or press the Enter key on your keyboard when you are in the Amount field.
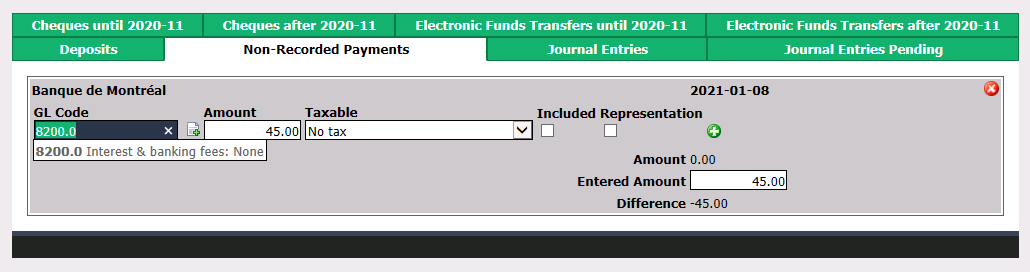
Verify the GL Code associated with the supplier that will appear by default. For more information, please see the article Adding/Editing a Supplier.
Click on the Green + icon or press the Enter key on your keyboard when you are in the Amount field and the payment will be added.
You can delete these payments by clicking on the Red X icon.
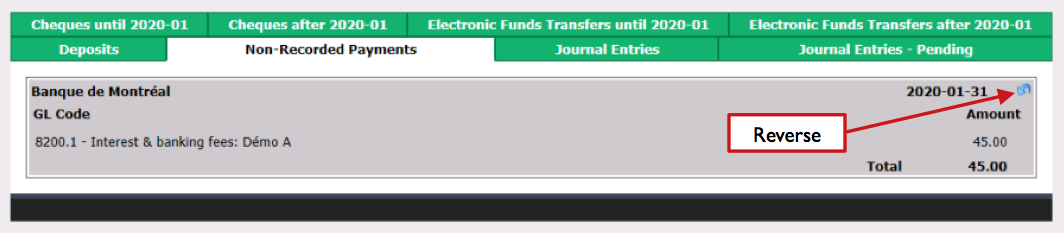
Once you click on Submit , it is possible to reverse a payment by clicking on the Blue Arrow icon.
Journal Entries
"Journal Entries" tab: List of all journal entries that have been made in the account during the accounting period of the reconciliation.
"Journal Entries - Pending" tab: List of all repetitive journal entries that have been created for this account for the accounting period following the reconciliation period.
For more information about journal entries, please see the article Adding/Editing a Journal Entry (445).
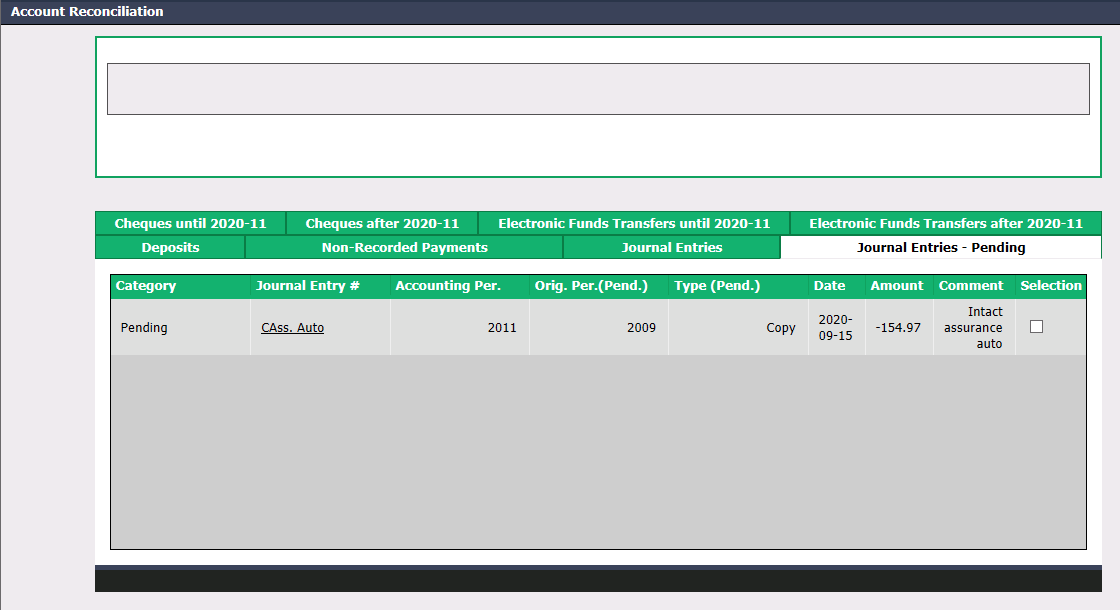
- Before accepting a pending journal entry, you can check the box below Selection to verify if you balance.
Warning
By checking the box next to the pending journal entry, it will not be accepted. See below for how to accept a pending journal entry so that it can be found in the “Journal Entries” tab.
- If you want to accept a pending journal entry, click on the desired Journal Entry # in the "Journal Entries - Pending" tab. In this example, the accounting period of the reconciliation is 2020-11 and the pending journal entry is the car insurance payment.
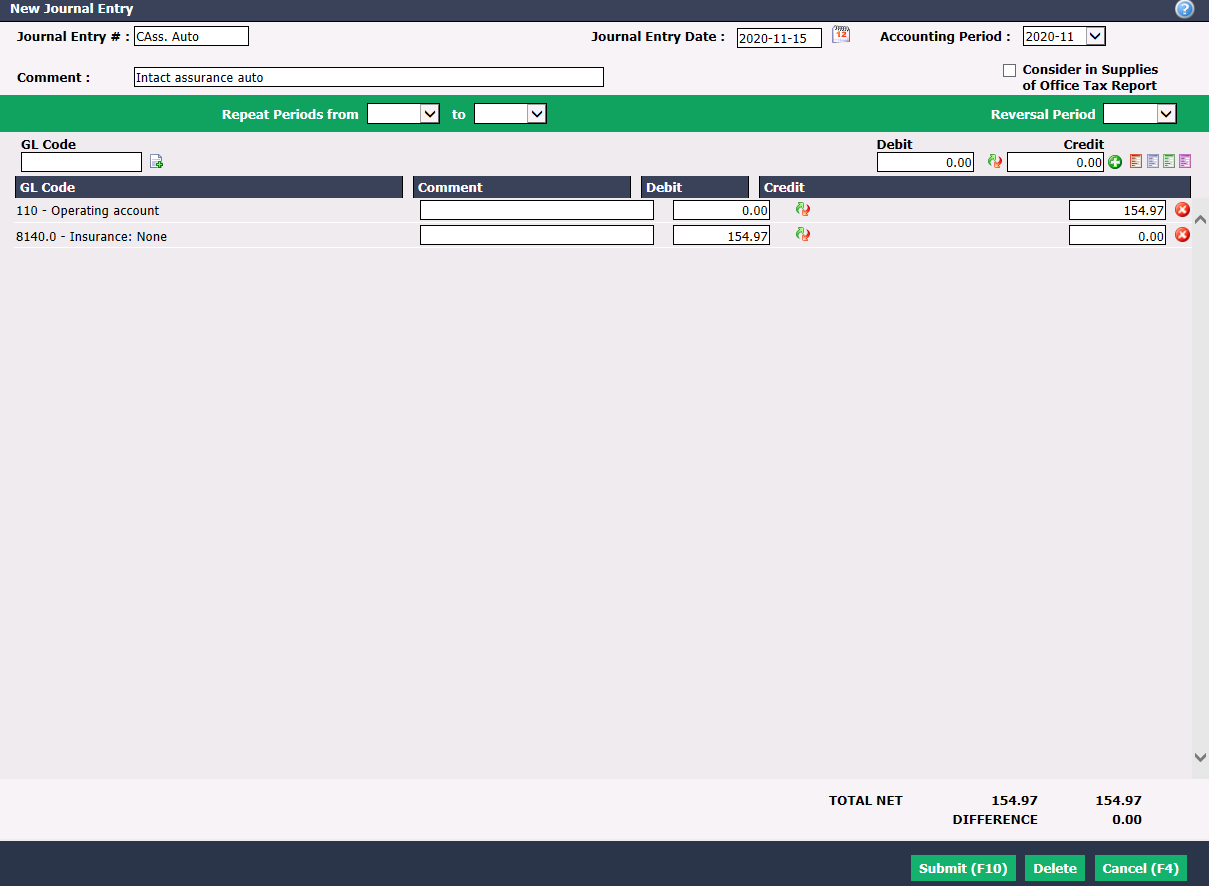
- In Journal Entry Date , enter the date the payment was made. In this example, the payment was made on November 15, 2020. The Accoun****ting Period will be automatically selected according to the date entered.
Warning
Please make sure that the date entered is the same as the selected accounting period.
NOTE: If the payment amount is different from the one you configured in the journal entry, you can change it in Debit and Credit.
Click on Submit and the page of the journal entry will appear.
Go back to the reconciliation page and click on Submit. Click on Actions >> Edit Account Reconciliation.
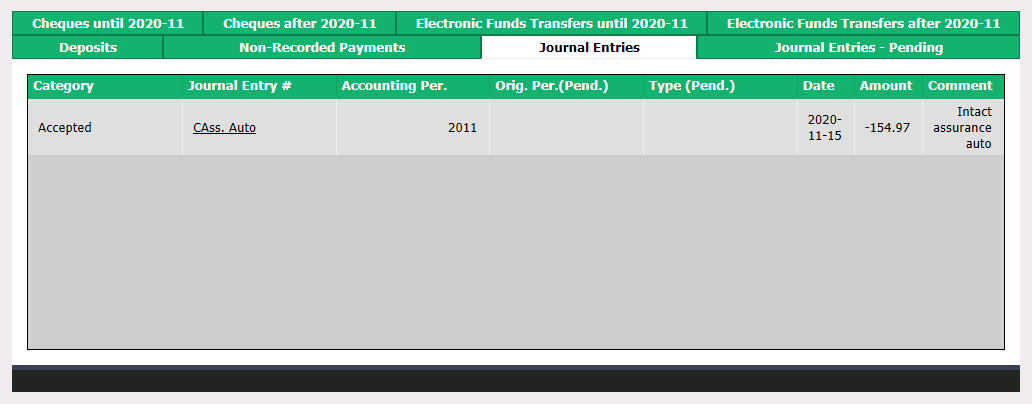
- The journal entry is now accepted and can be found in the "Journal Entries" tab.
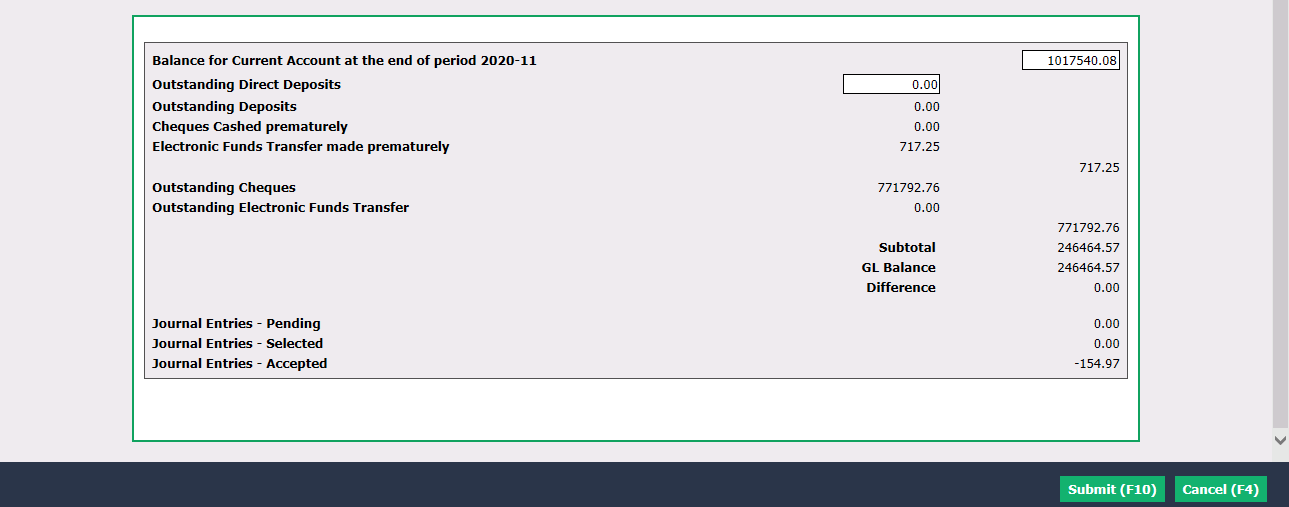
- In the bottom section of the reconciliation, you can see a summary of banking activities:
Outstanding Direct Deposits : If you have, for example, an electronic transfer from your trust account to your current account but the deposit did not arrive in the current account for this period (account and reconciliation period), enter the amount of this deposit in the field.
Outstanding Deposits : All deposits that have not been checked in the "Deposits" tab.
Cheques Cashed prematurely : All cheques with a date later than the accounting period of the reconciliation that were checked in the "Cheques after YYYY-MM" tab.
Electronic Funds Transfer made prematurely : All electronic transfers with a date later than the accounting period of the reconciliation that were checked in the "Cheques after YYYY-MM" tab.
Outstanding Cheques : All cheques that are not yet cashed, so those that are not checked in the "Cheque until AAAA-MM".
Outstanding Electronic Funds Transfer : Amount of withdrawals that will be made in the account at a later date than the reconciliation accounting period.
Journal Entries - Pending : All journal entries in the "Journal Entries - Pending" tab that are not yet checked or accepted.
Journal Entries - Selected : All journal entries in the "Journal Entries - Pending" tab that are checked.
Journal Entries - Accepted : All pending journal entries that have been accepted and are now in the "Journal Entries" tab.
Subtotal : Reconciled account balance at the end of the reconciliation period + all deposits - all withdrawals.
GL Balance : General Ledger balance at the time of this account reconciliation.
Difference : Subtotal - GL Balance.
Warning
At the end of the account reconciliation, the Difference must be $0.00.
- When you have completed the verification of all amounts on eZmax compared to those on the account statement, click on Submit and the reconciliation of this account will be added to the system.
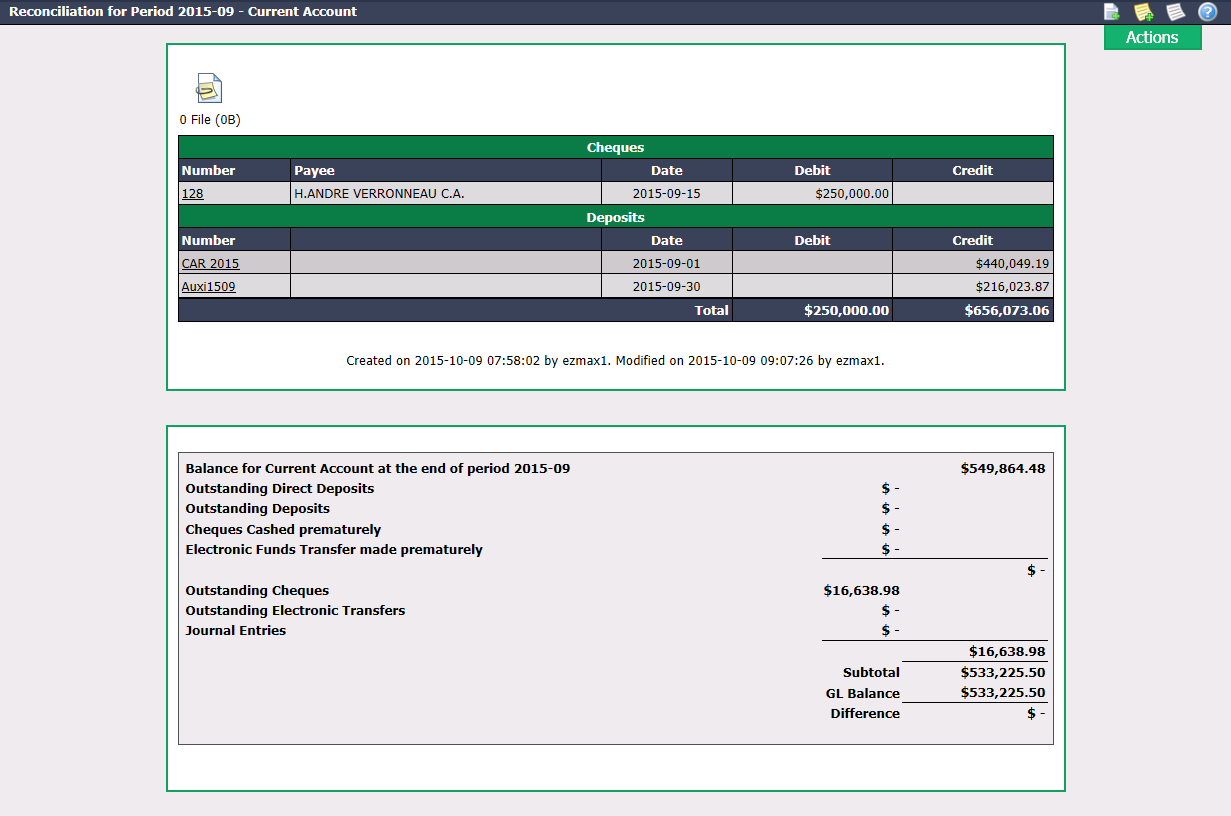
- Once the account reconciliation is created, from the Actions menu, you have the option to:
- Edit Account Reconciliation: For more information, see below in this article.
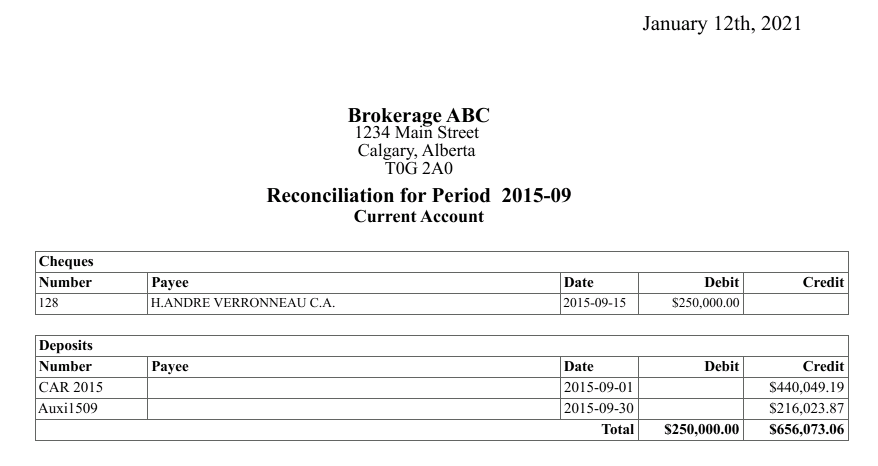
- Print Account Reconciliation: See the example below.
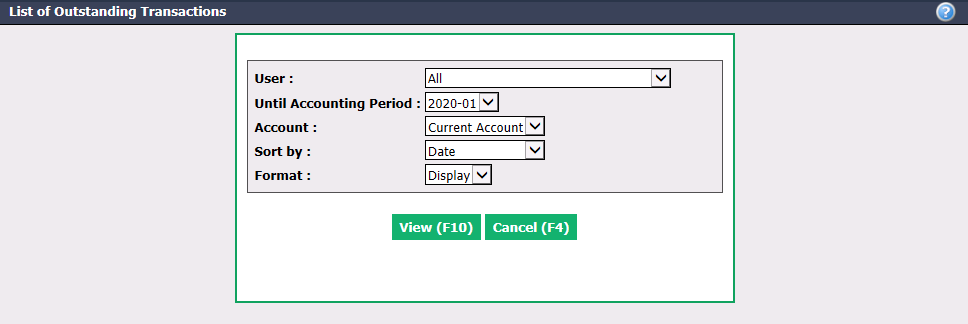
* Display List of Outstanding Transactions: List of deposits and withdrawals not yet displayed in the account but processed in eZmax.
- You can add the account statement to the EDM (Electronic Document Management) by clicking on the Document Management icon

at the top left of the reconciliation page. For more informations, please see the article Adding Documents to EDM.
Editing an Account Reconciliation
To modify an account reconciliation, select it from the List of Account Reconciliations.
Click on Actions >> Edit Account Reconciliation.
Make the desired changes and click on Submit to save them.