

English
Adding/Editing a Client
Adding a Client
From Main menu >> Accounts Receivable >> List of Clients.
Click on Actions >> New Client.
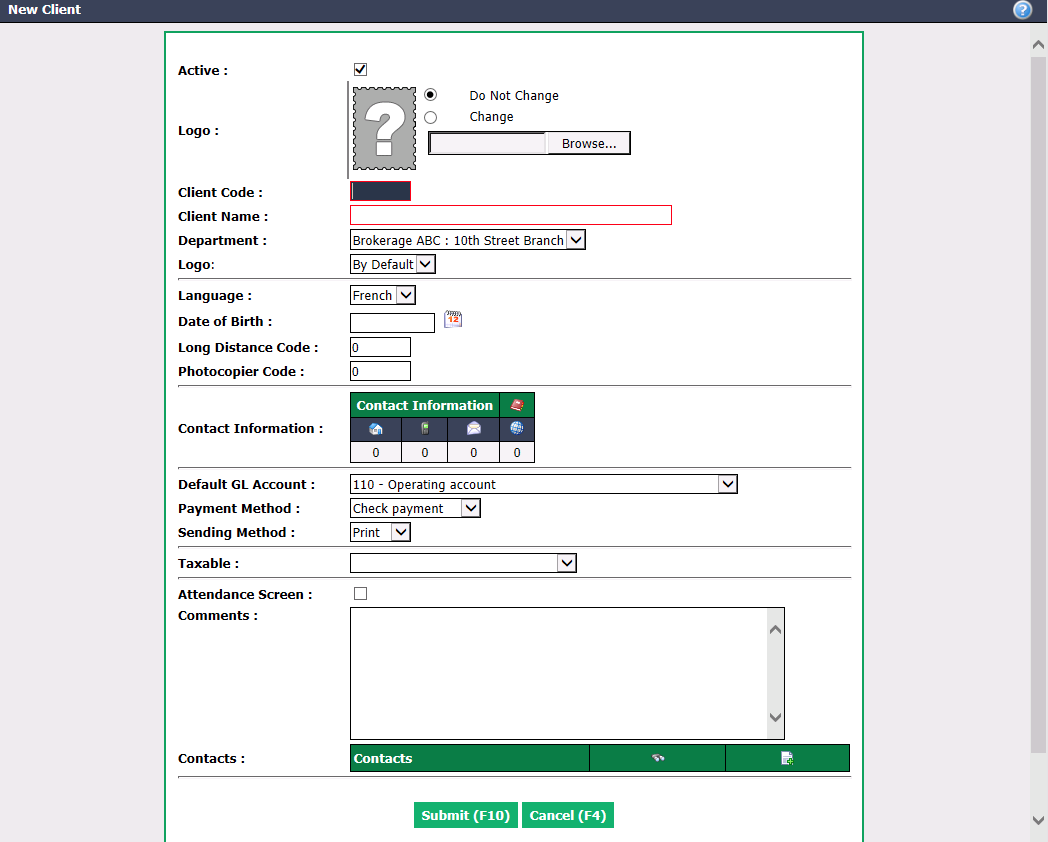
The client’s Logo can be added by clicking the Browse button, then selecting and uploading the desired file.
Create a Client Code (abbreviation, maximum of 5 characters) and enter the Client Name (full name).
Assign the client to the right Department , if applicable.
Make sure you select the appropriate client Language.
You can enter the client’s **Date of **Birth , Long Distance Code and **Photocopier **Code.
Contact Information for the client, i.e. addresses, e-mails, phone numbers and websites, can be added by clicking on one of the icon in the box.
Select a Default GL Account for this client when there is manual invoicing (for example, a credit).
Select a default Payment Method each time you will pay this client (for example, a credit).
Warning
If you choose an electronic transfer as Payment Method , you must save the client information at least once and then go add a bank account.
- Select a Sending Method :
- Print: Hard copy
- E-mail: Attached file
NOTE : If you choose "E-mail" as Sending Method , make sure you add an e-mail address to the Contact Information.
Make sure you select the appropriate tax configuration for your province in Taxable.
Attendance Screen : If this module is available in your agency, you can check this box to activate it.
Comments can be added in this field.
The individual contacts of the client can be added to Contacts by clicking on the + icon. You can search in your eZmax contacts by clicking on the Magnifying Glass icon.
Click on Submit to save the information of the new client.
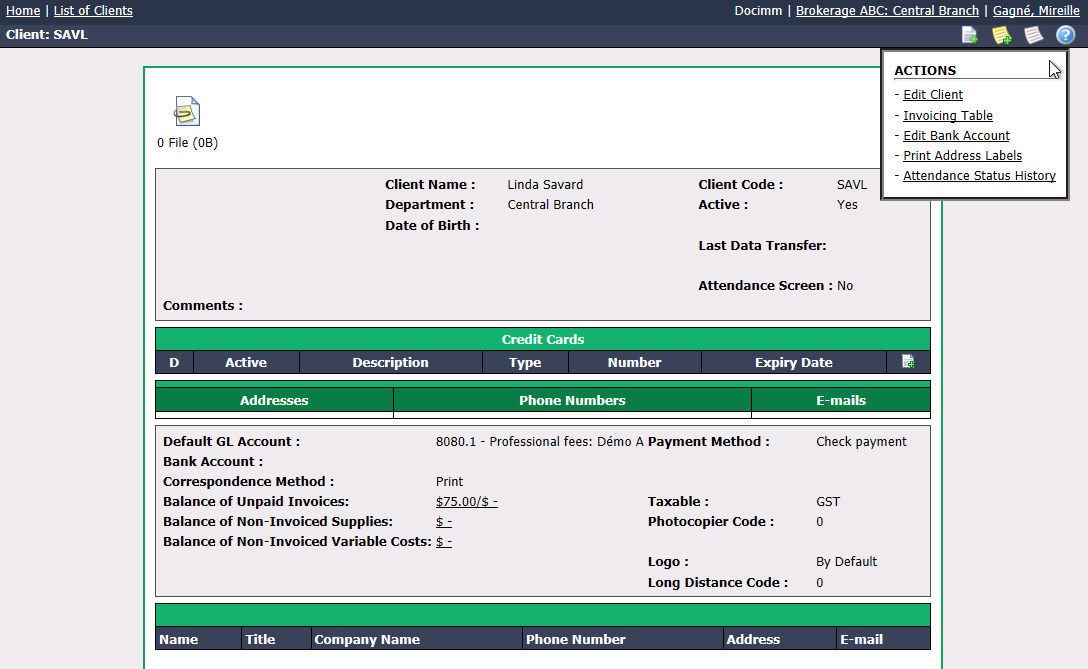
- Once the client is created, you can add one or more Credit Cards by clicking on the Sheet with a + icon. The client will be able to pay his invoices by credit card provided that the company uses the Moneris system. For more information, please see the article Processing System of Credit Card Payments, Invoice Payment by Credit Card - General (416) and Invoice Payment by Credit Card - Real Estate (415).
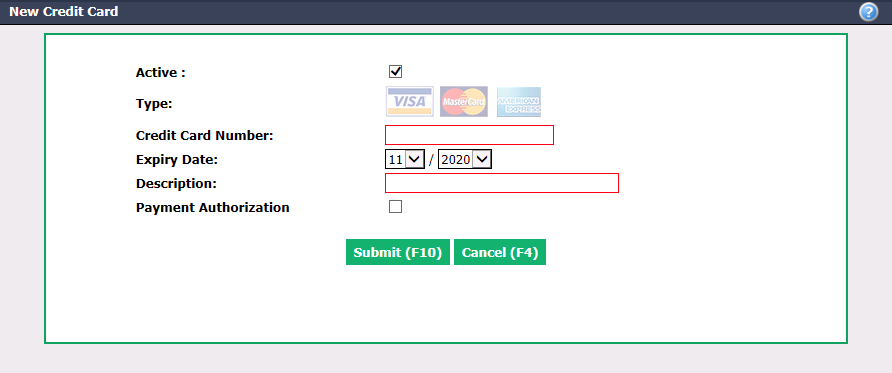
NOTE: The Payment Authorization box must be checked if this client wants to use the option of paying his invoices by credit card.
You will also be able to add monthly fixed costs that will be invoiced automatically to the client when you complete your invoicing. For more information, please see the article Client Invoicing Table.
From the Actions menu, you have the option to Print Address Labels and access the Attendance Status History (if this module is activated).
At any time, you can click on the different balances:
- Balance of Unpaid Invoices to display the List of Unpaid Invoices (Regular invoices, manual and monthly).
- Balance of Non-Invoiced Supplies to display the List of Purchased Supplies by this client (pending express supply invoicing). For more information, please see the article Express Supply Invoicing.
- Balance of Non-Invoiced Variable Costs to display the List of Variable Costs of this client (Pending reinvoicing). For more information, please see the articles Adding a Purchase - Reinvoicing to Agents/Clients (Real Estate), Adding a Purchase - Reinvoicing to Clients (General) and Difference between Variable Costs, Supplies and Fixed Costs (117).
Editing a Client
- To modify an existing lawyer, select it from the List of Lawyers and click on Actions >> Edit Client or Edit Bank Account.
- Edit Client: You can change all the client information.
- Edit Bank Account: If the current payment method is "Check Payment" and you want to change it to "Electronic transfer", you must check the Direct Deposit box and enter the appropriate Transit , Institution and Bank Account numbers. If the current payment method is "Electronic transfer", you can modify the bank account information for EFT (electronic funds transfer).
- Direct Deposit : The payment will be deposited into the client’s account.
- Direct Debit : The payment will be taken from the client’s account. If you want this option, you must contact the technical support.
NOTE: Add "0" before the 3-digit institution number.
- Click on Submit to save your changes.