

English
Add/Use/Edit a Template Group
It is possible to create a template group, allowing you to bundle multiple standard documents and add them to an eZsign folder in a single step. For example, an employer can use a template group to quickly collect all required signatures from a new employee.
Add a Template Group
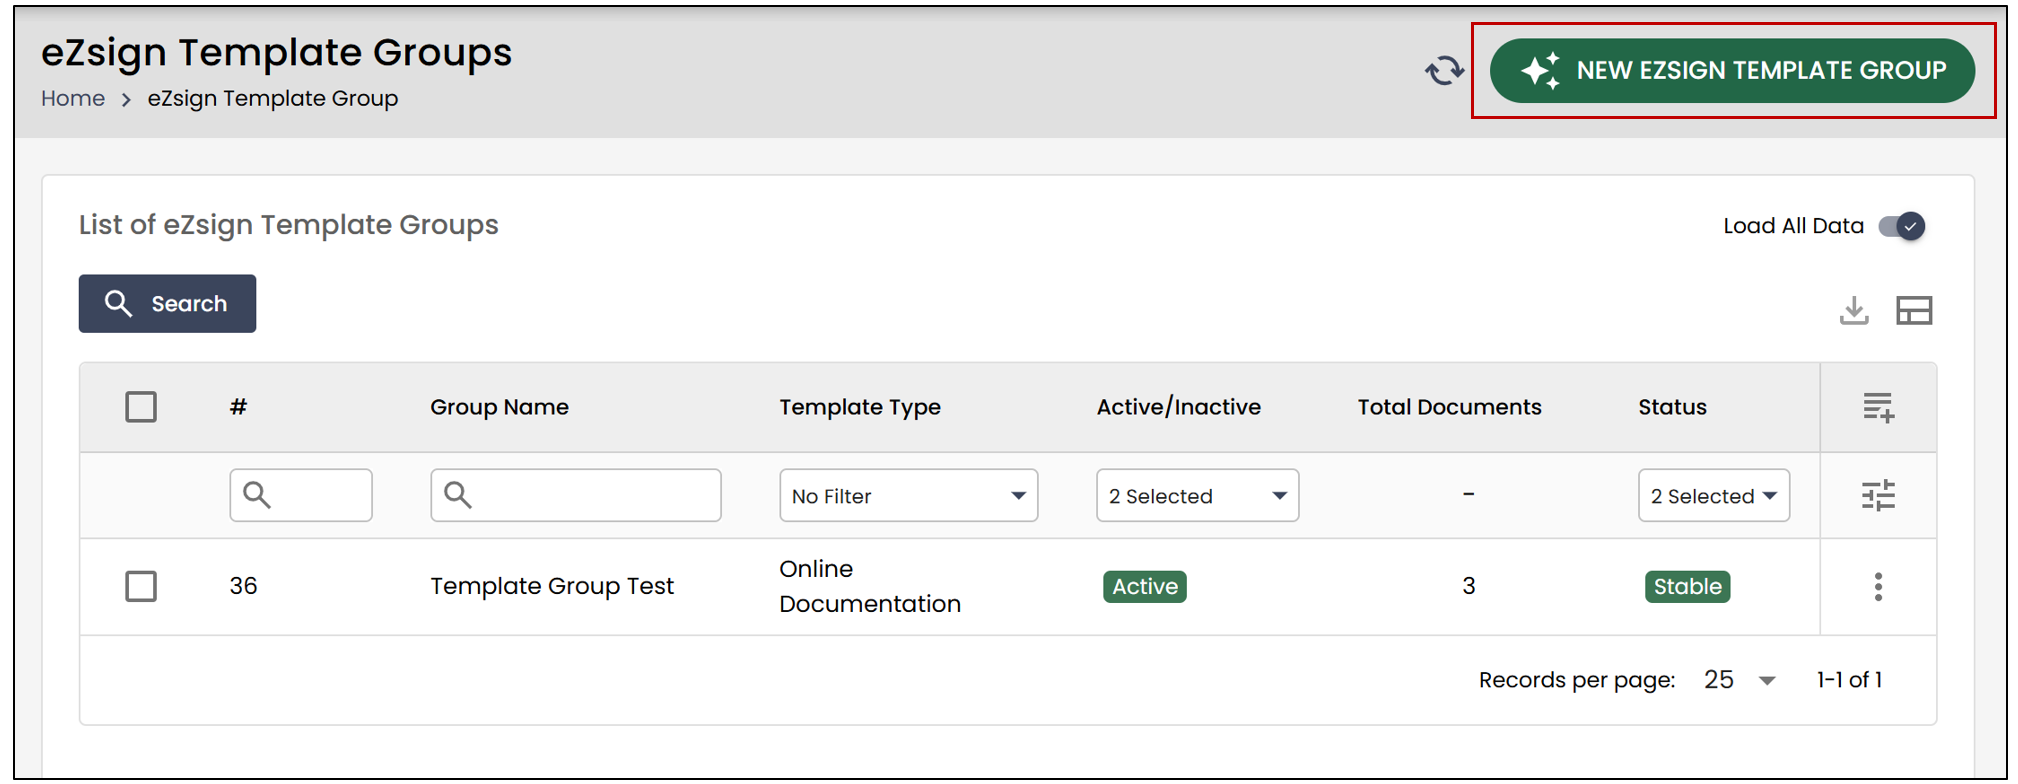
From the left menu >> eZsign Template Groups >> New eZsign Template Group.
Basic Information of the eZsign Template Group
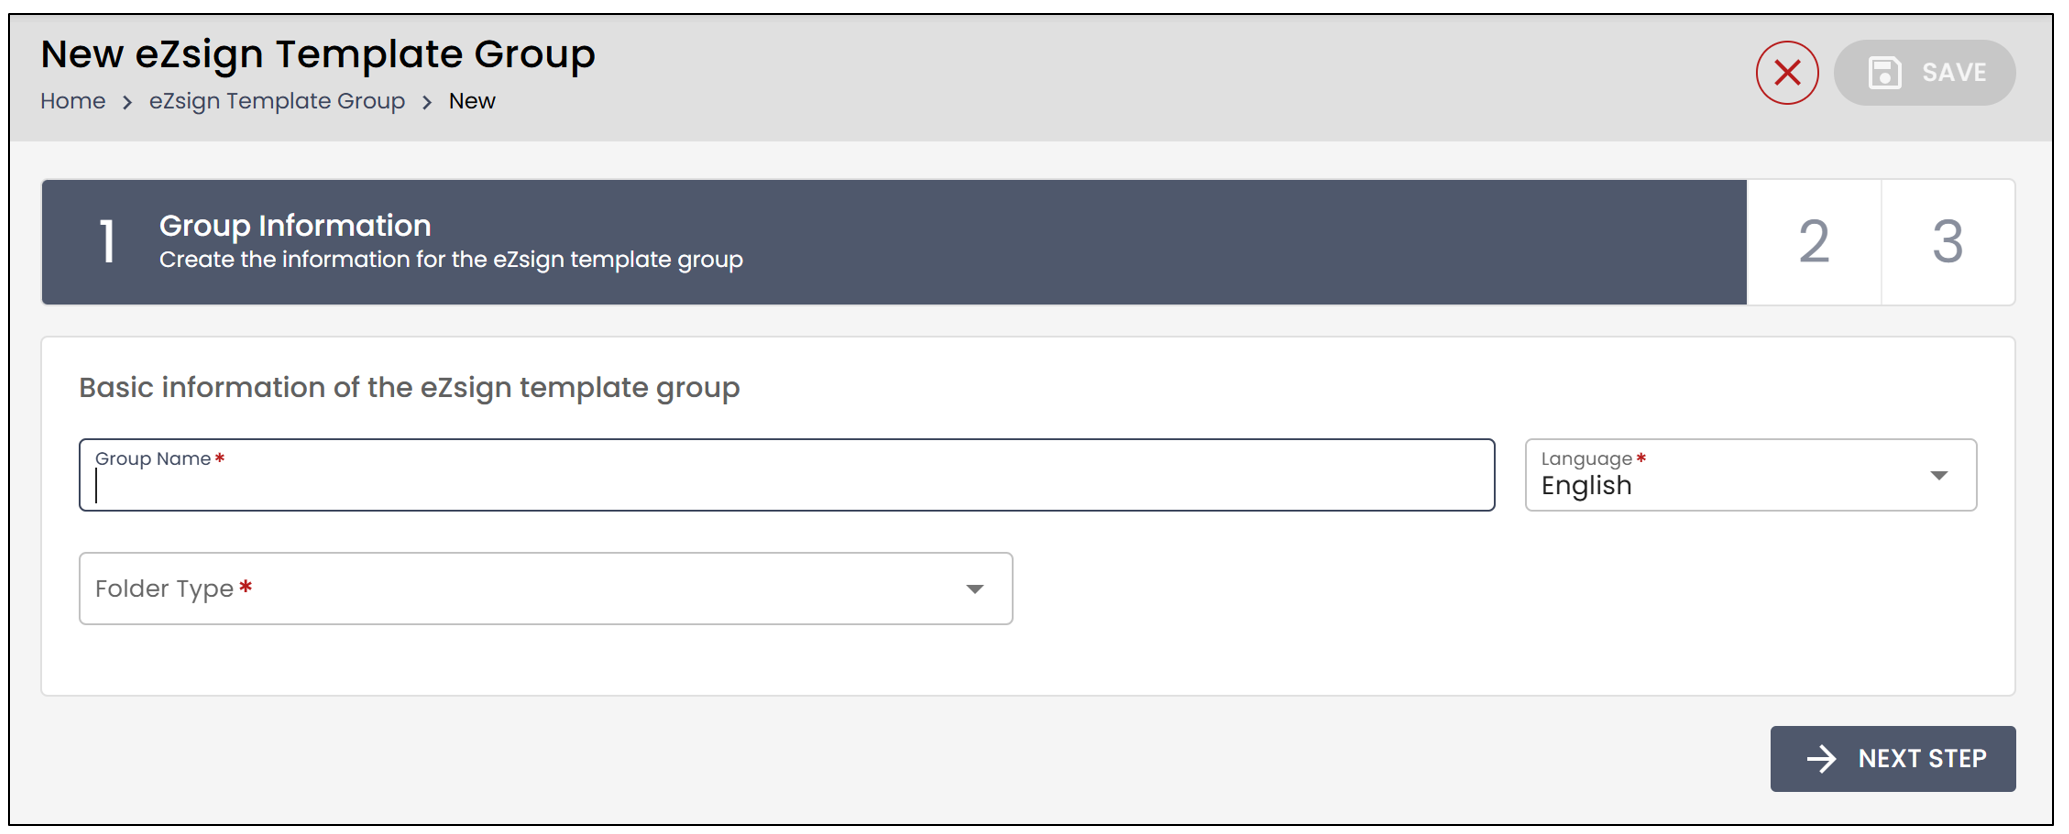
Enter the Group Name (e.g., "New Employee – Forms to Sign") and select the desired Language.
You will then need to select the Folder Type from the drop-down list.
NOTE: The available options in this list will depend on what your account administrator has configured in the system (personal or shared folders). For more information, see the article Difference between a Personal Folder and a Shared Folder.
- When finished, click Next Step.
Add eZsign Templates
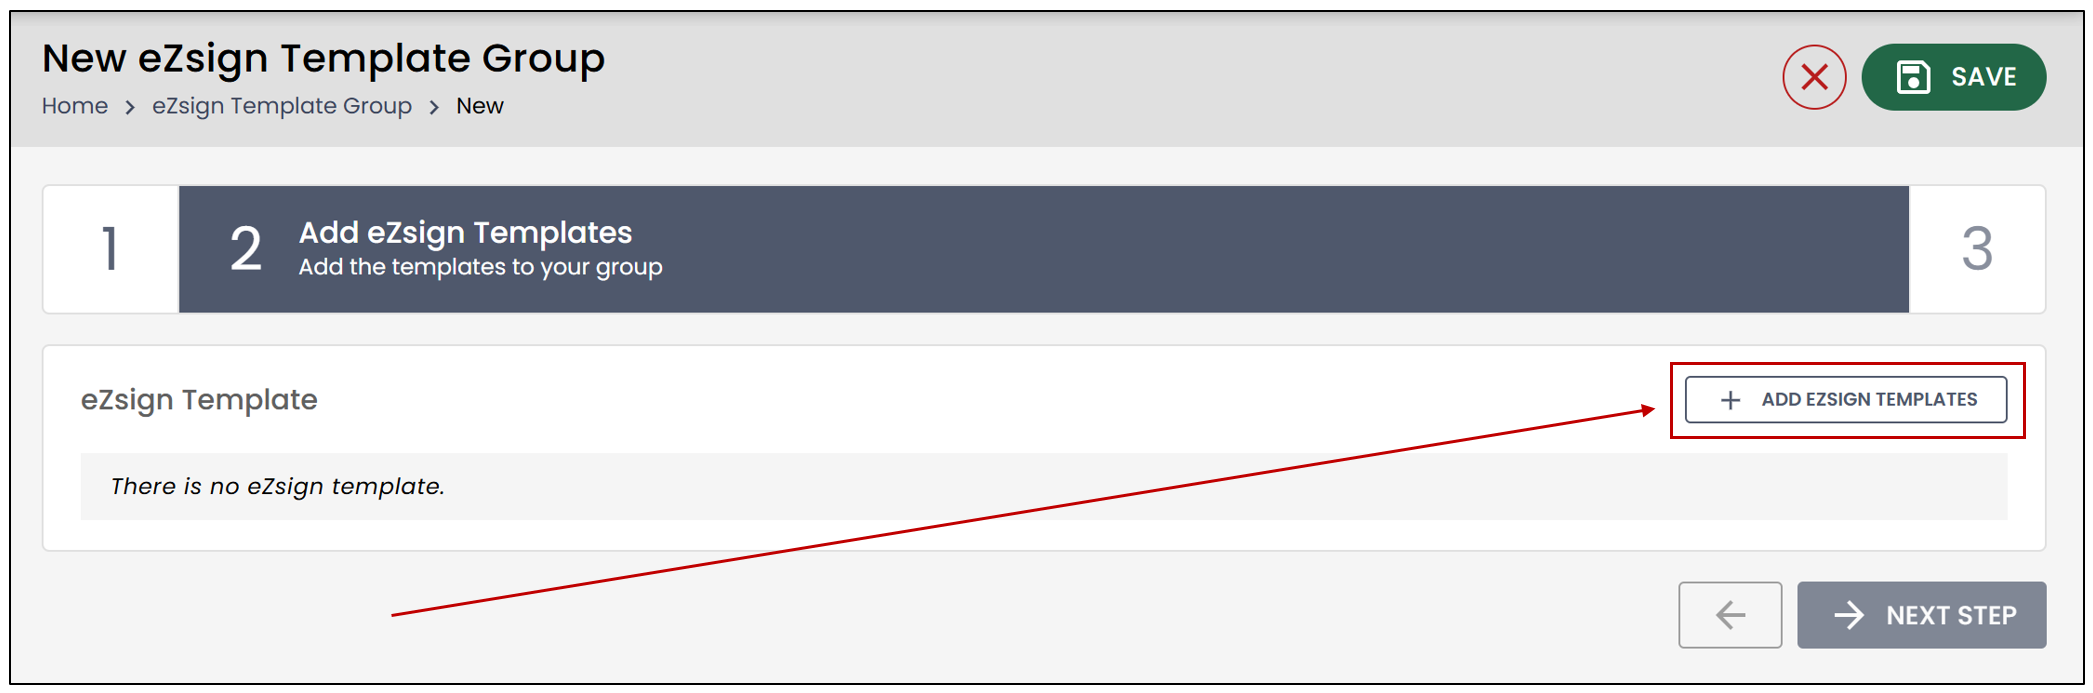
This step involves adding eZsign templates to your new group.
- Select Add eZsign Templates.
- Click the “+” to the right of the desired documents.
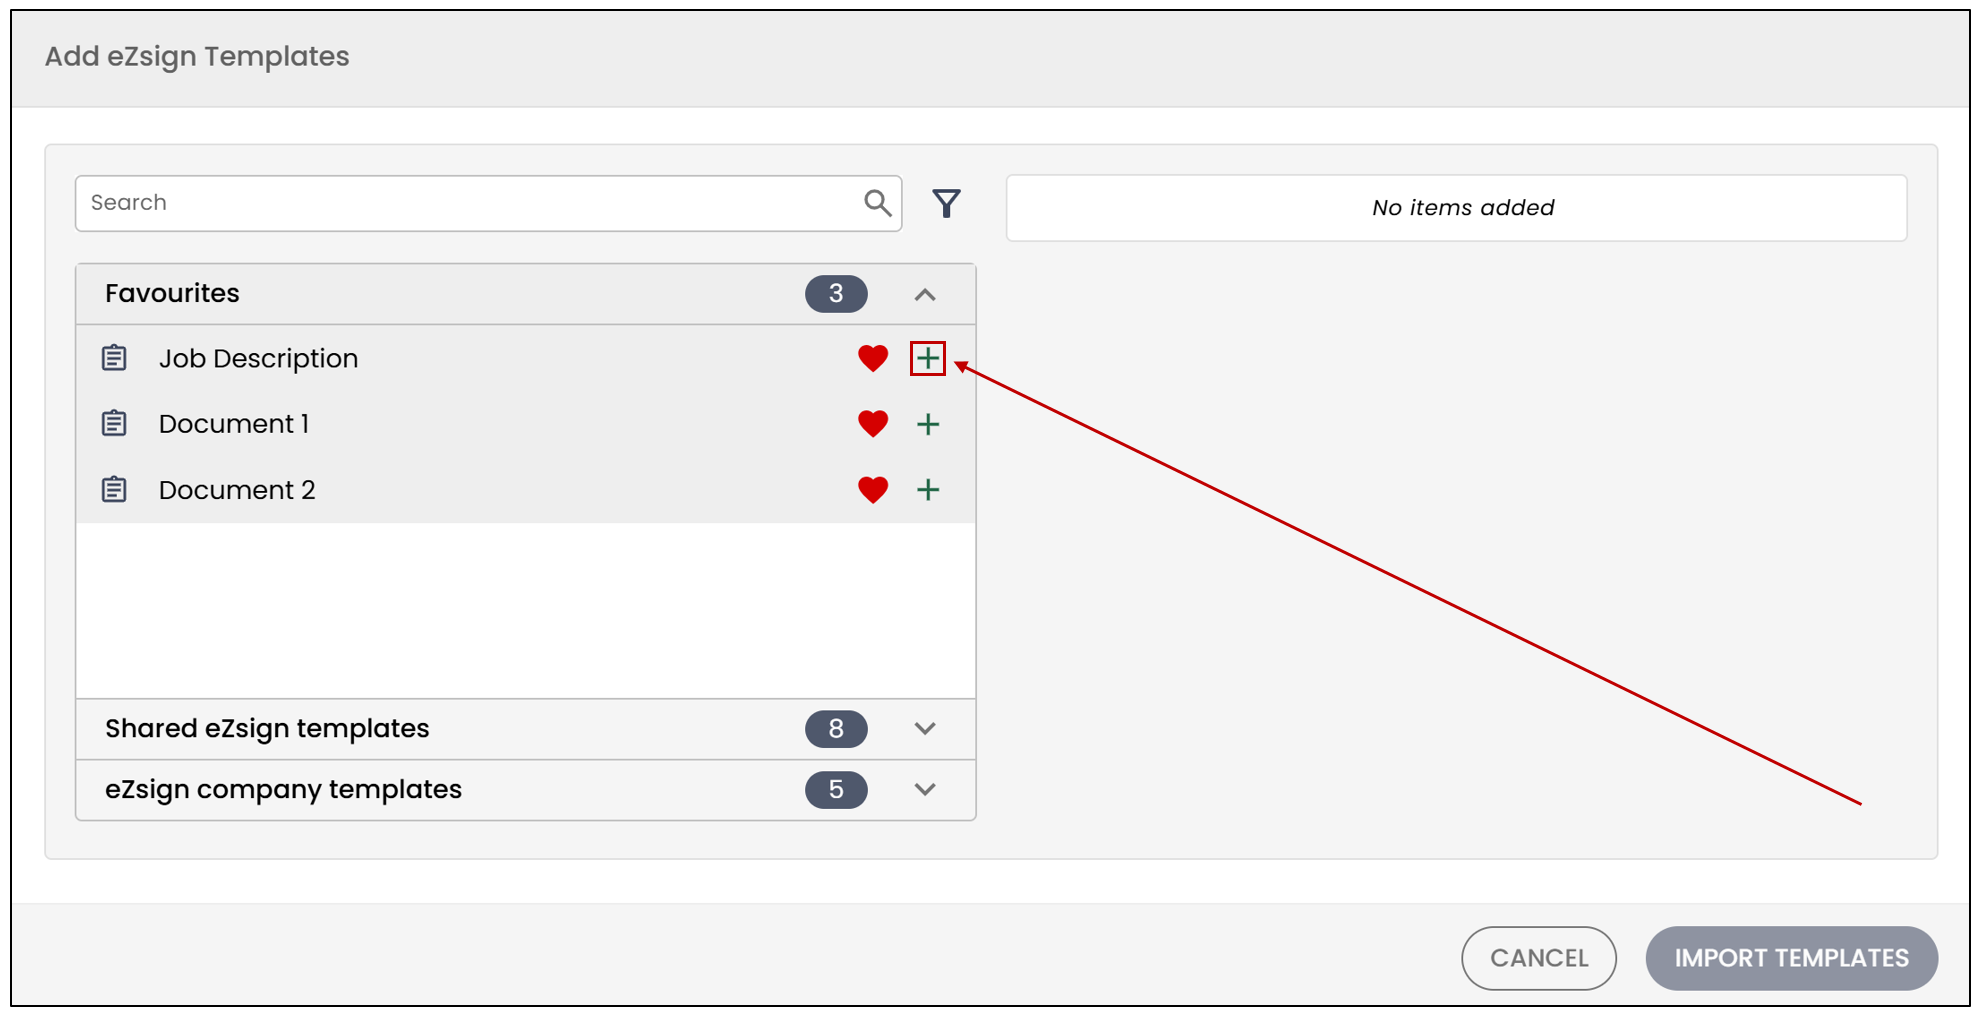
- Once all templates are added, click Import Templates.
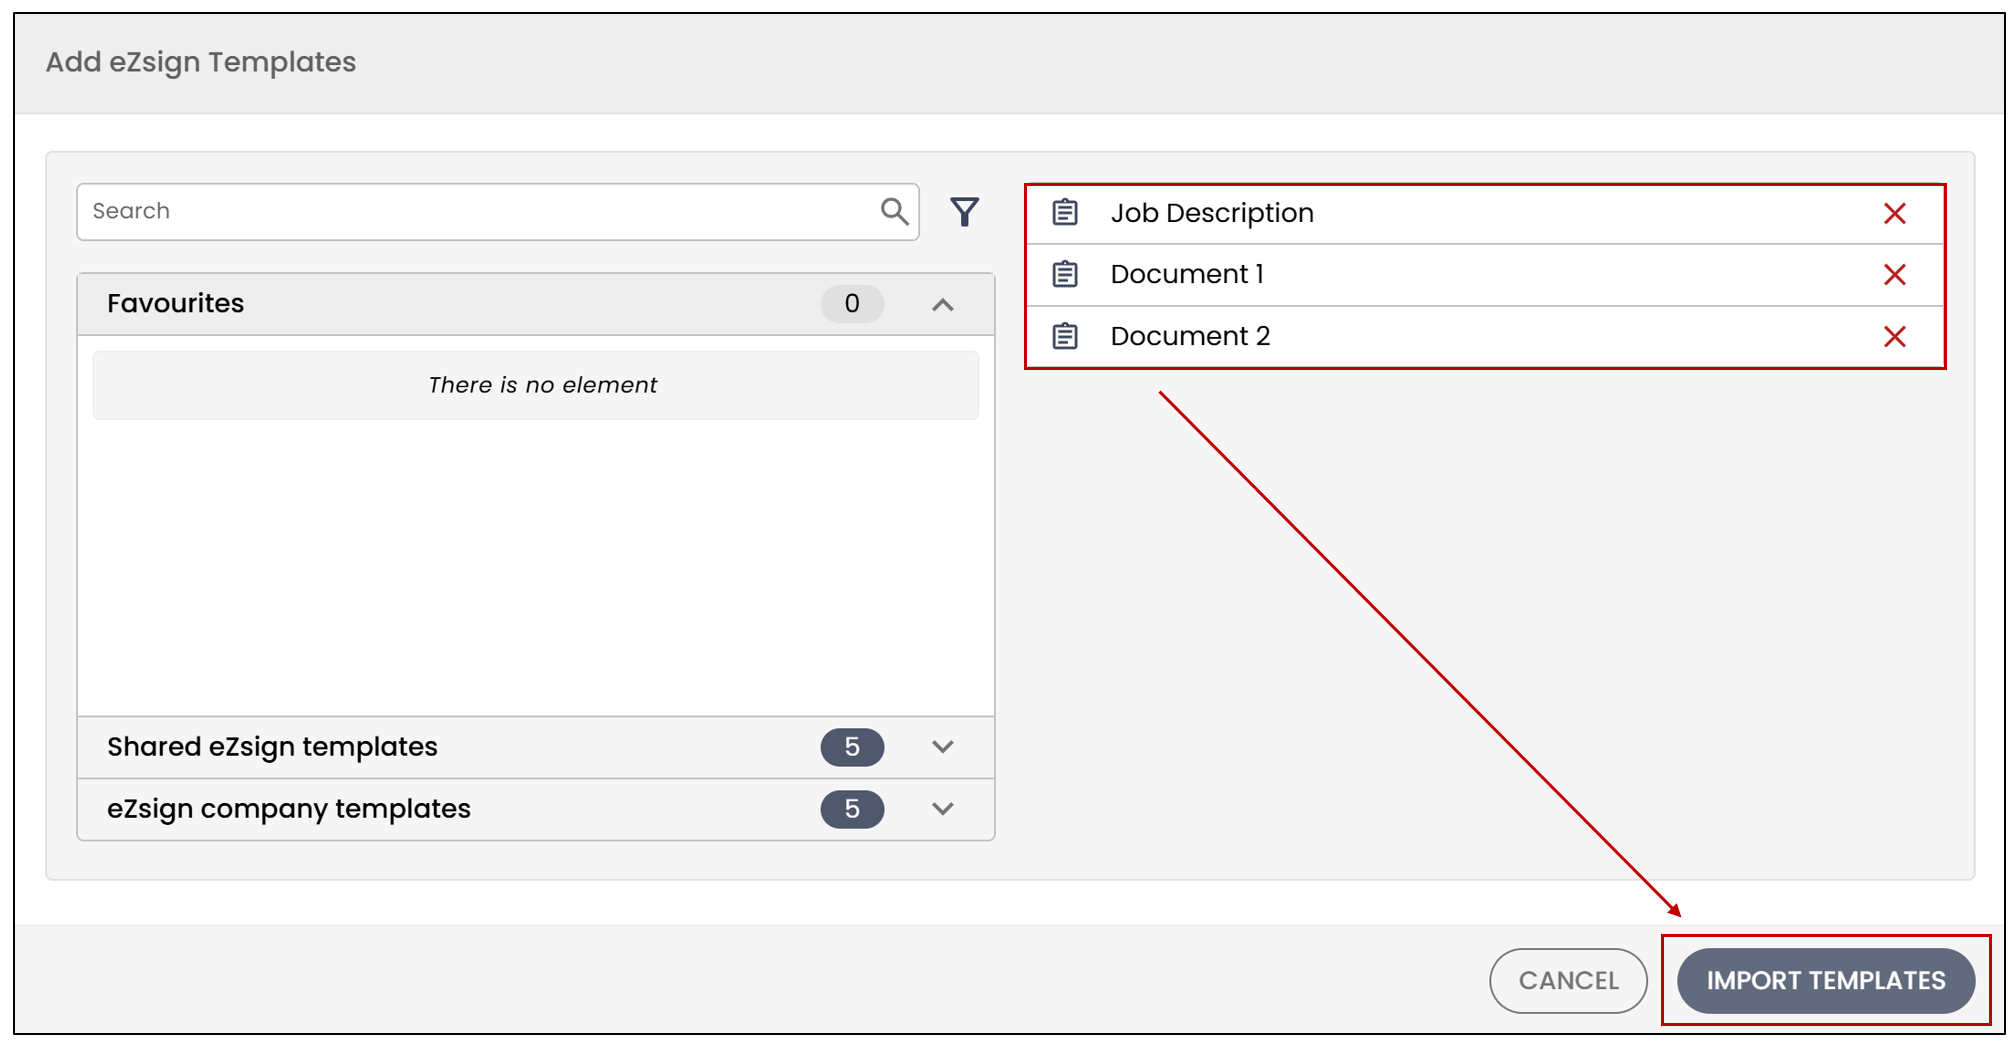
- You will see the templates appear; click Next Step.
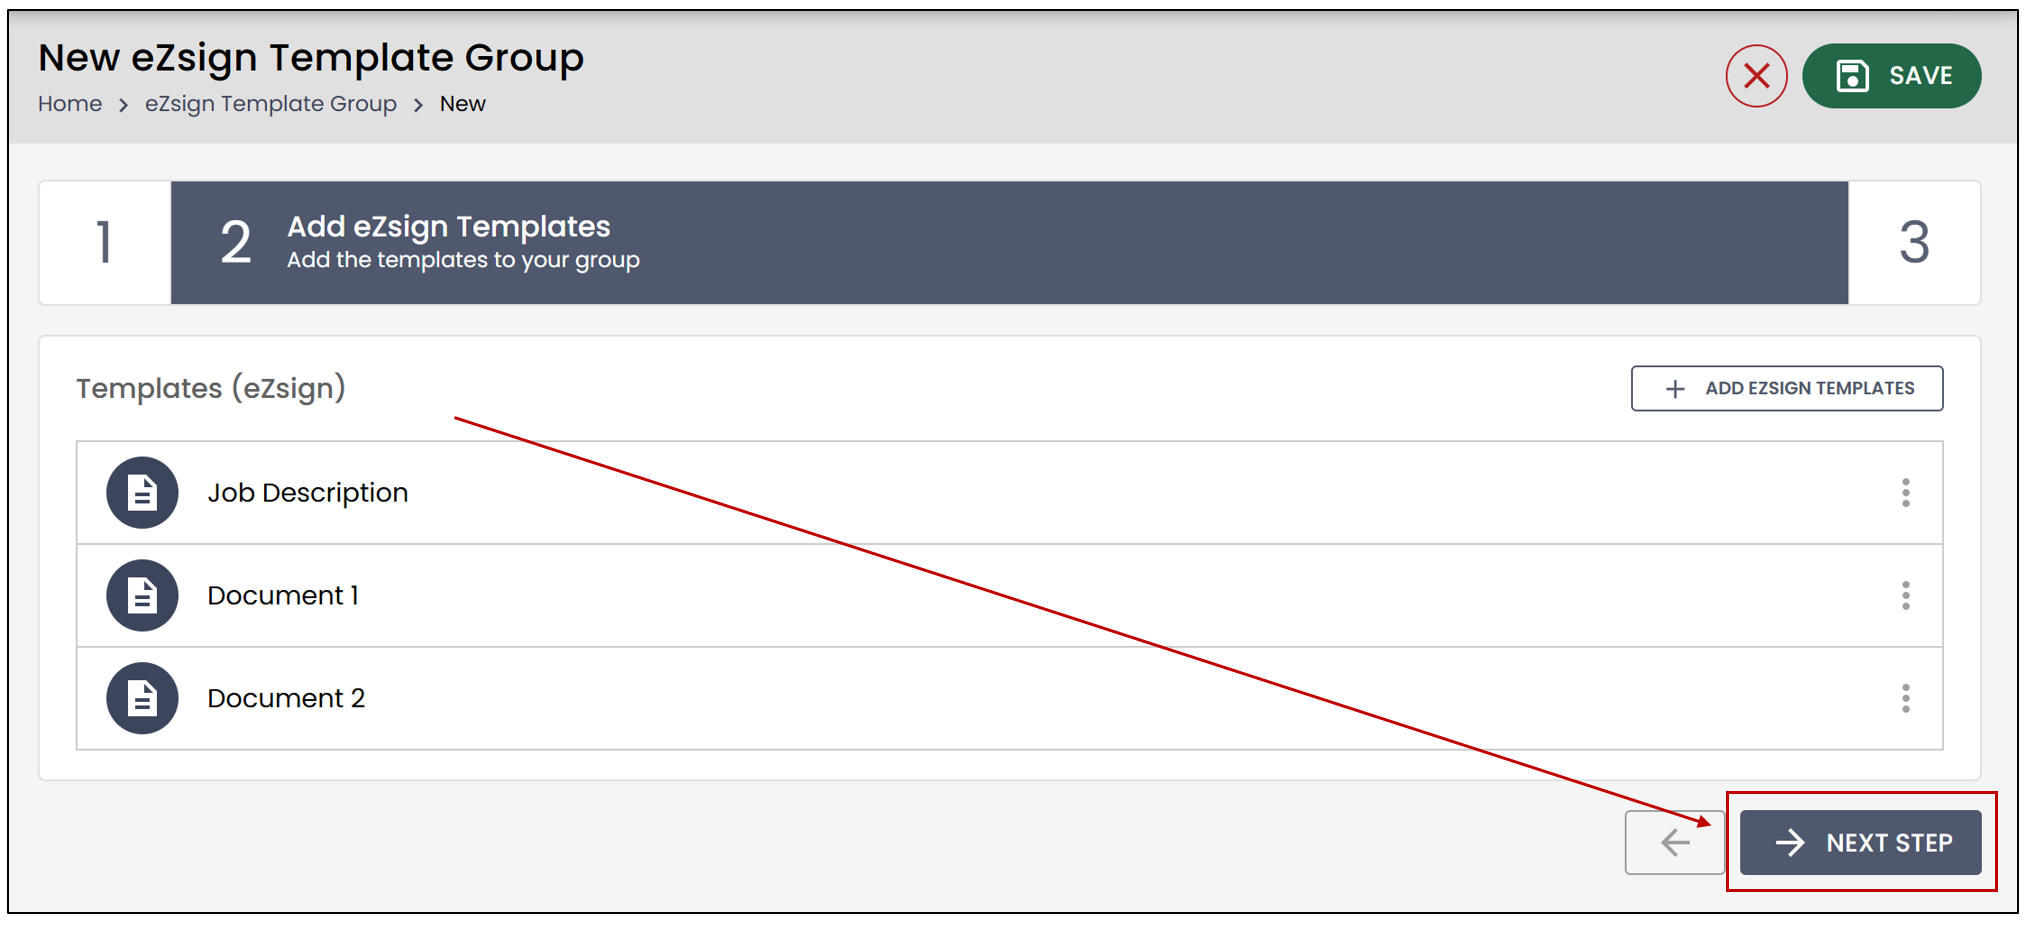
Normalize Roles
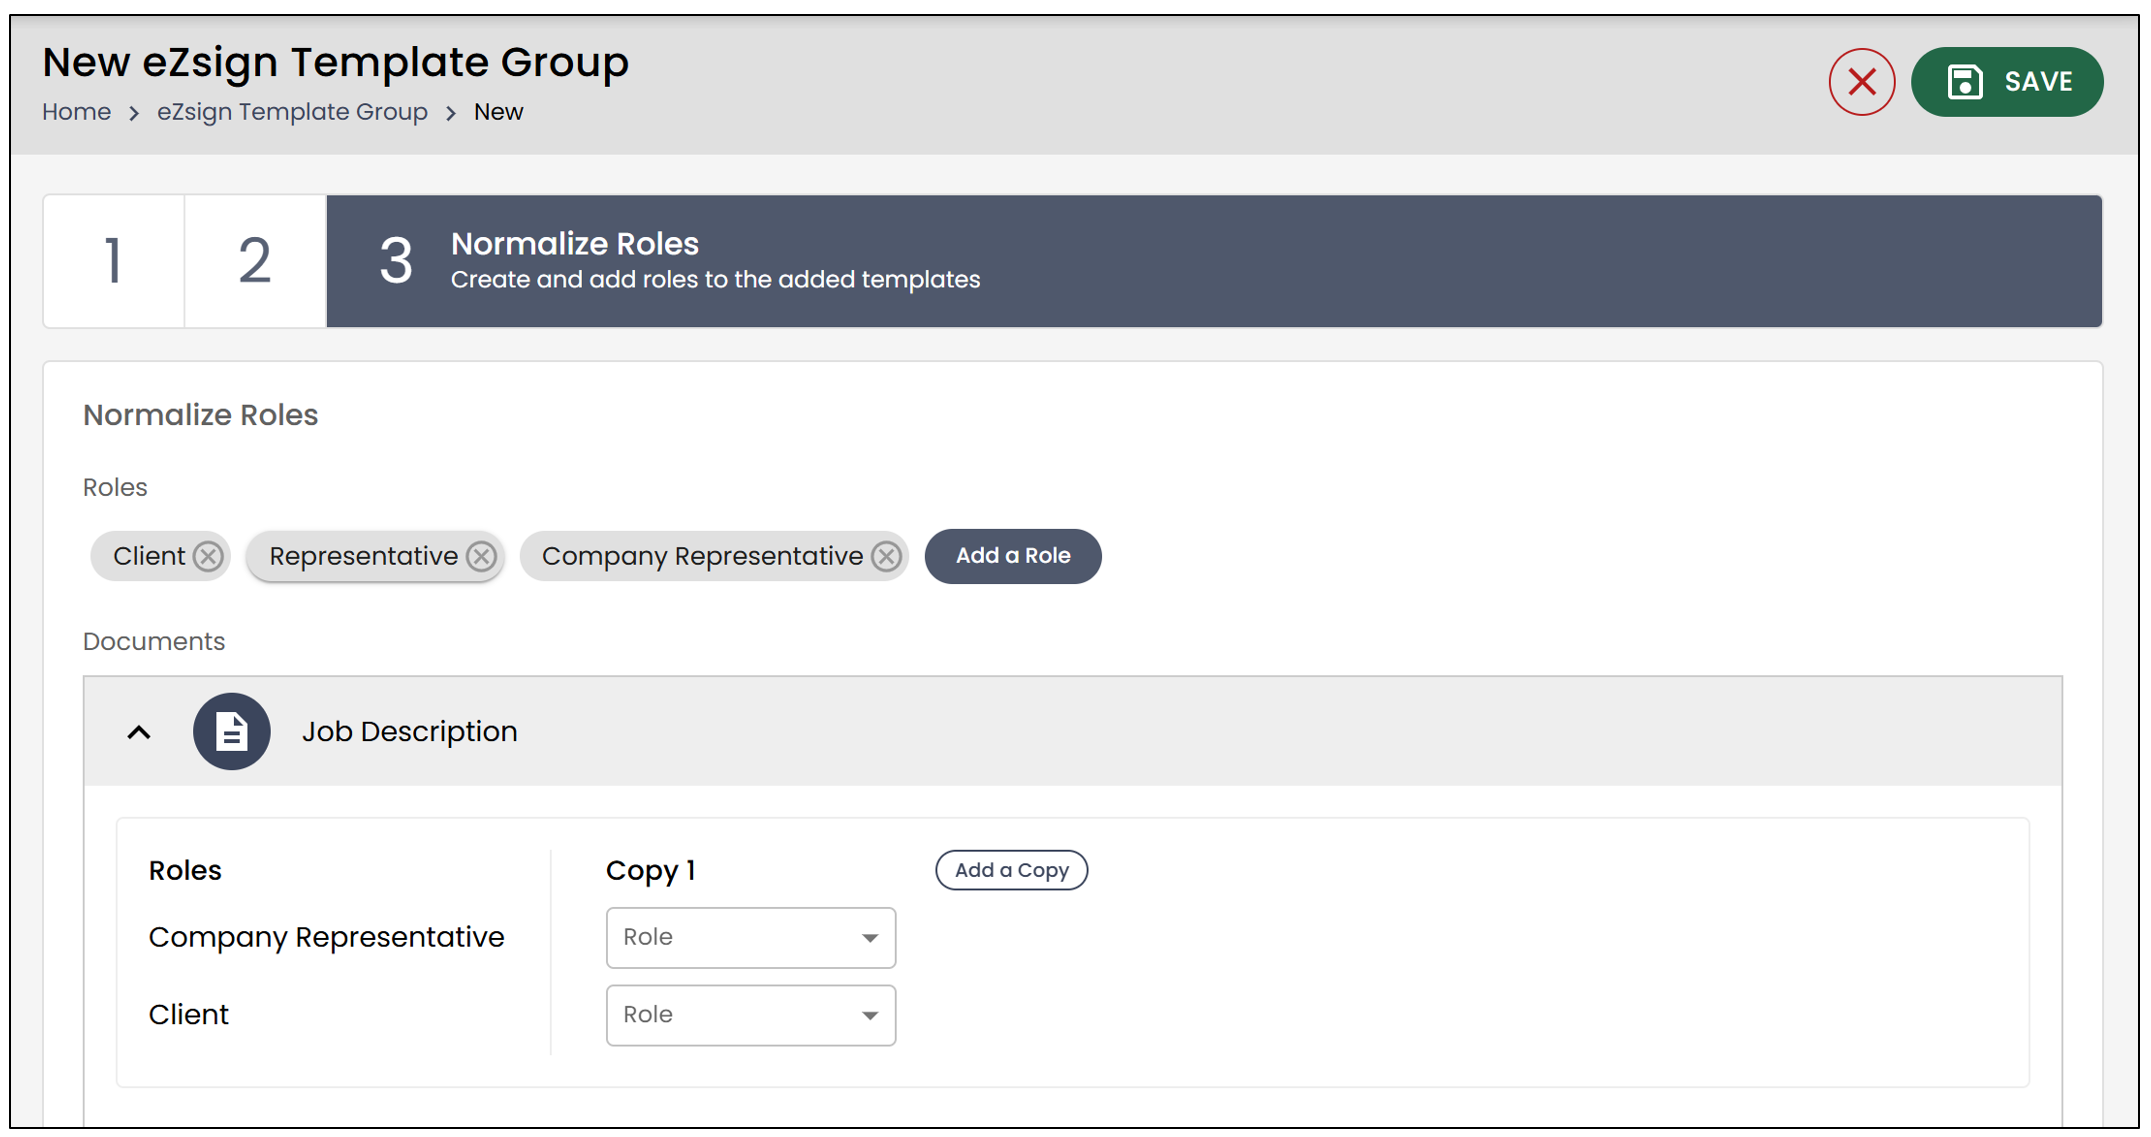
You will be able to add or remove roles for each of the added templates.
- To remove a role already assigned to a template, click the "X" to the right of it.
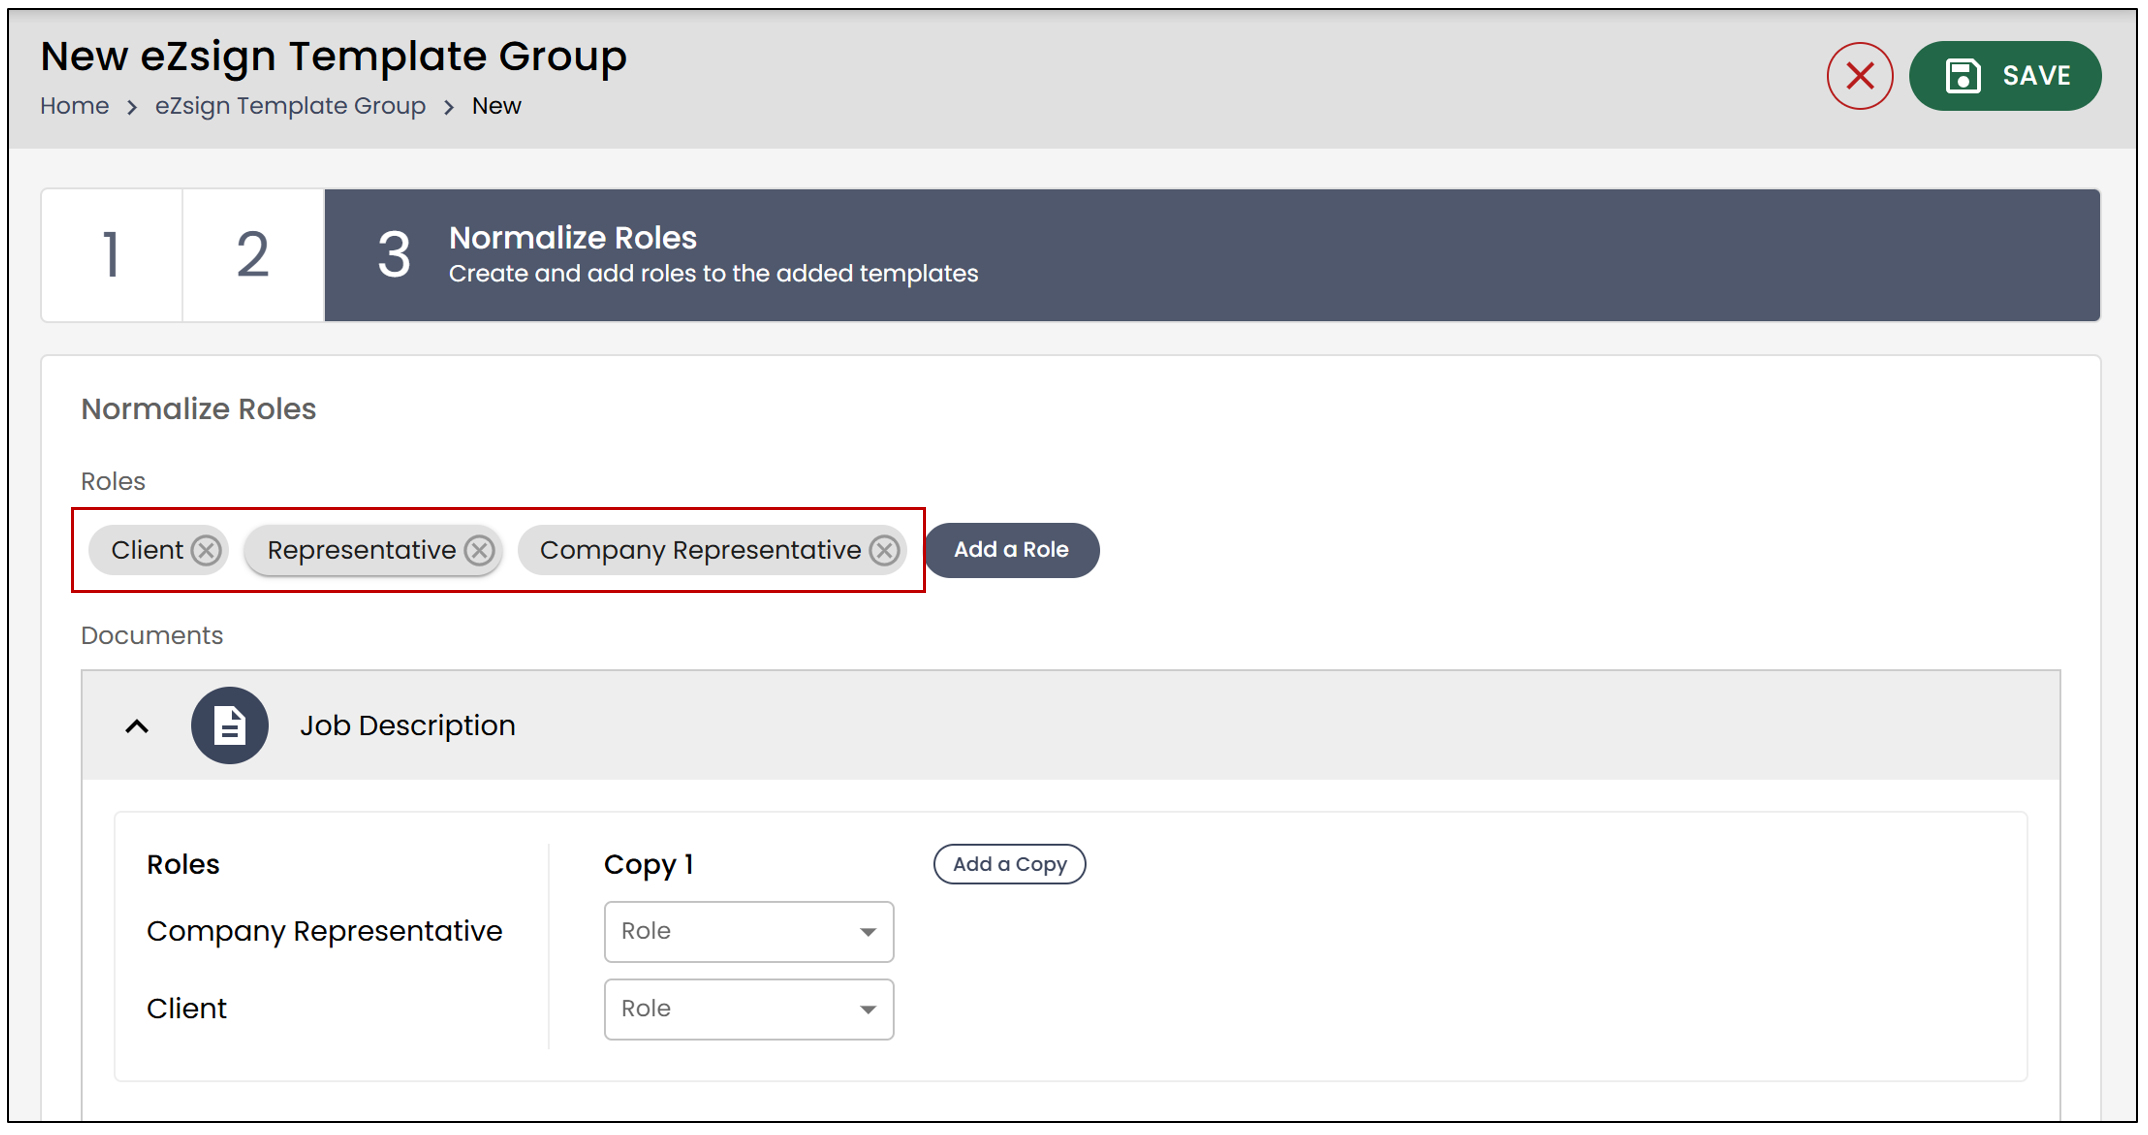
- To add a role to one of the templates, click the designated button for that purpose.
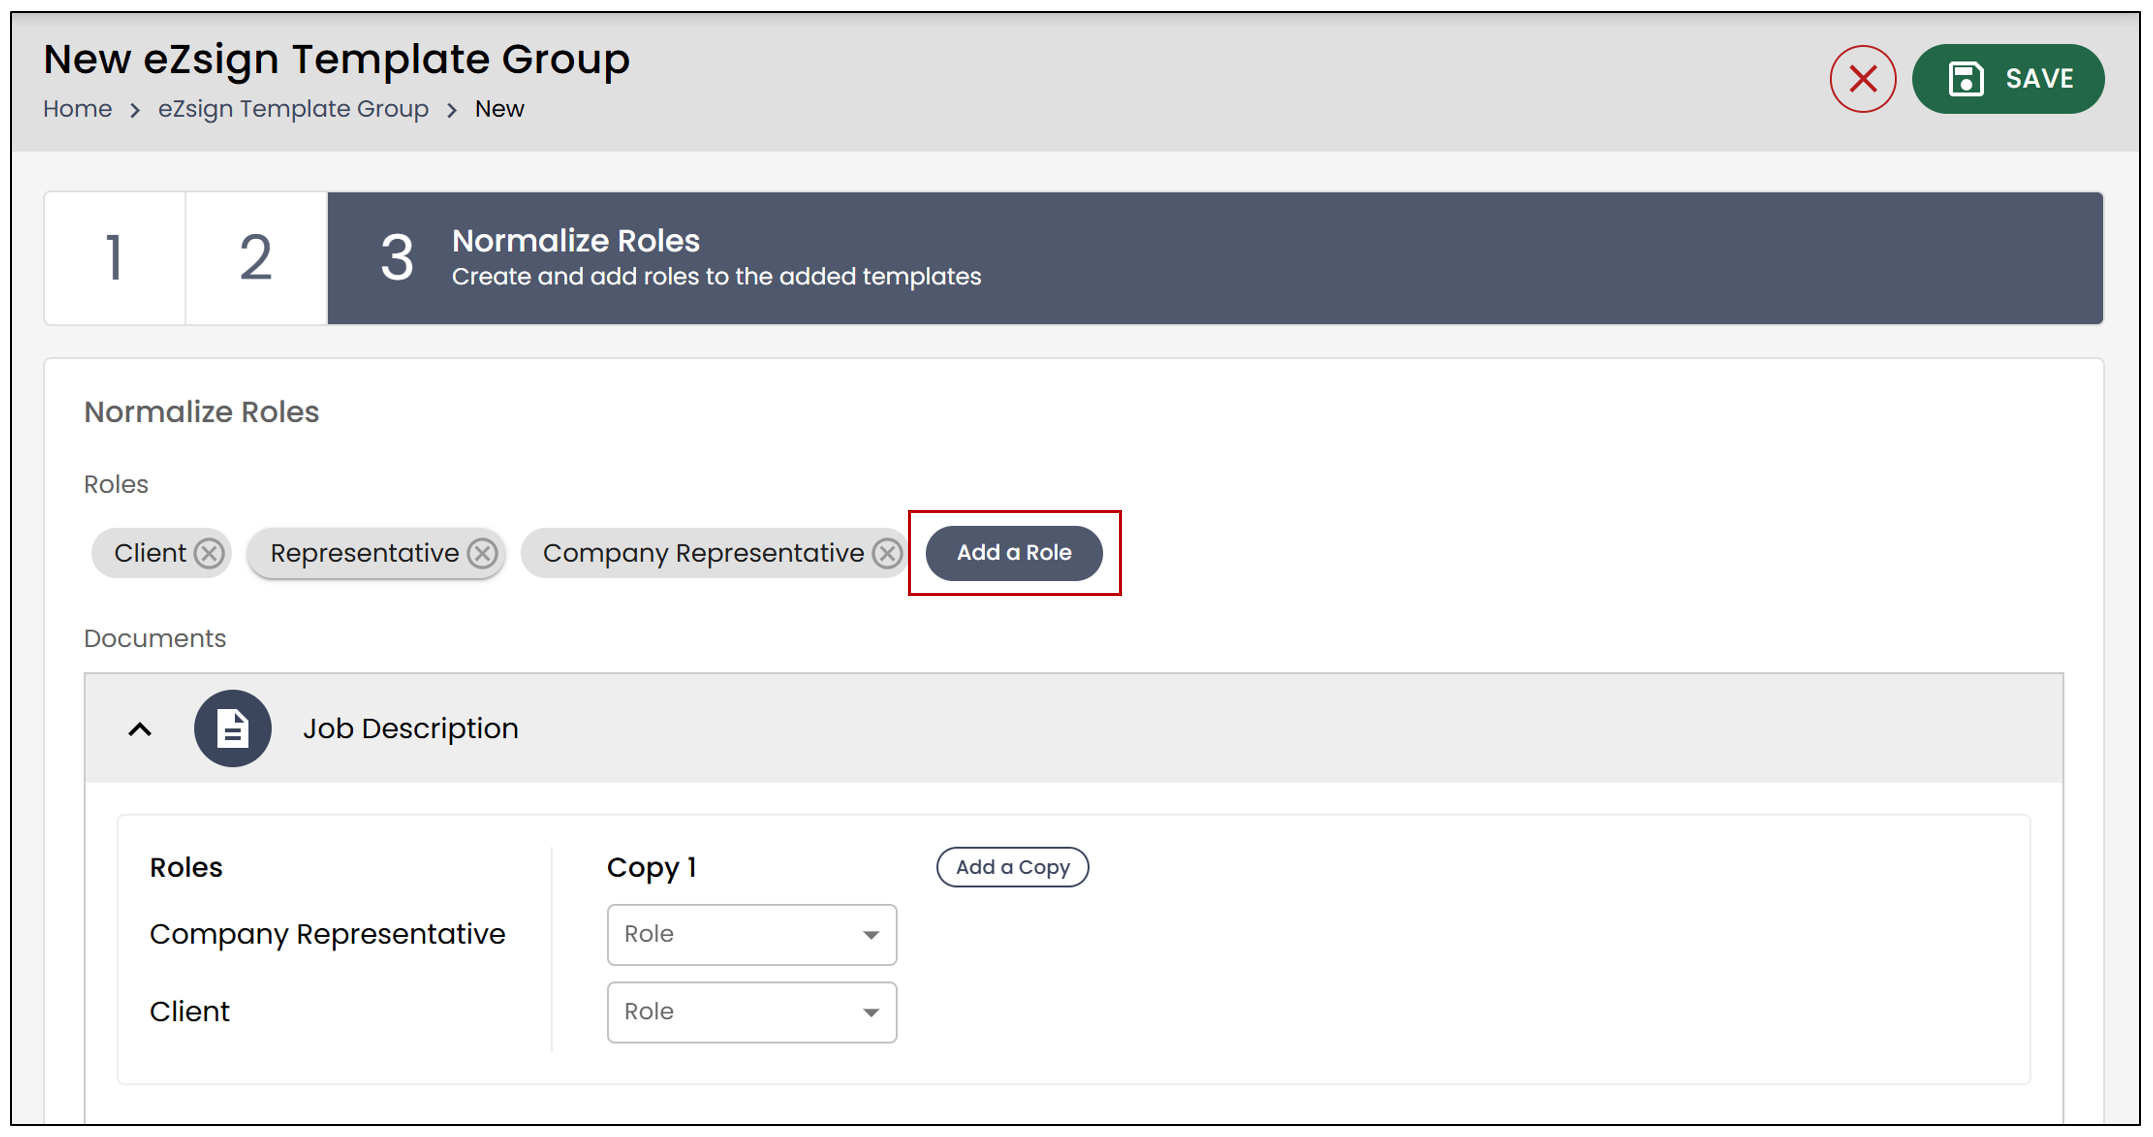
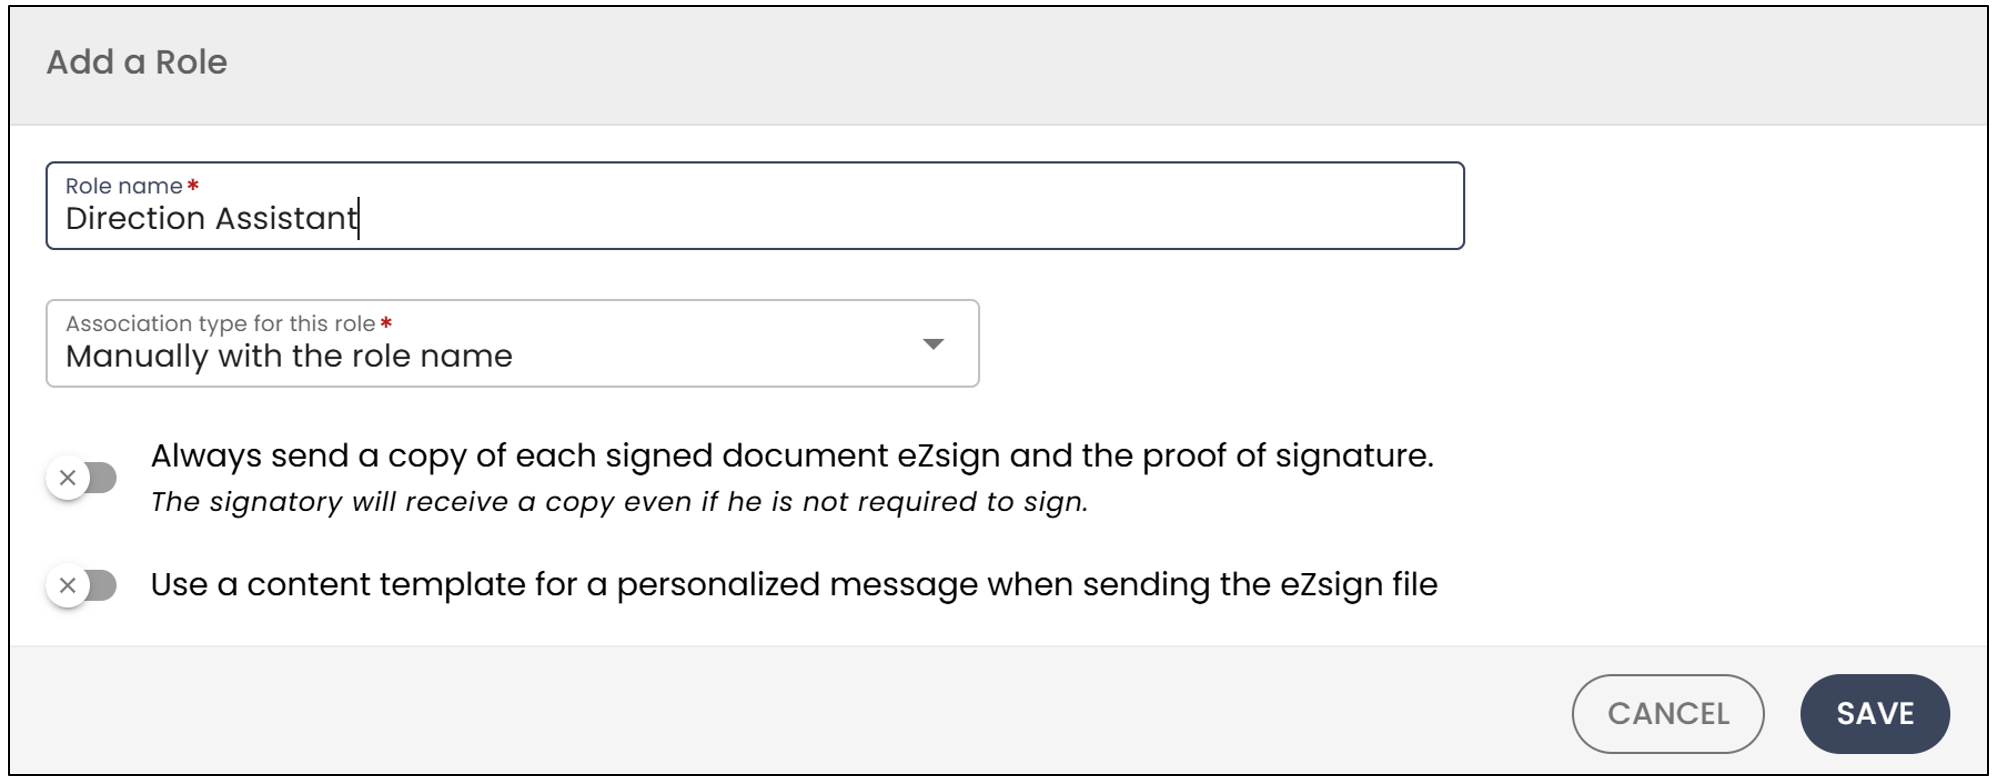
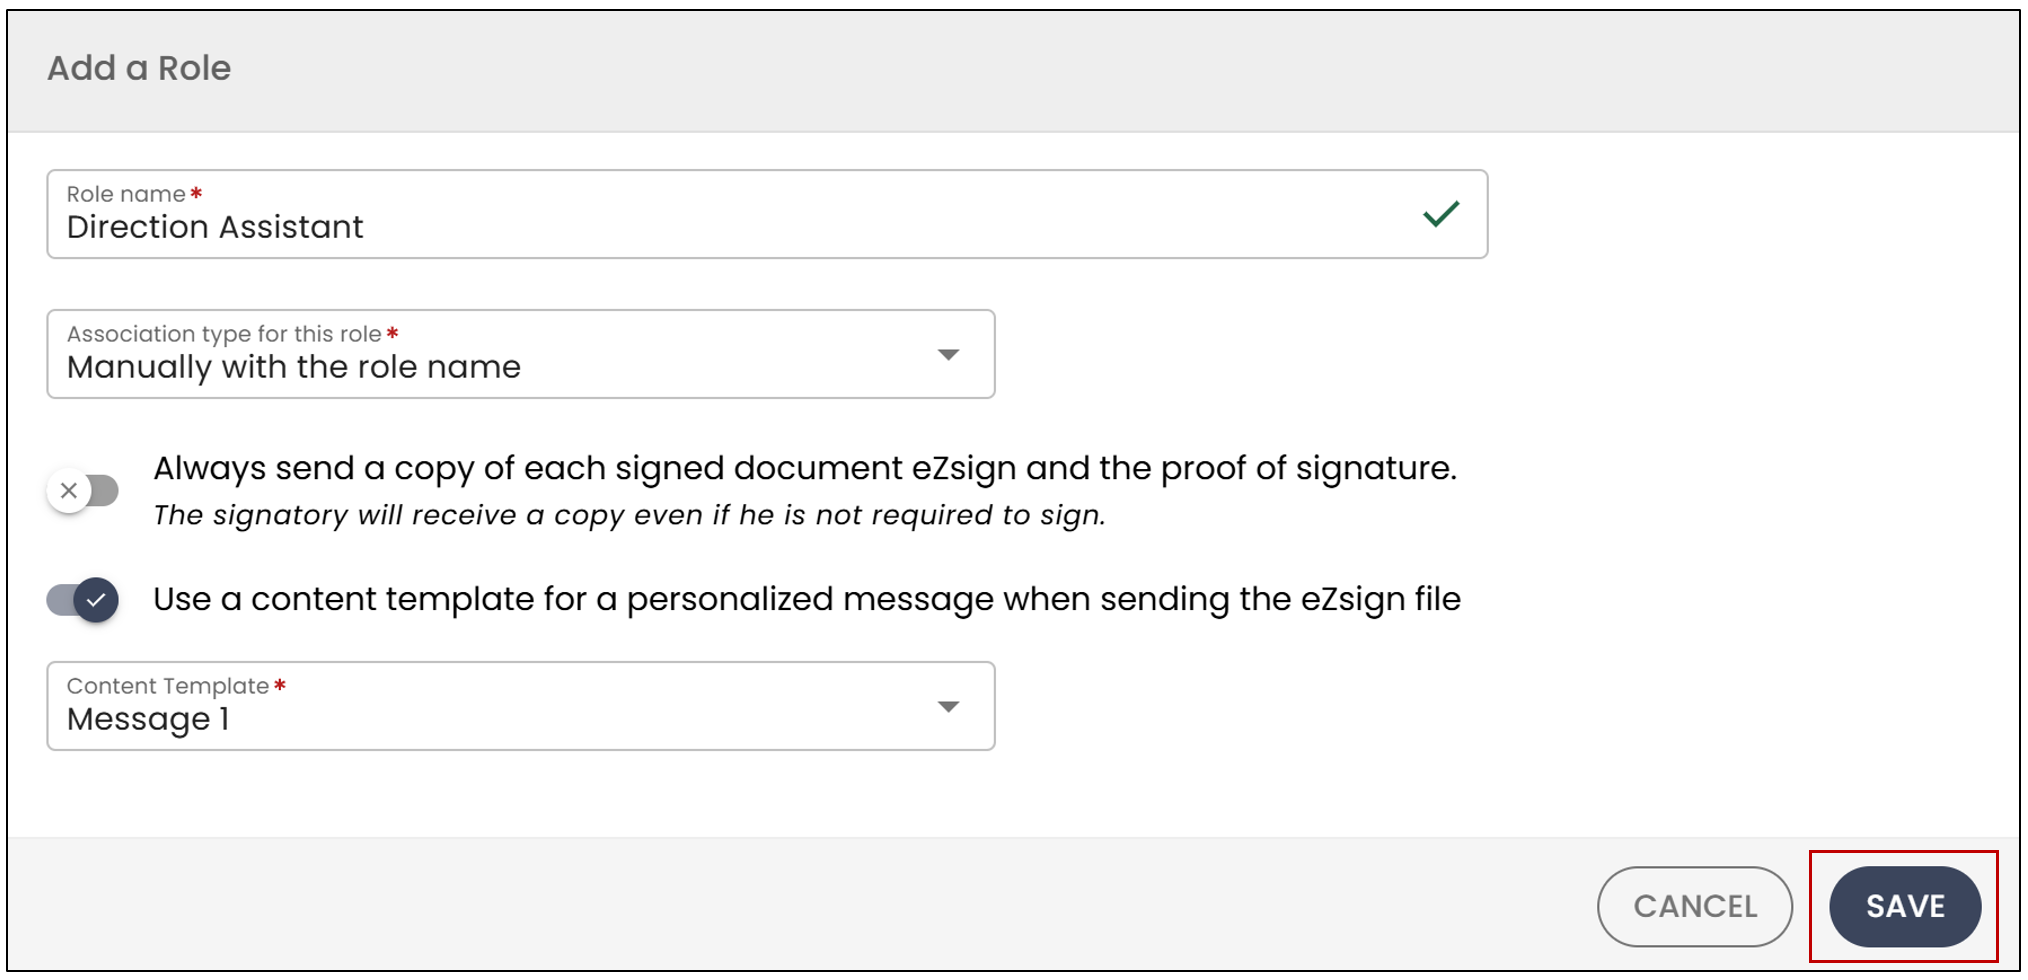
- Enter the Role Name.
- Select the Association type for this role from the drop-down list.
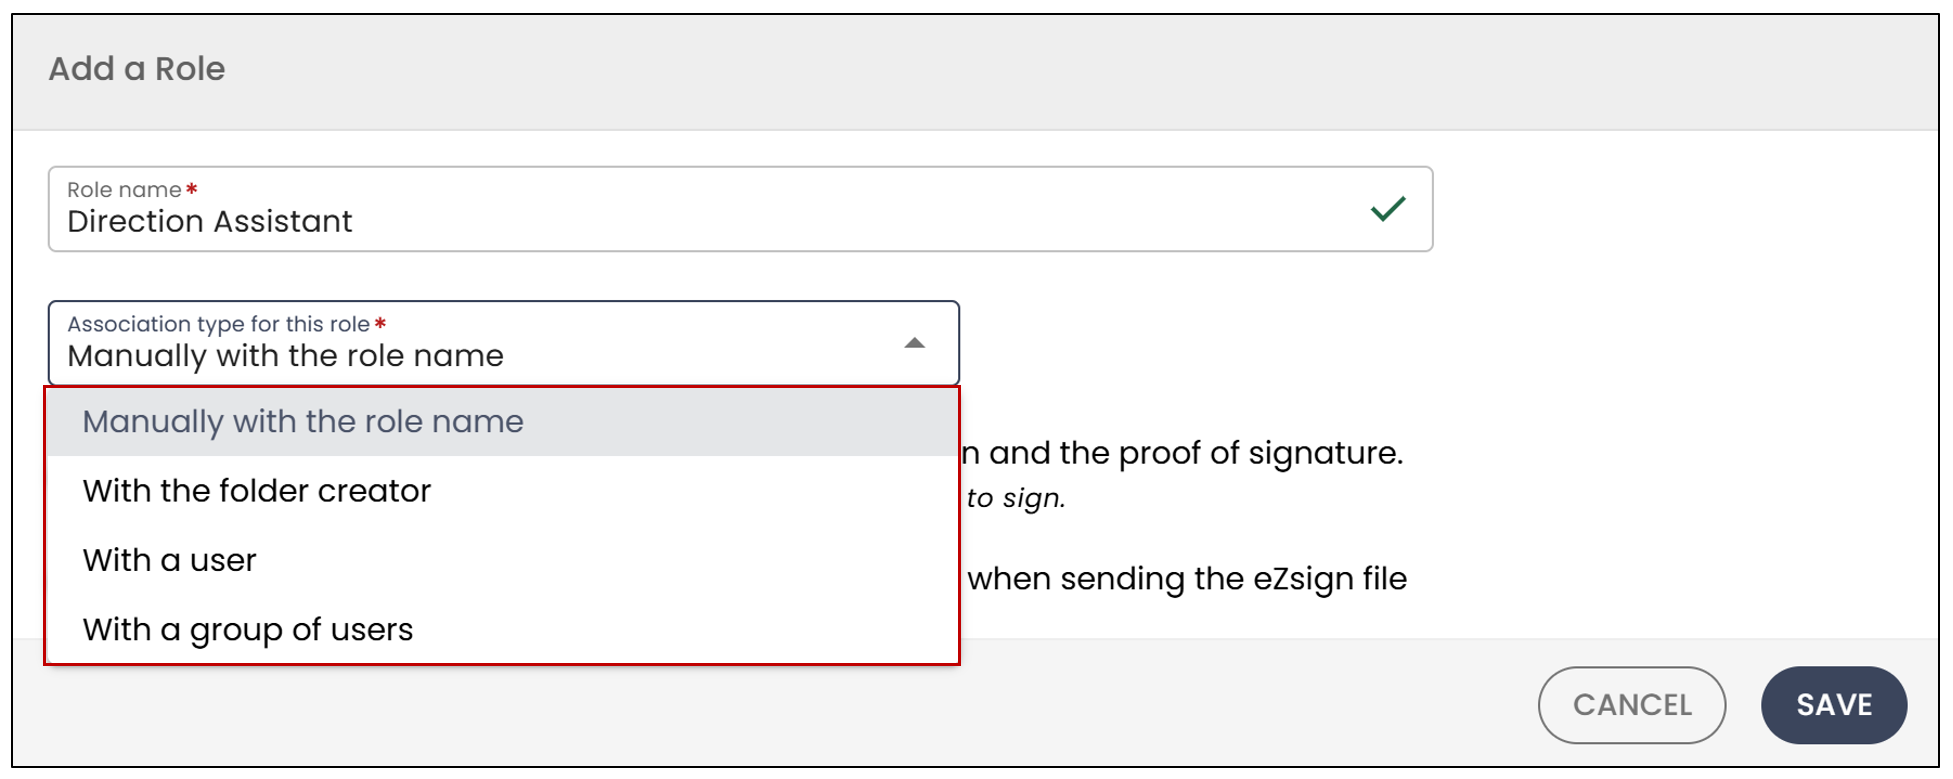
Manually with the role name : When using this template, the folder creator can designate the appropriate user to assume this role.
With the folder creator : The creator will be automatically assigned this role when the folder is created.
With a user : The user selected from the drop-down list will be automatically assigned this role when the folder is created.
With a group of users : The selected group will be automatically assigned this role when the folder is created.
Always send a copy of each signed eZsign document and the signature proof : If this option is enabled, the signer will receive a copy even if they are not required to sign.
Use a content template for a personalized message when sending the eZsign folder : If this option is enabled, a content template will be used when sending an eZsign folder. You can select it directly from the drop-down list.
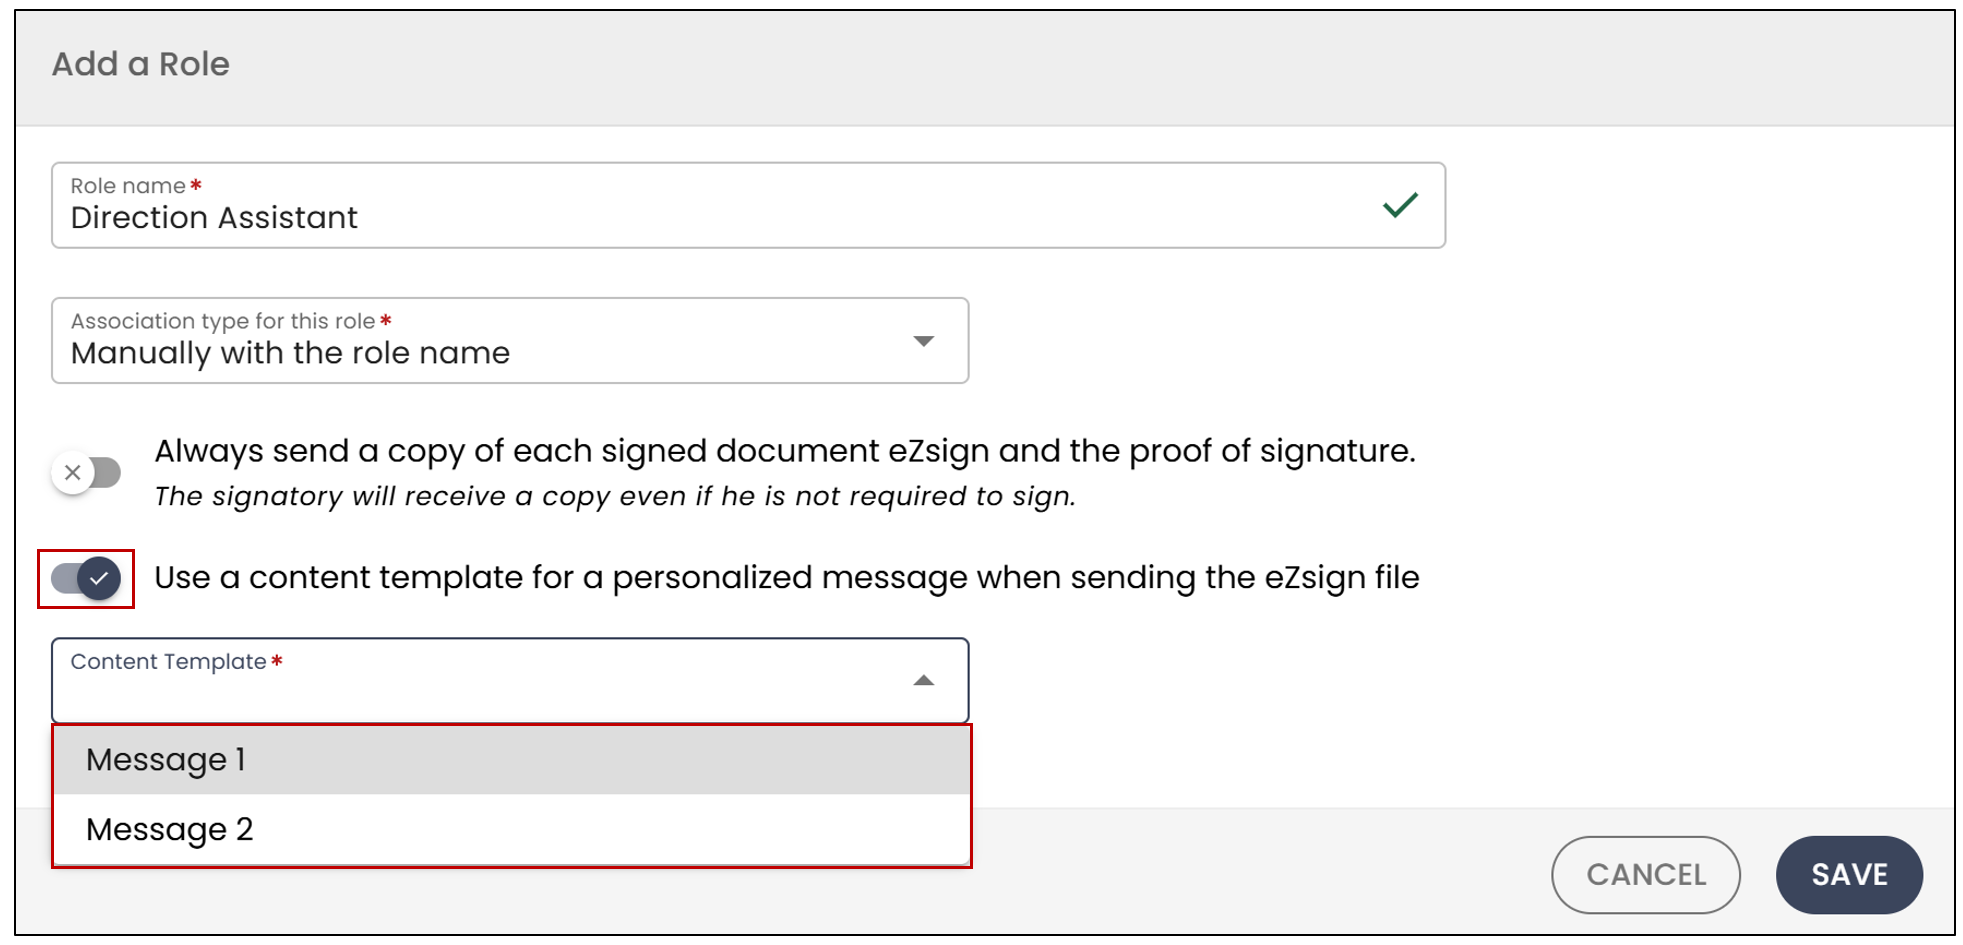
- When you have finished, click Save at the bottom right.
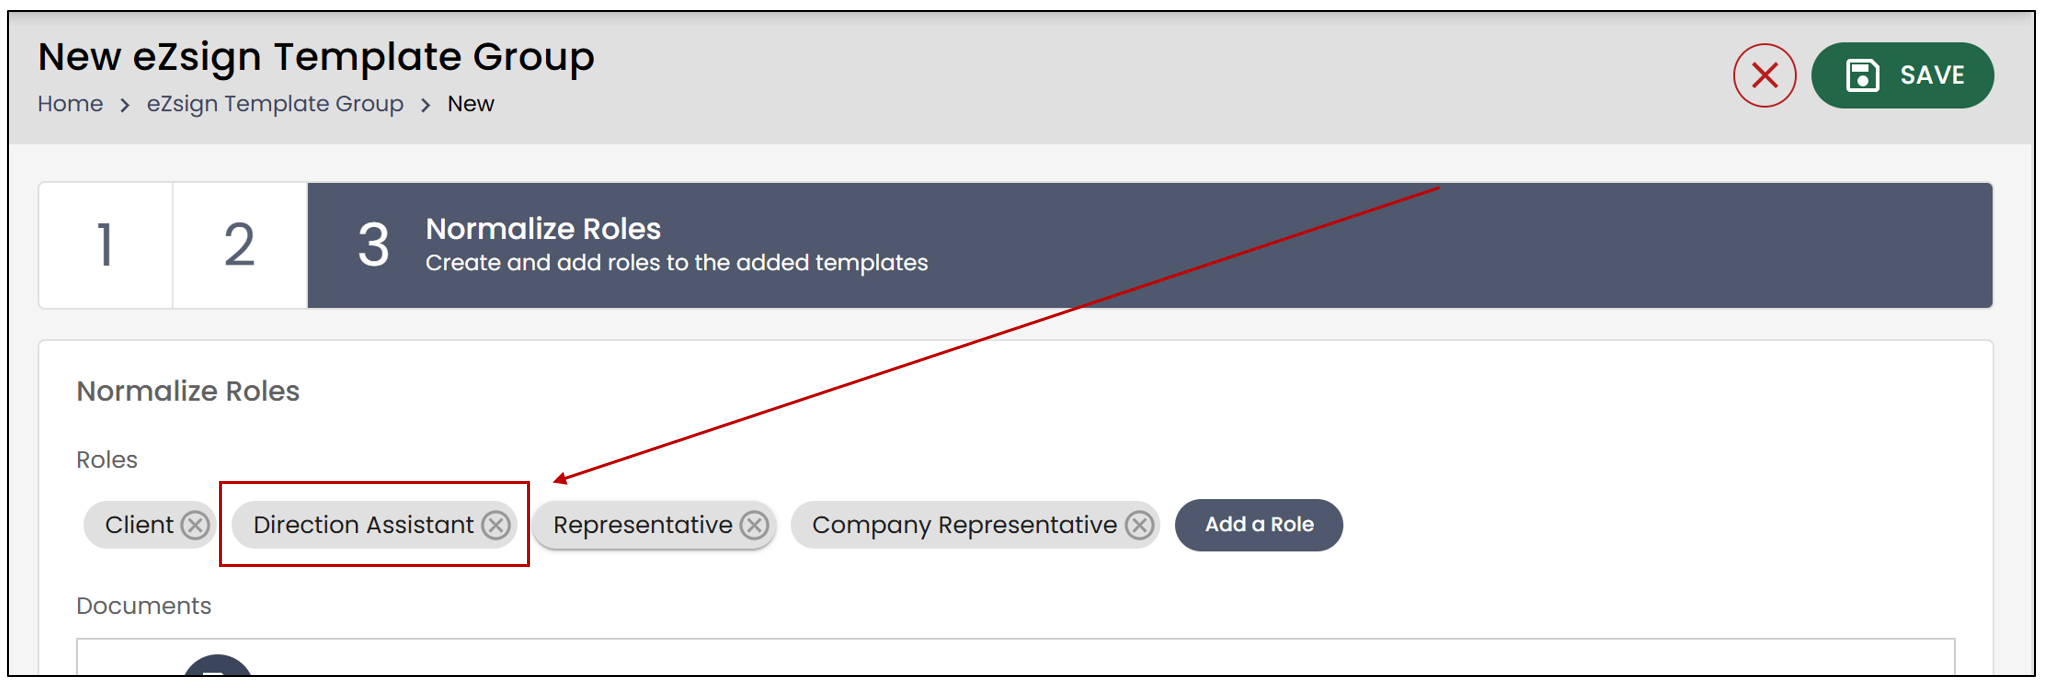
You will see the new role added to your template group:
- For each template, you will need to select the desired roles associated with the form or signature fields.
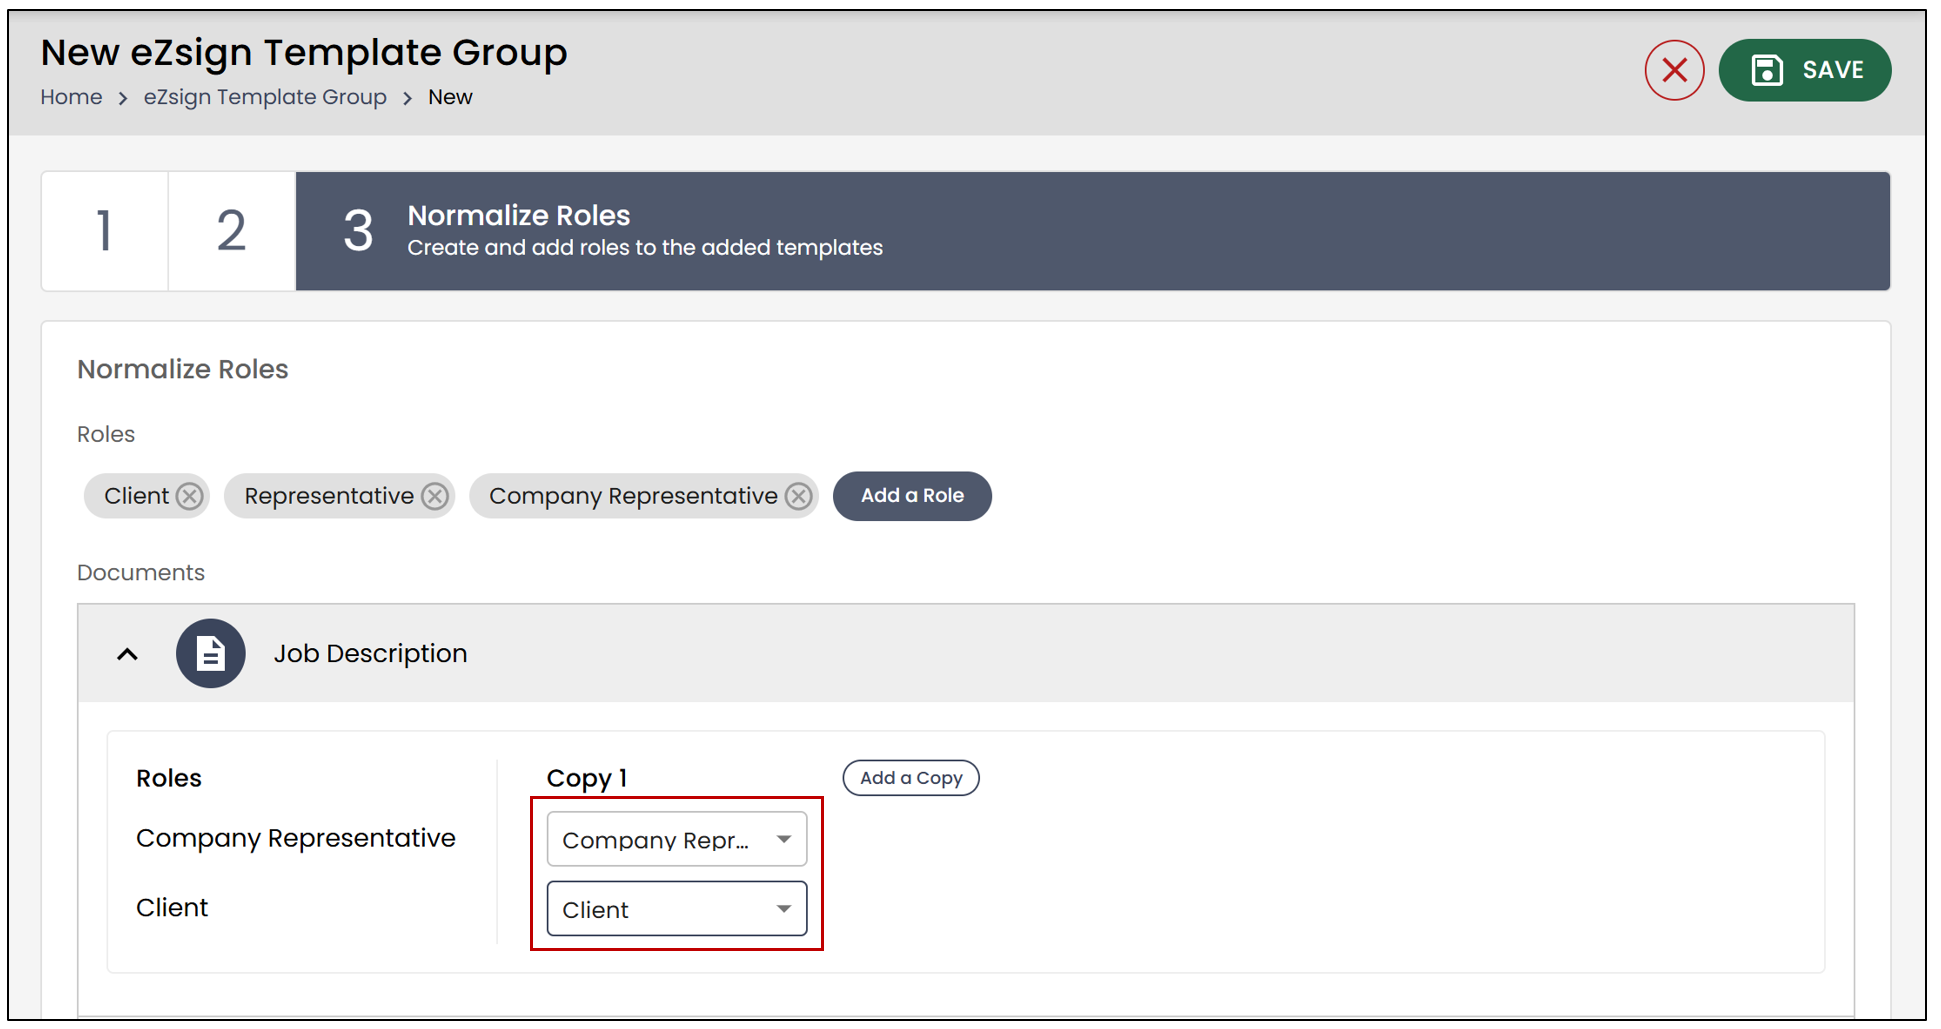
- To create a copy, click on Add a copy.
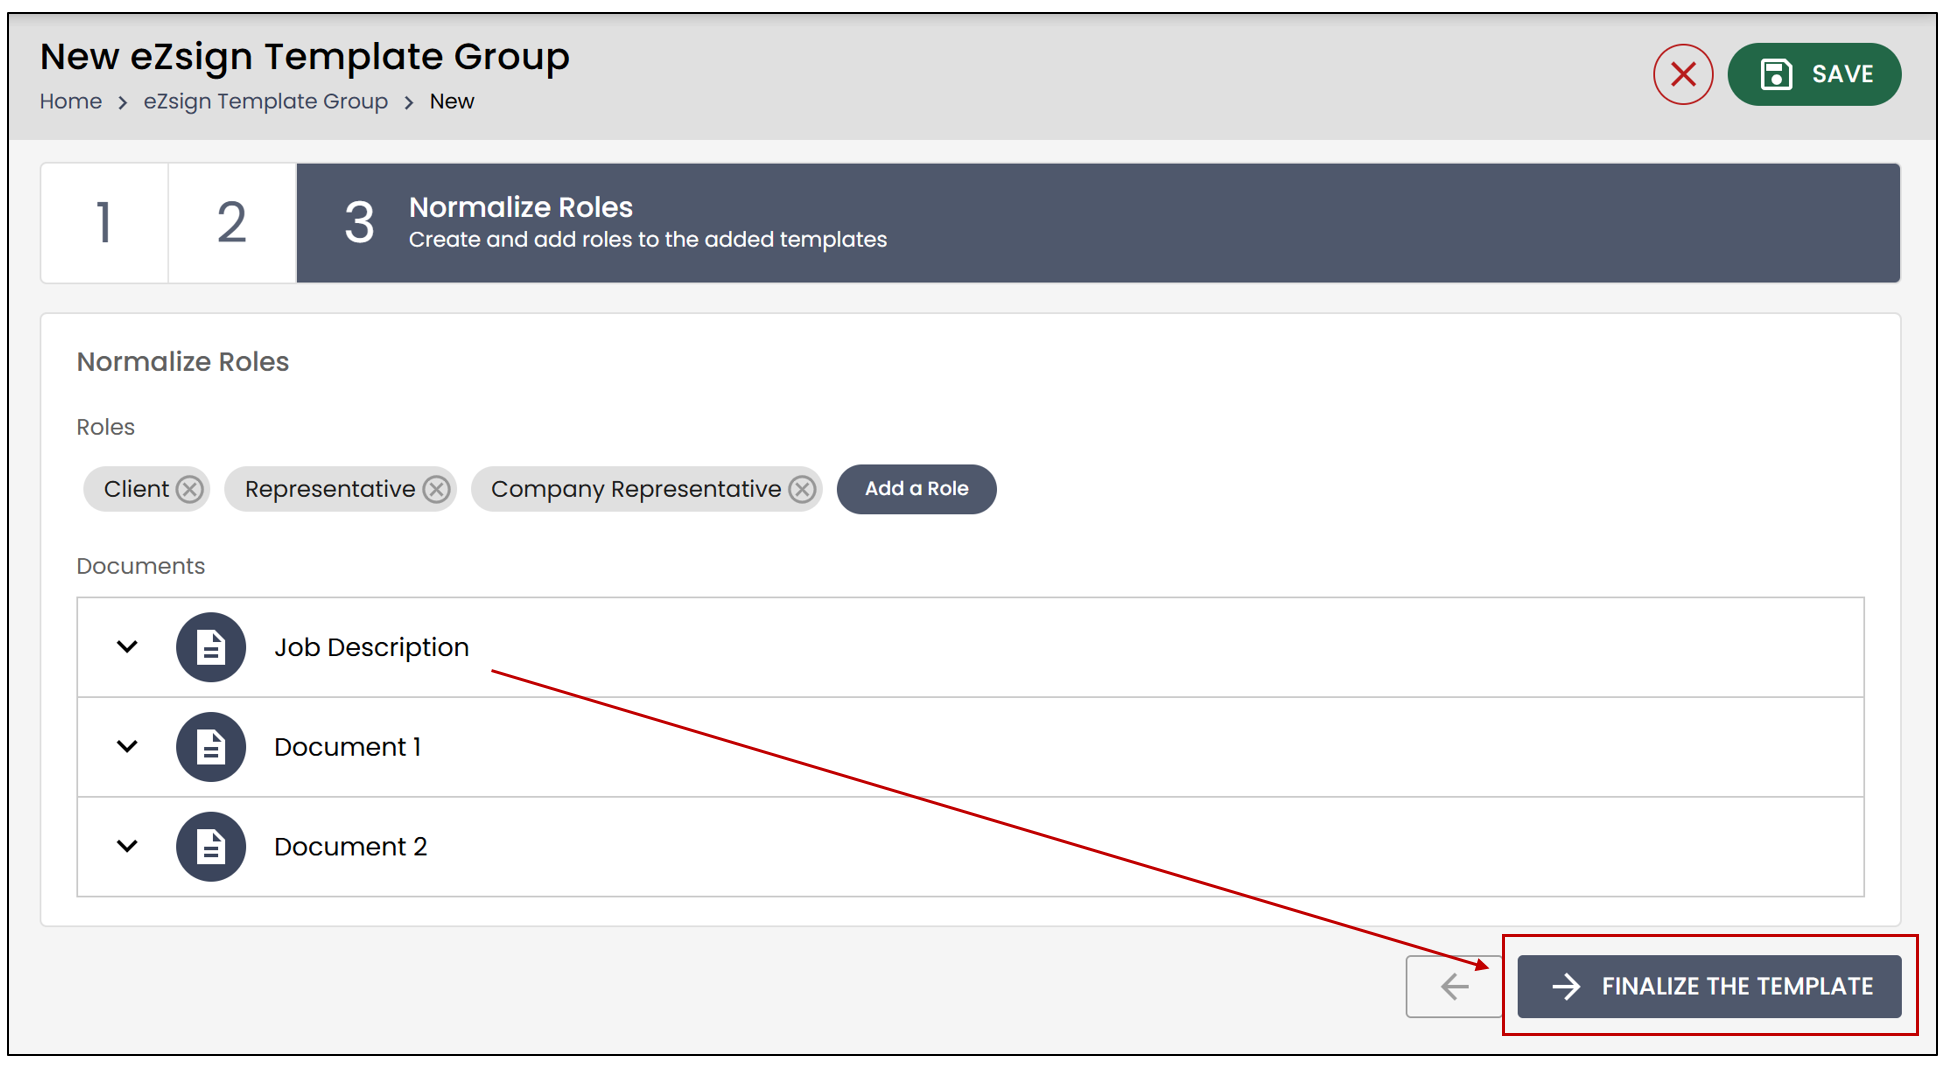
When all desired roles have been added to the templates, click on Finalize the template.
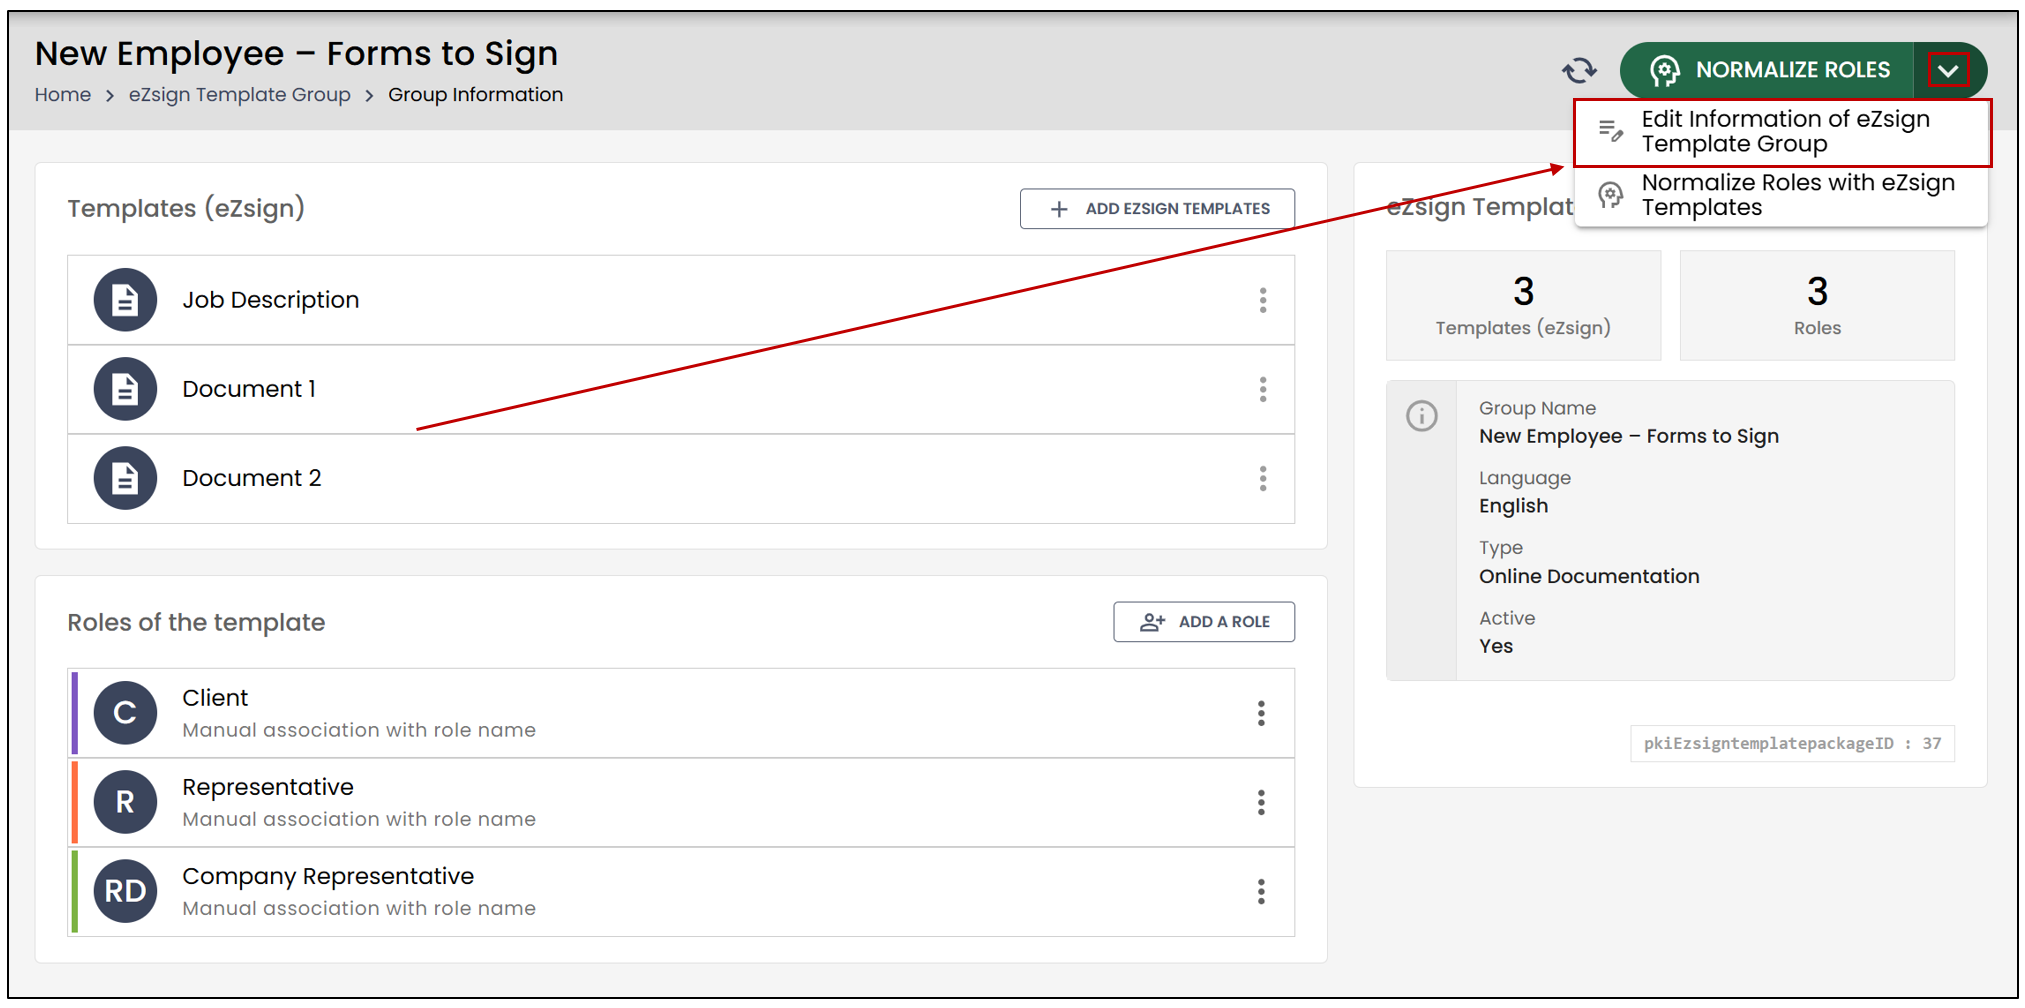
You will be able to view all the information related to the template group.
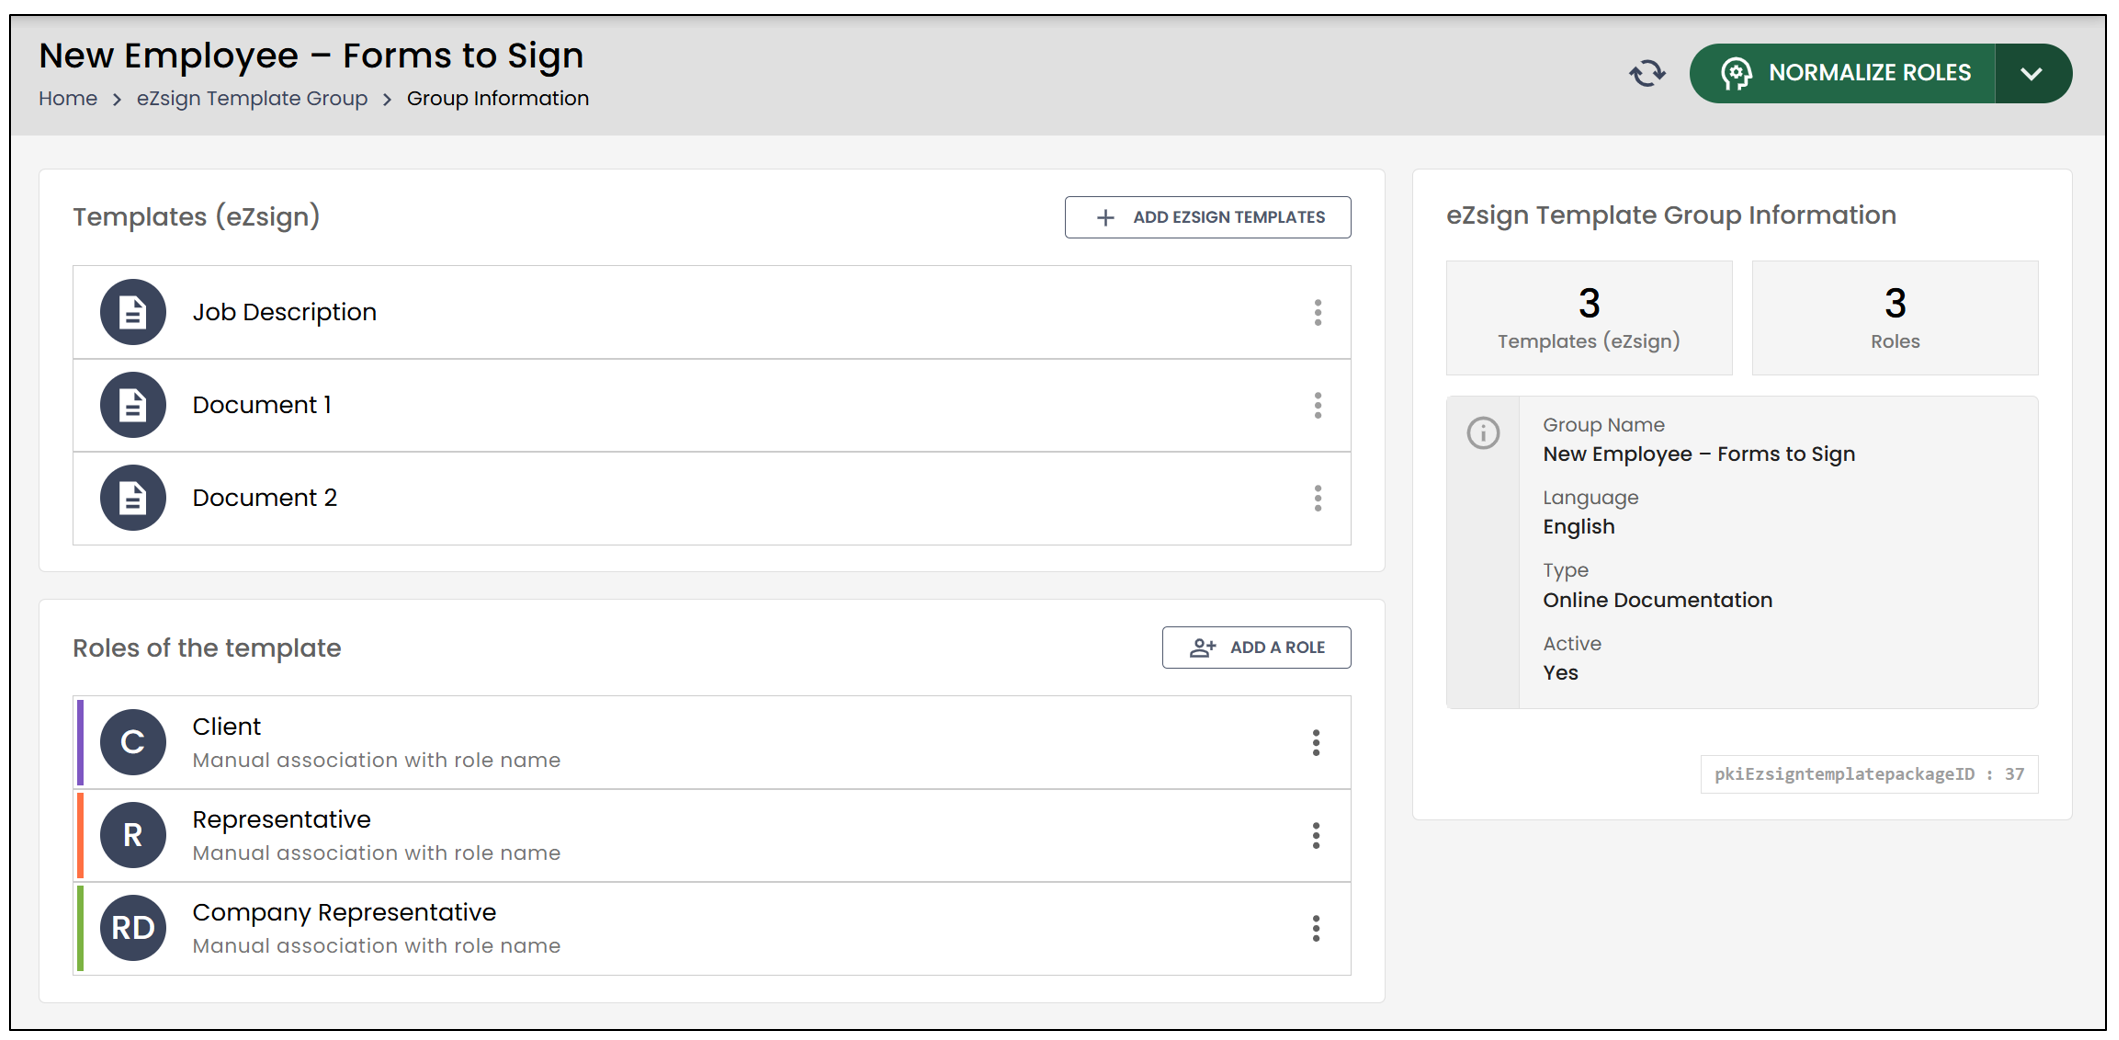
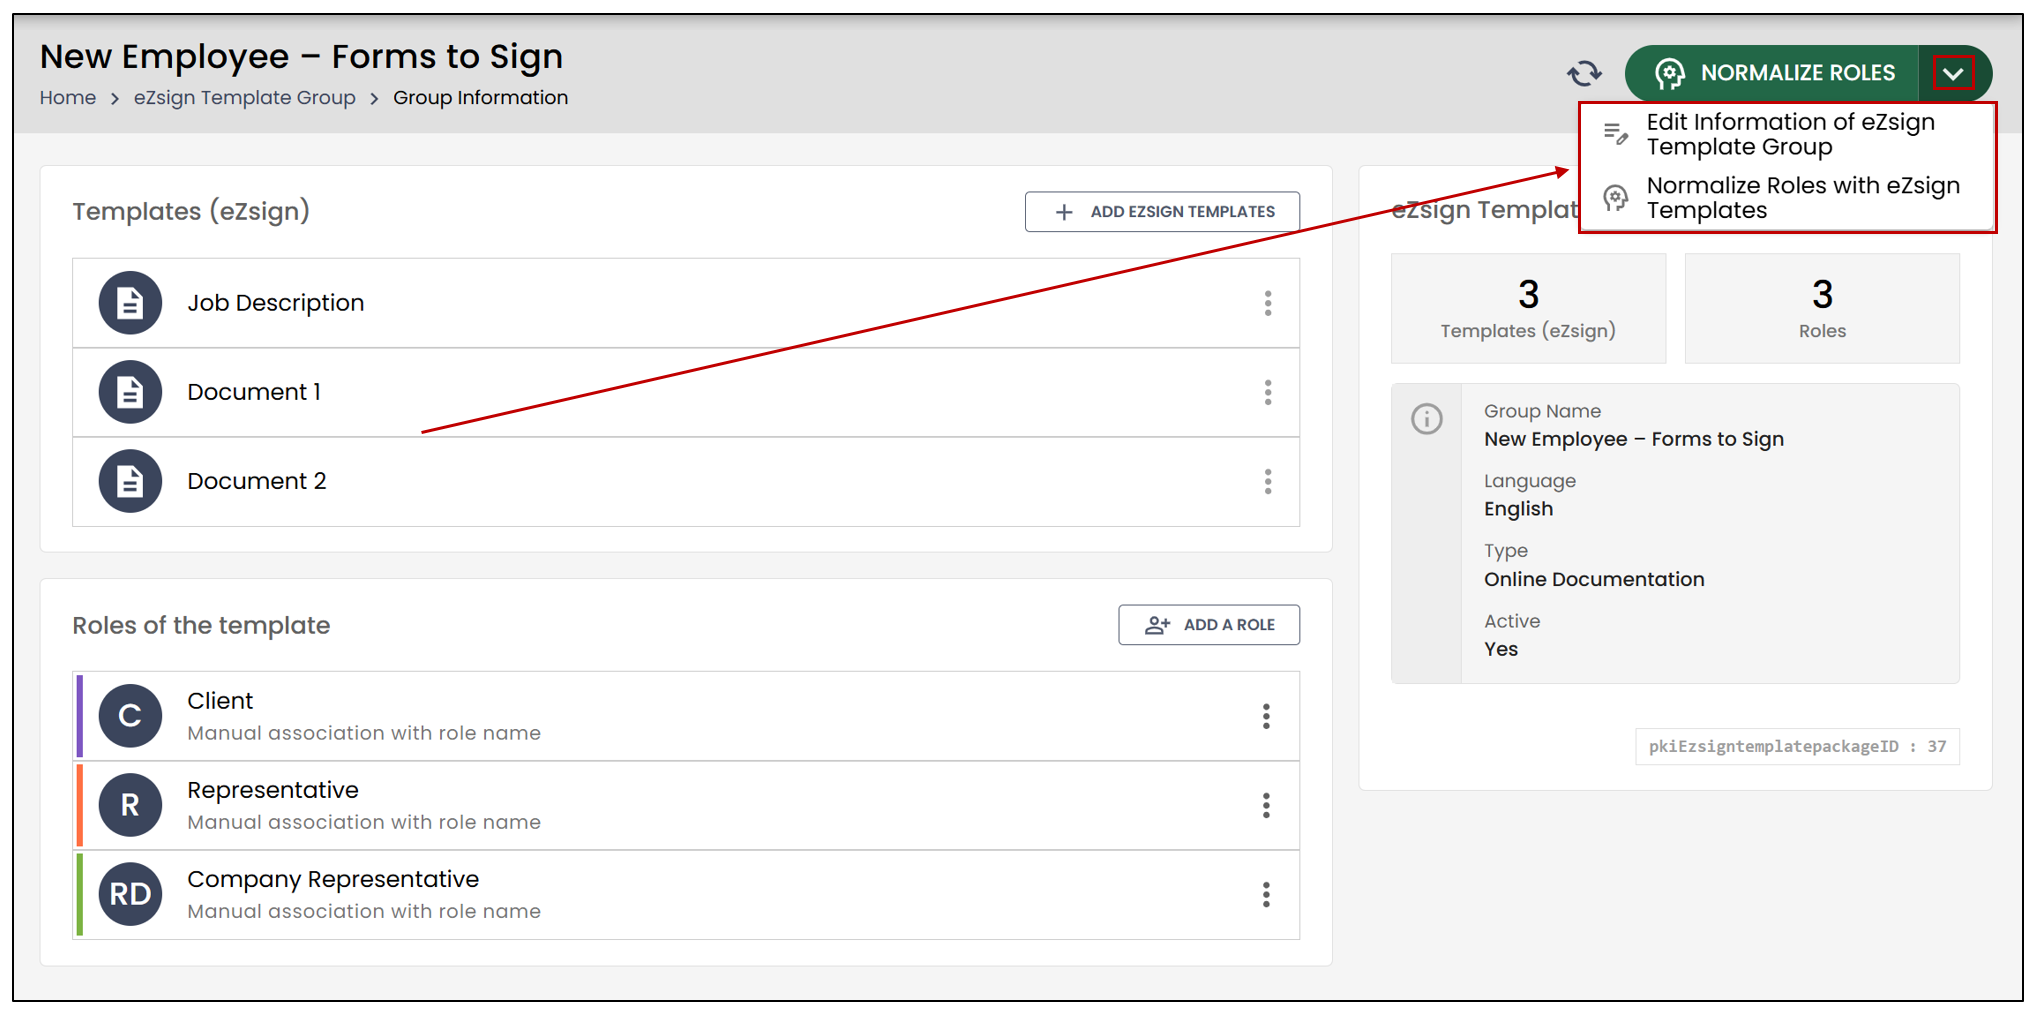
- To Edit Information of eZsign Template Group or to Normalize Roles with the eZsign Templates , click on the downward-pointing arrow.
Using a Template Group in an eZsign Folder
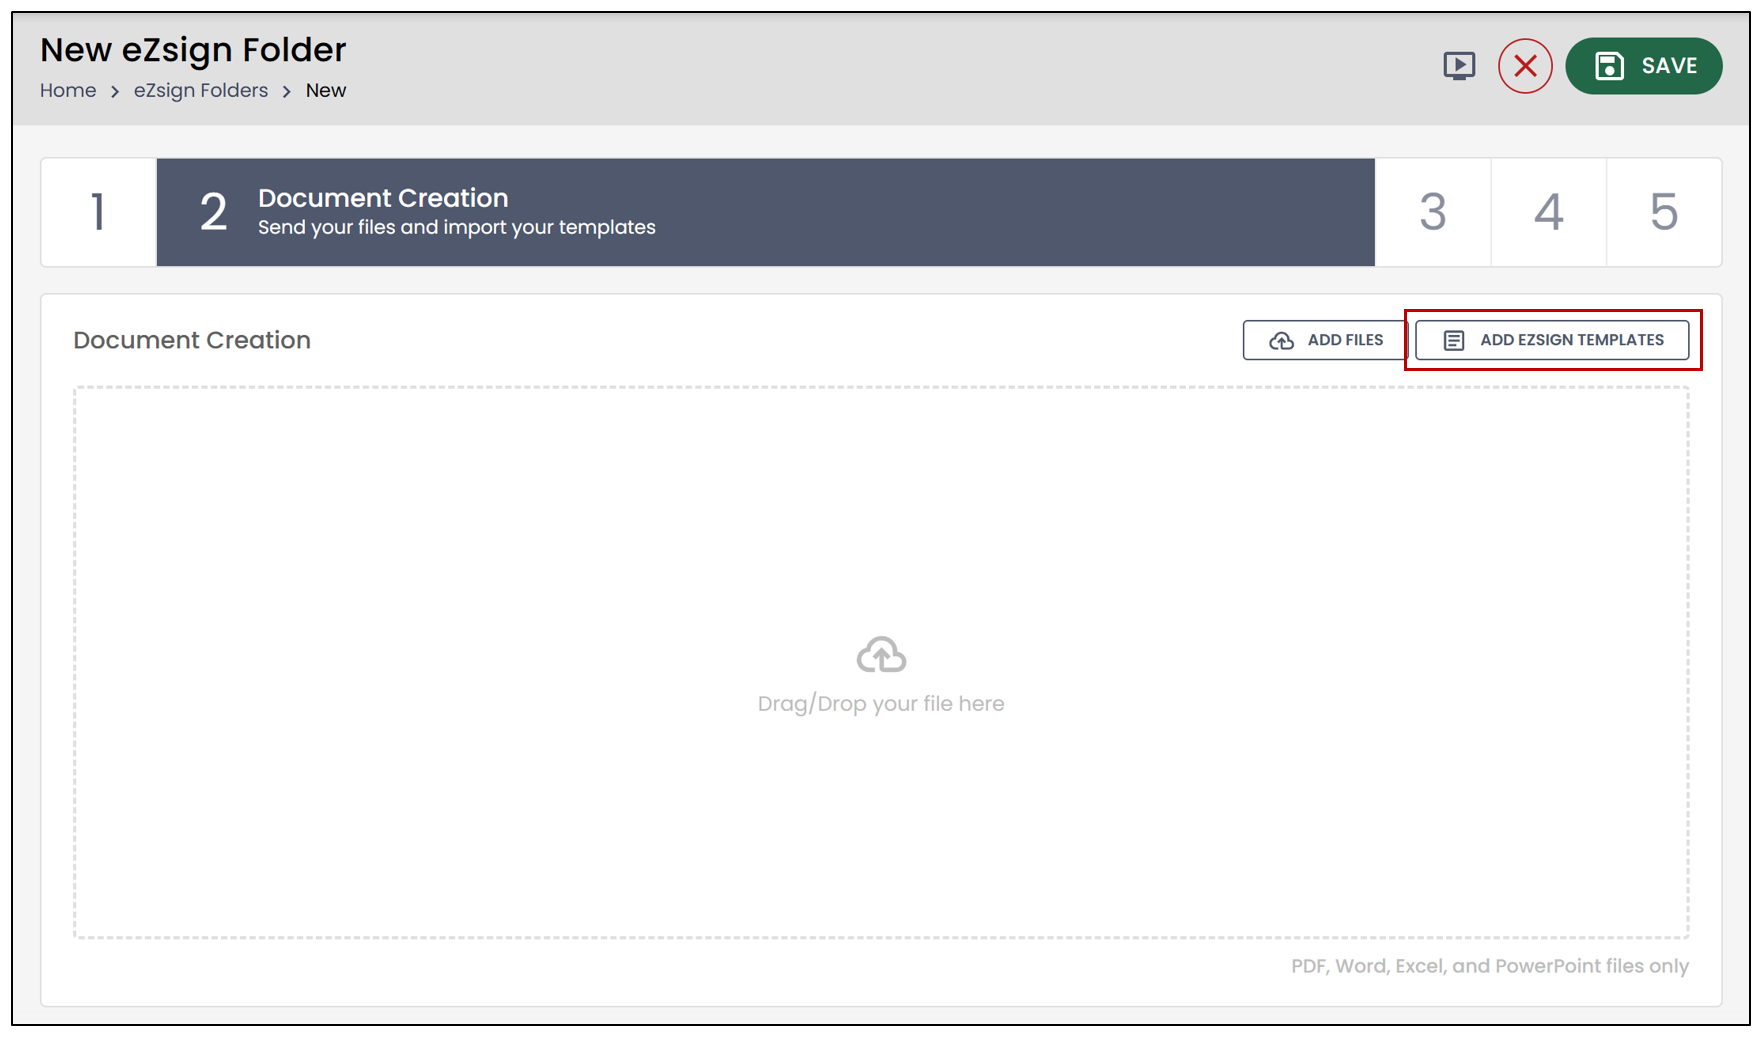
Once a template group has been added to the system, it can be used in an eZsign folder to quickly add multiple eZsign templates.
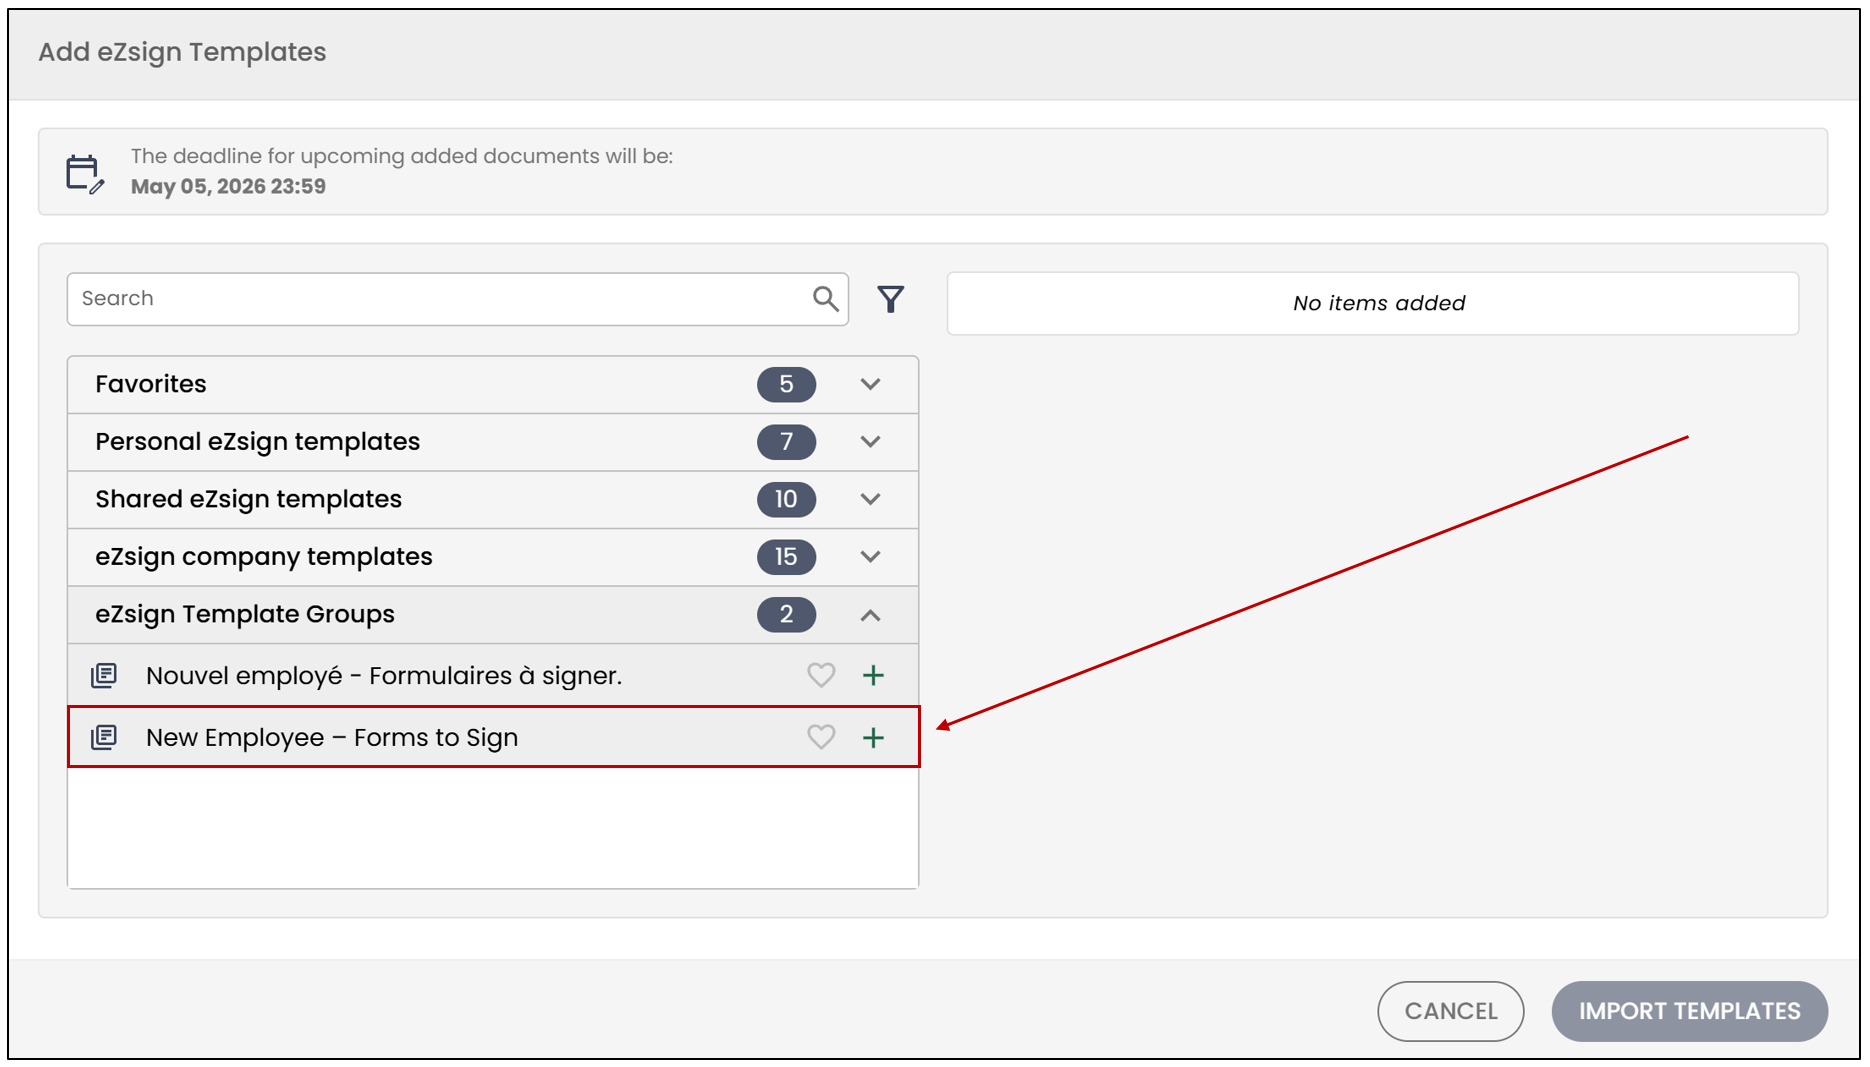
- At the Document Creation step, select Add eZsign Templates , then choose it from the dropdown list.
Edit a Template Group
From the left menu >> eZsign Template Groups >> select the desired template group.
- Click the downward-pointing arrow, then select Edit Information of eZsign Template Group.
Only the template group name and its activation status can be modified.
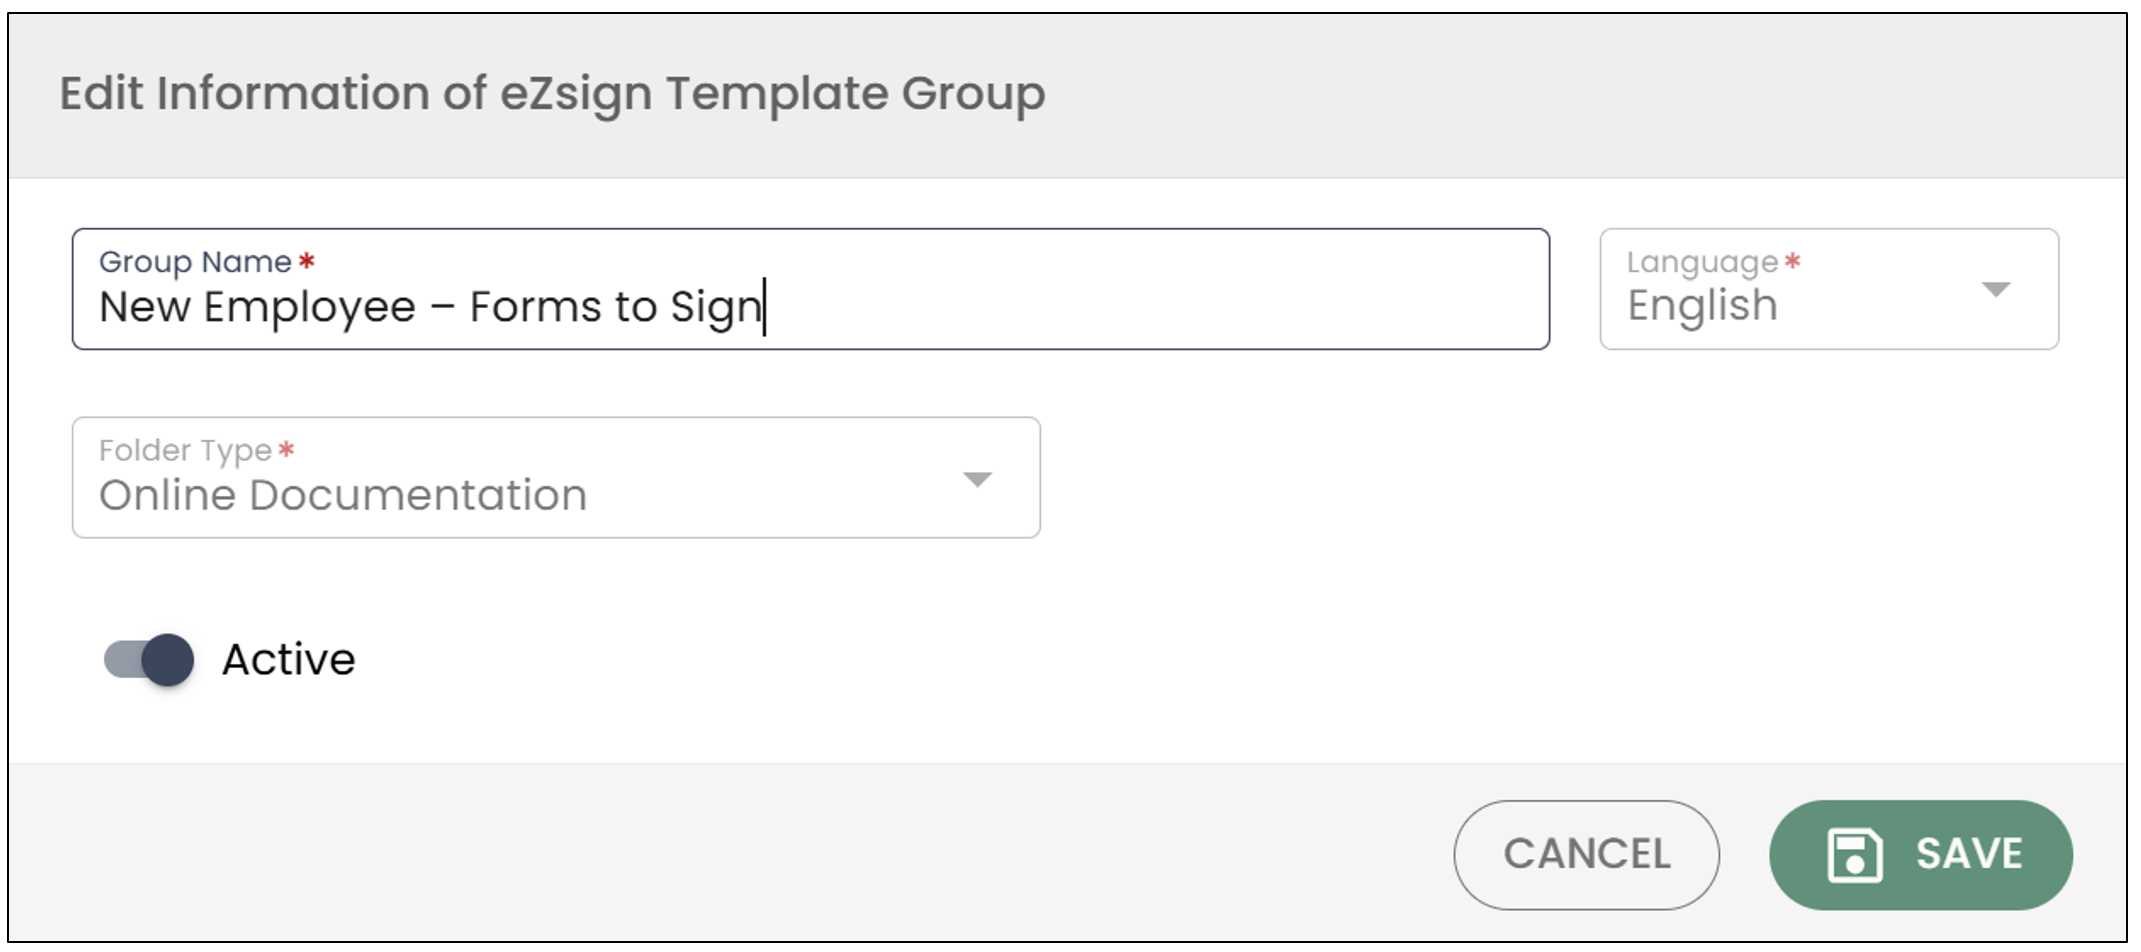
- Click Save to record your changes.