

English
Viewing/Editing/Archiving/Deleting an eZsign Folder
View an eZsign folder
Once a folder is created, you can view it.
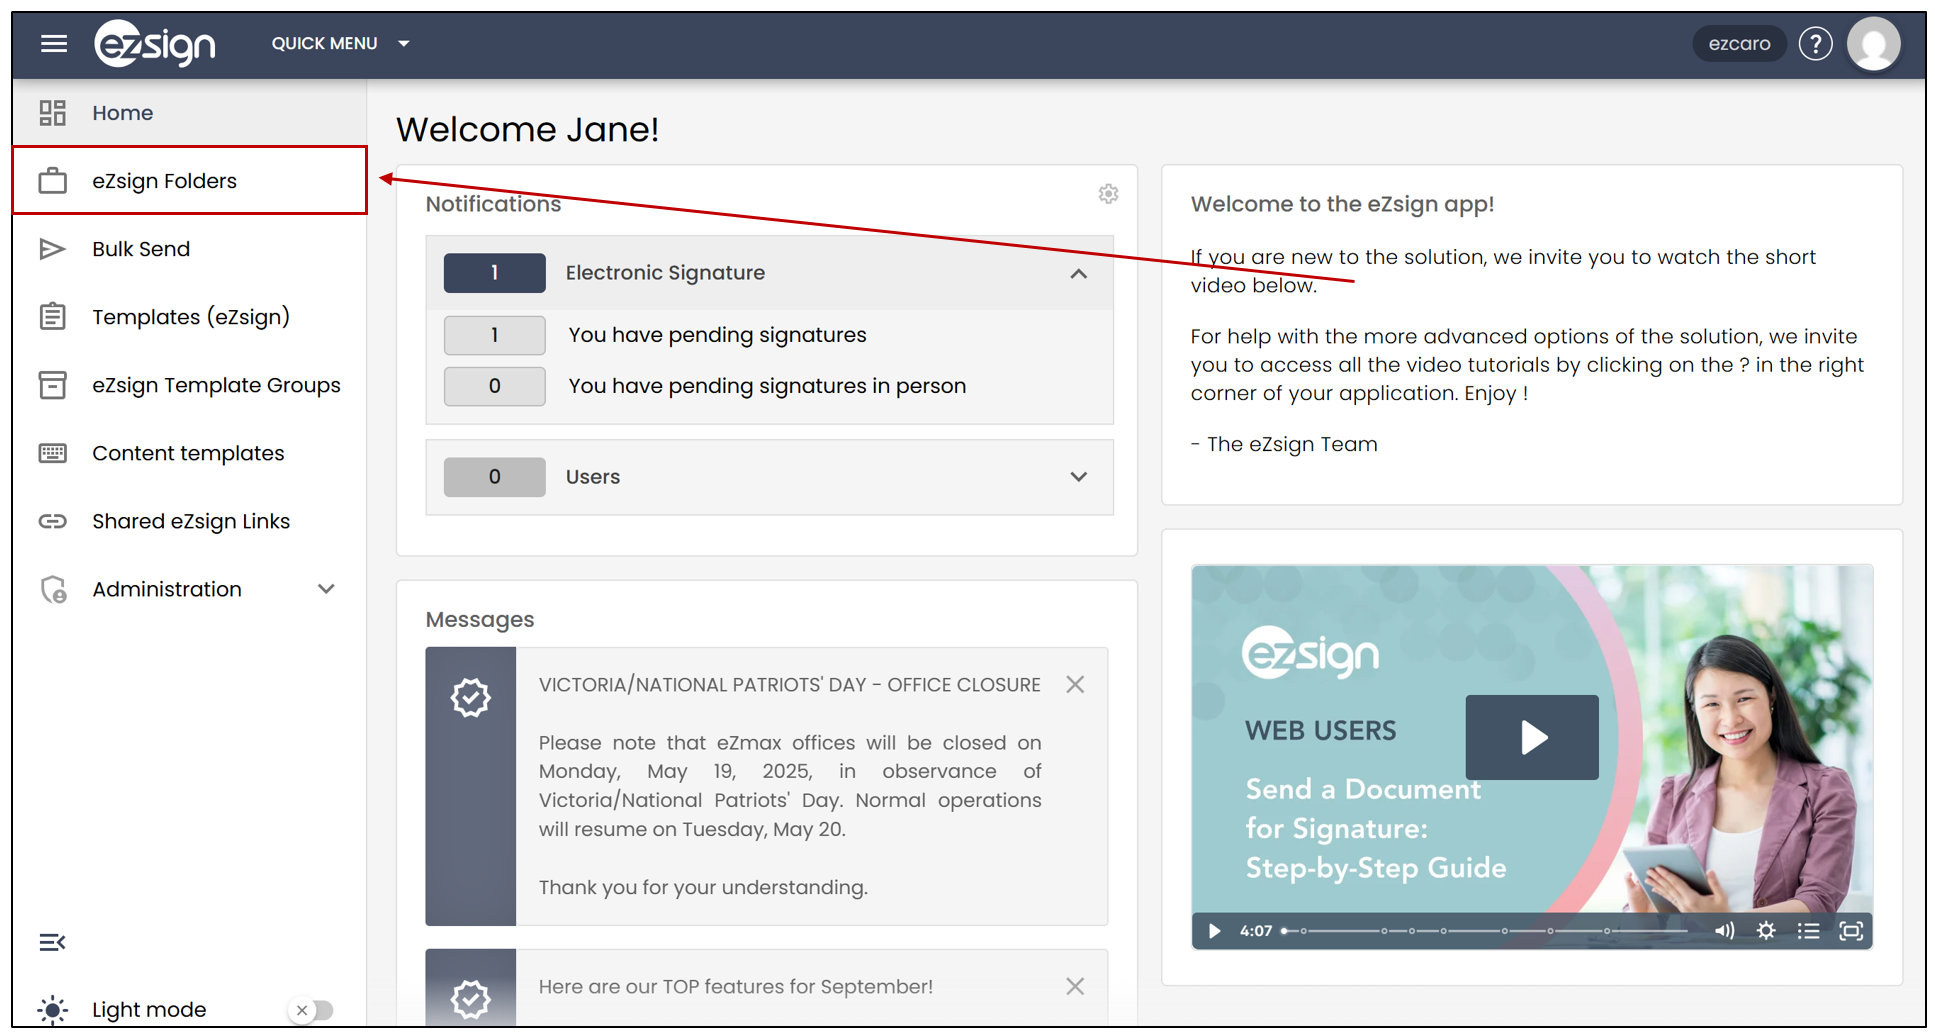
- From the left menu, click on eZsign Folders.
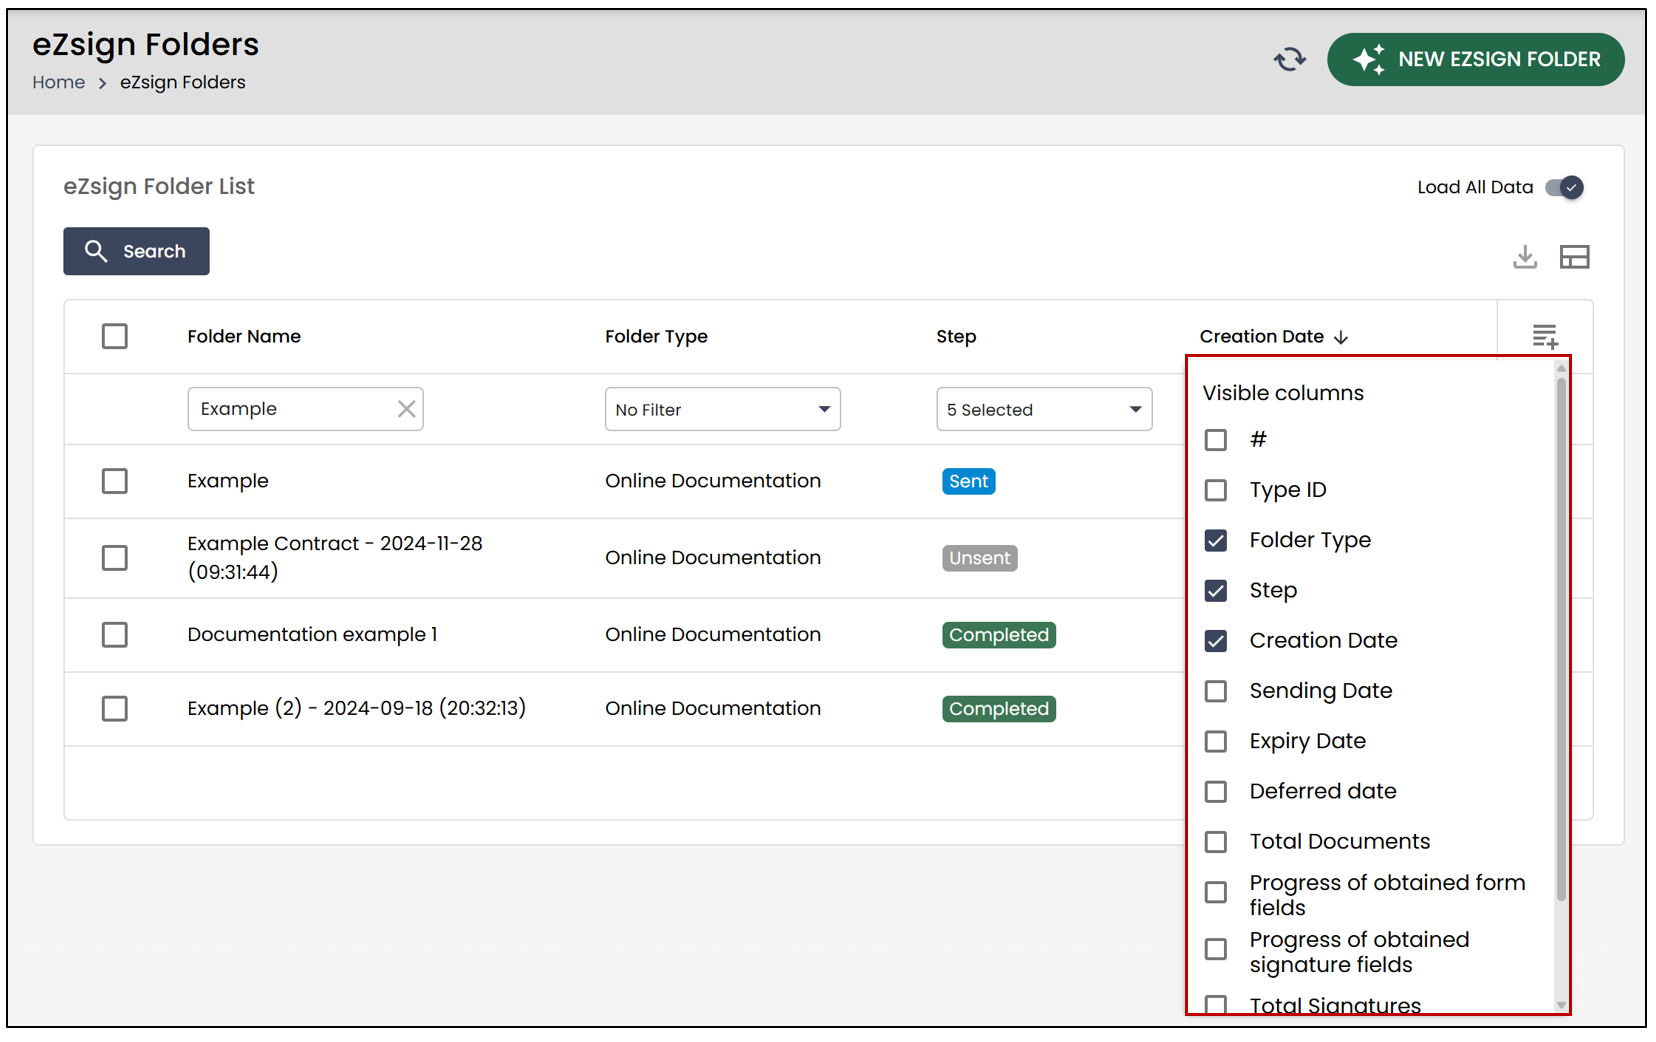
You can display folders by Folder Type , by Step , or by Creation Date.
To add filters, you can select the

icon located to the right of Creation Date.
- Click on the desired folder to display it on the screen.
eZsign Folder Information
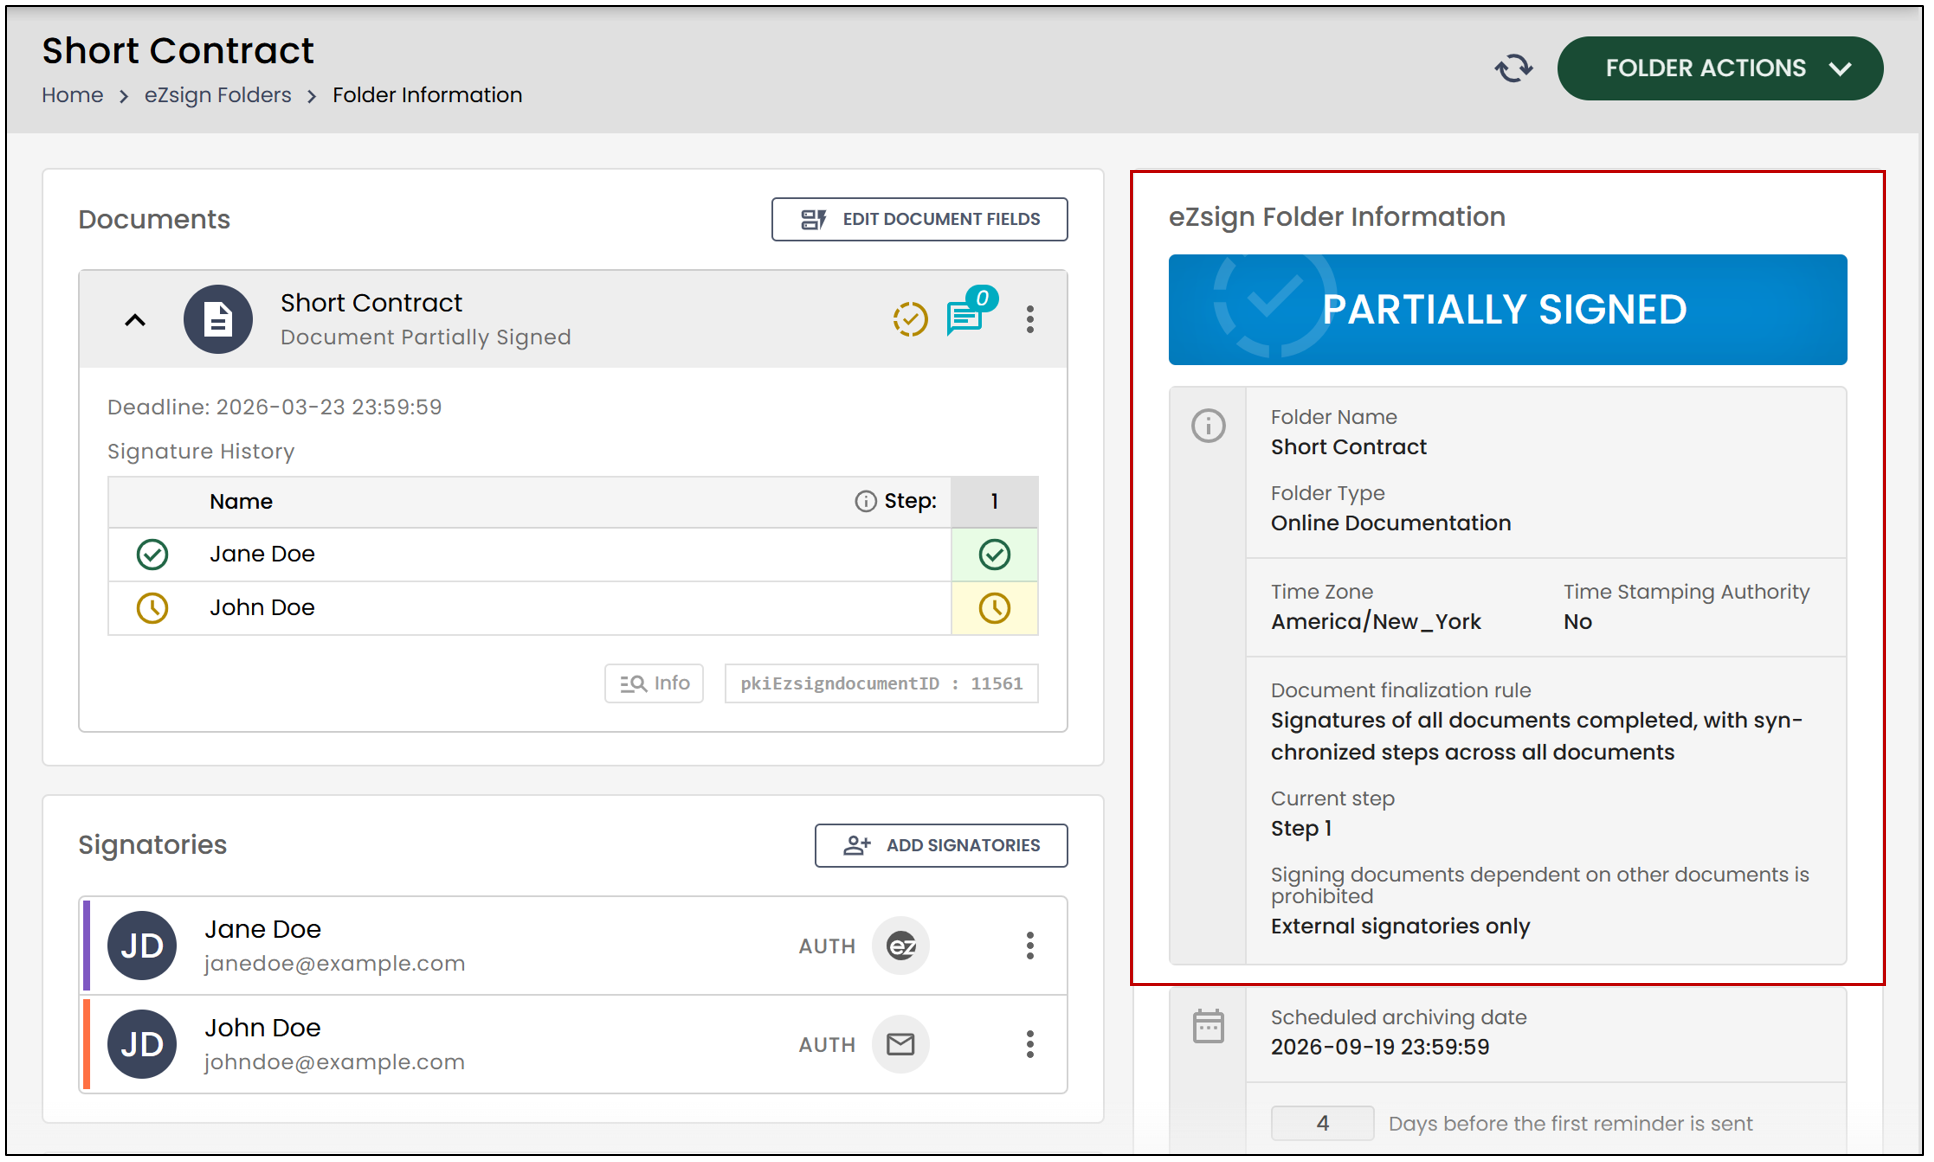
The folder step is displayed in this section. For more information on folder steps, see the article Status of eZsign Folders.
Folder Name : Name assigned to the folder by the user during its creation.
Time Stamping Authority : Configured in the folder type created in the system. For more information, see the article Time Stamping Authority.
Folder Type : Name of the folder type selected when creating the folder.
Reminders : Frequency of the reminder that will be sent via email to an external signer when they have a signature to complete in a document.
Conditions for completing a document : Depending on the folder type configuration, certain conditions for completing signed documents will apply.
Archiving Date : The date on which the folder will be archived.
NOTE: The archiving period begins after the last signature deadline indicated in the folder, even if the document was signed before that date. For example, if a document is signed on February 1st but the signature deadline is set for February 15th, the archiving period will begin after February 15th.
- Disposal Date : The date on which the folder will be deleted automatically or manually.
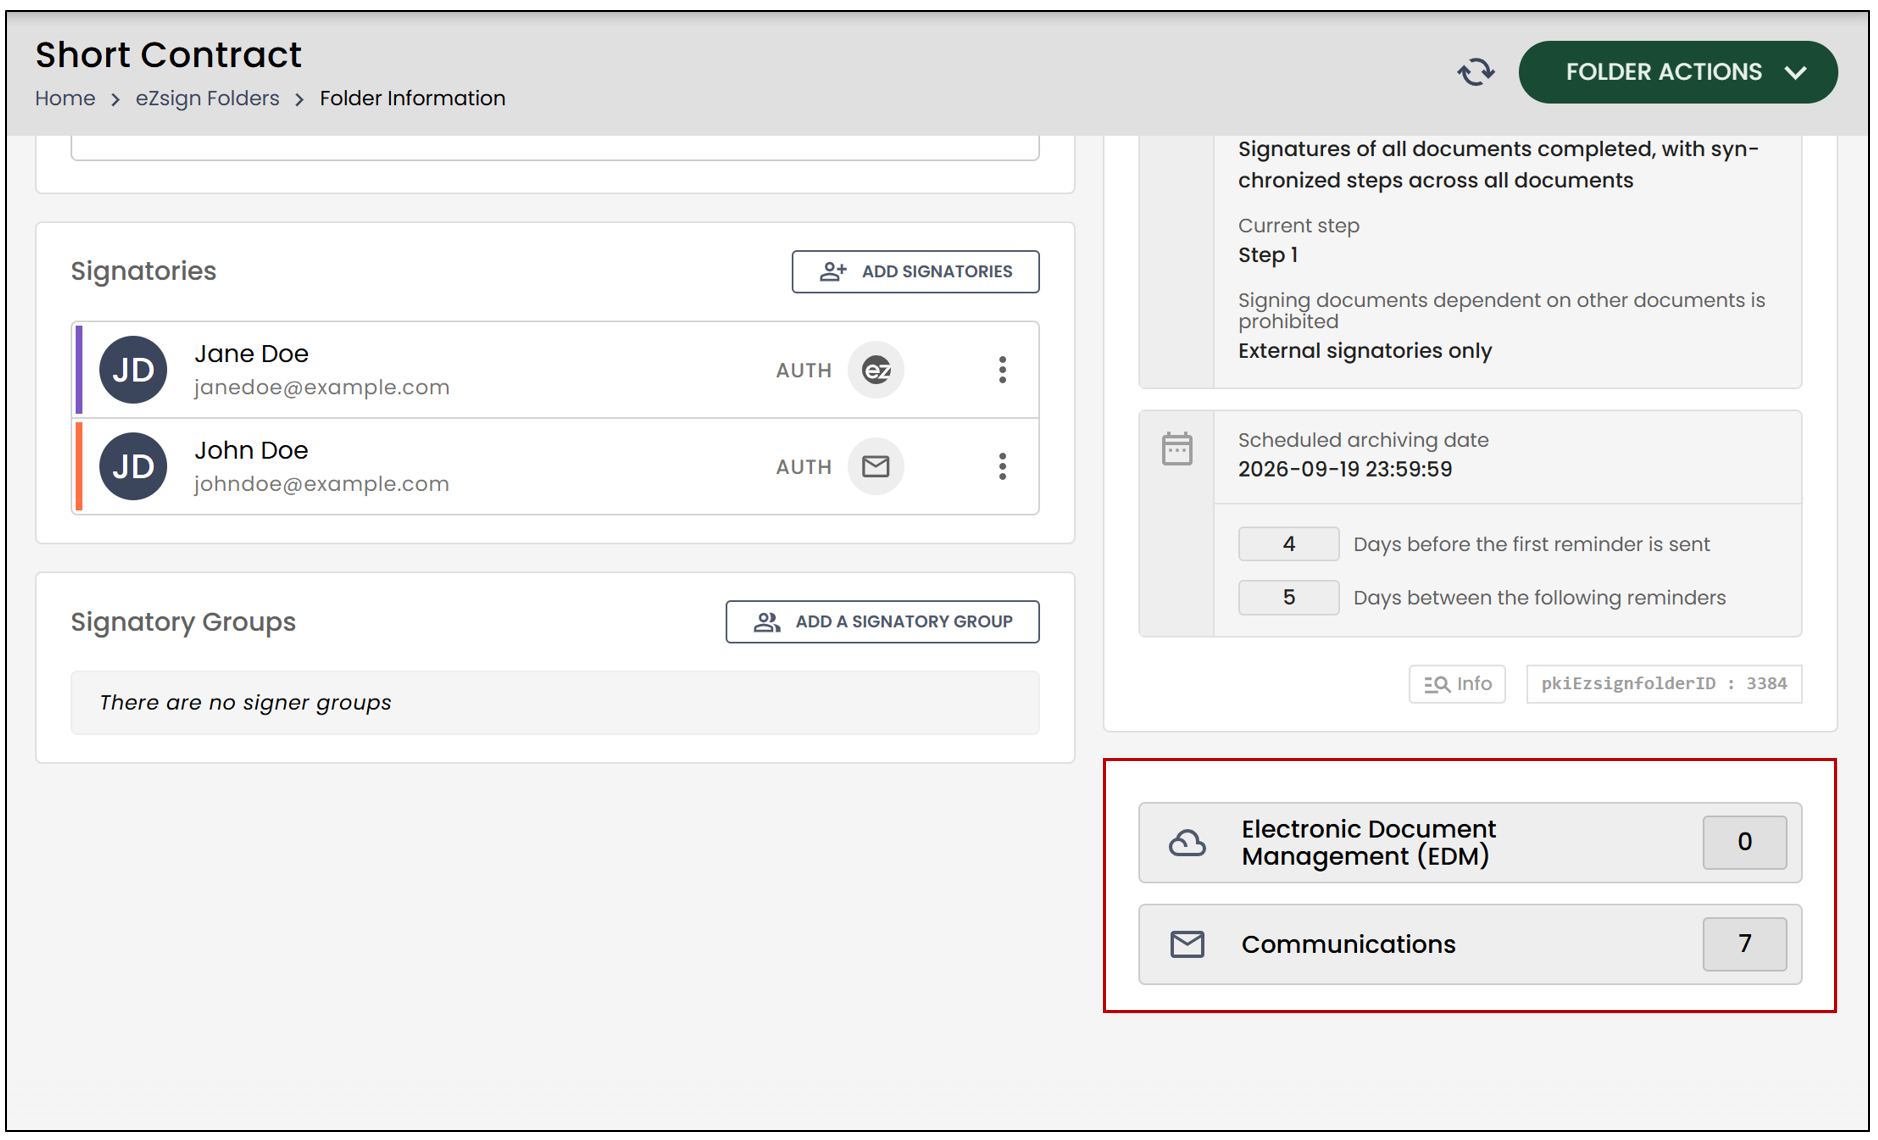
Below the eZsign Folder Information section, the number of Documents and Communications within the folder is displayed.
Electronic Document Management (EDM): Allows you to view completed documents, attachments, and proofs within the folder. For more information on EDM, please refer to the article Managing Documents in an eZsign Folder.
Communications : You can view the information related to the sending of documents for signing and completed documents in a folder by clicking on Communications. If you want to create a new communication, please refer to the article Sending Signed Documents by E-mail.
Documents
- This is the section where you can add, modify, and/or delete documents and fields. For more information, see the articles Adding/Editing/Deleting a Document in an eZsign Folder and Adding/Editing/Deleting a Field in a Document.
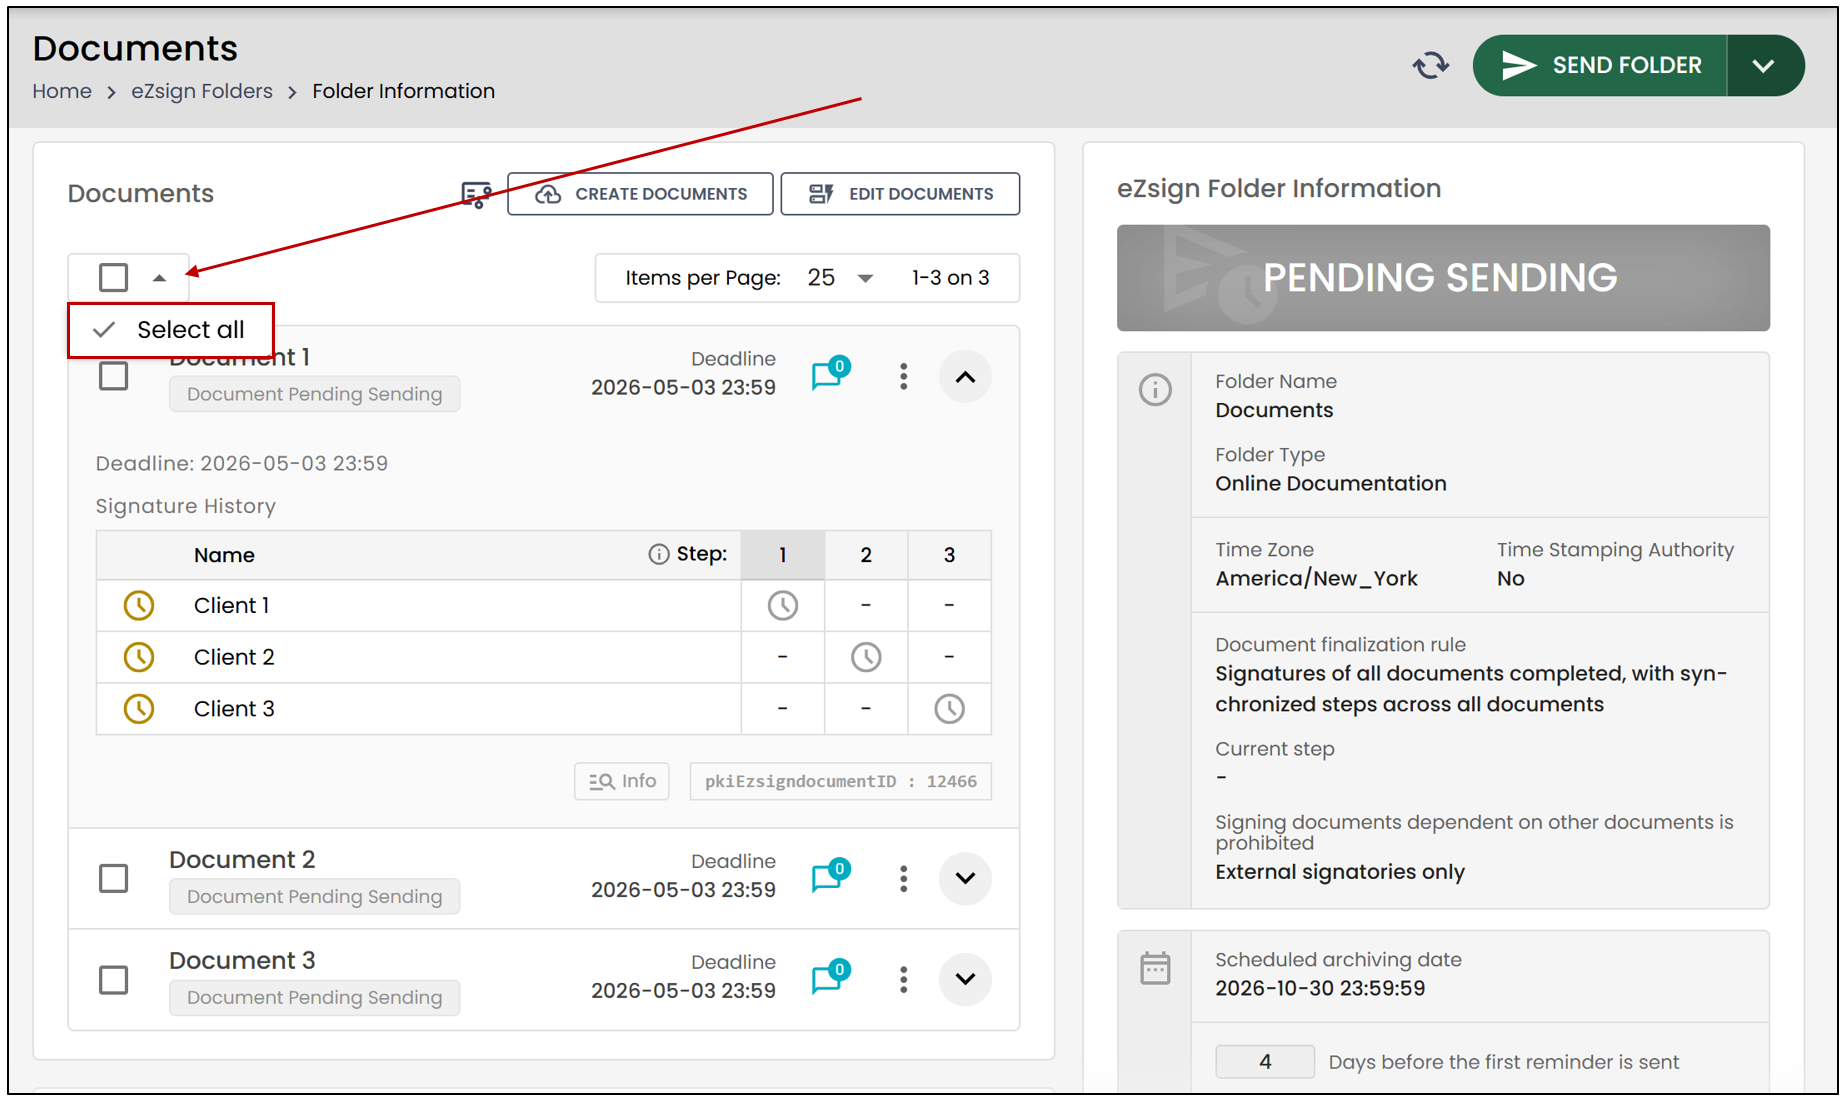
Thanks to the new Bulk Actions feature, you can now perform actions on one or multiple incomplete documents at the same time.
- Check the box to the left of each desired document or click Select All.
Once the documents are selected, you can perform the following actions:
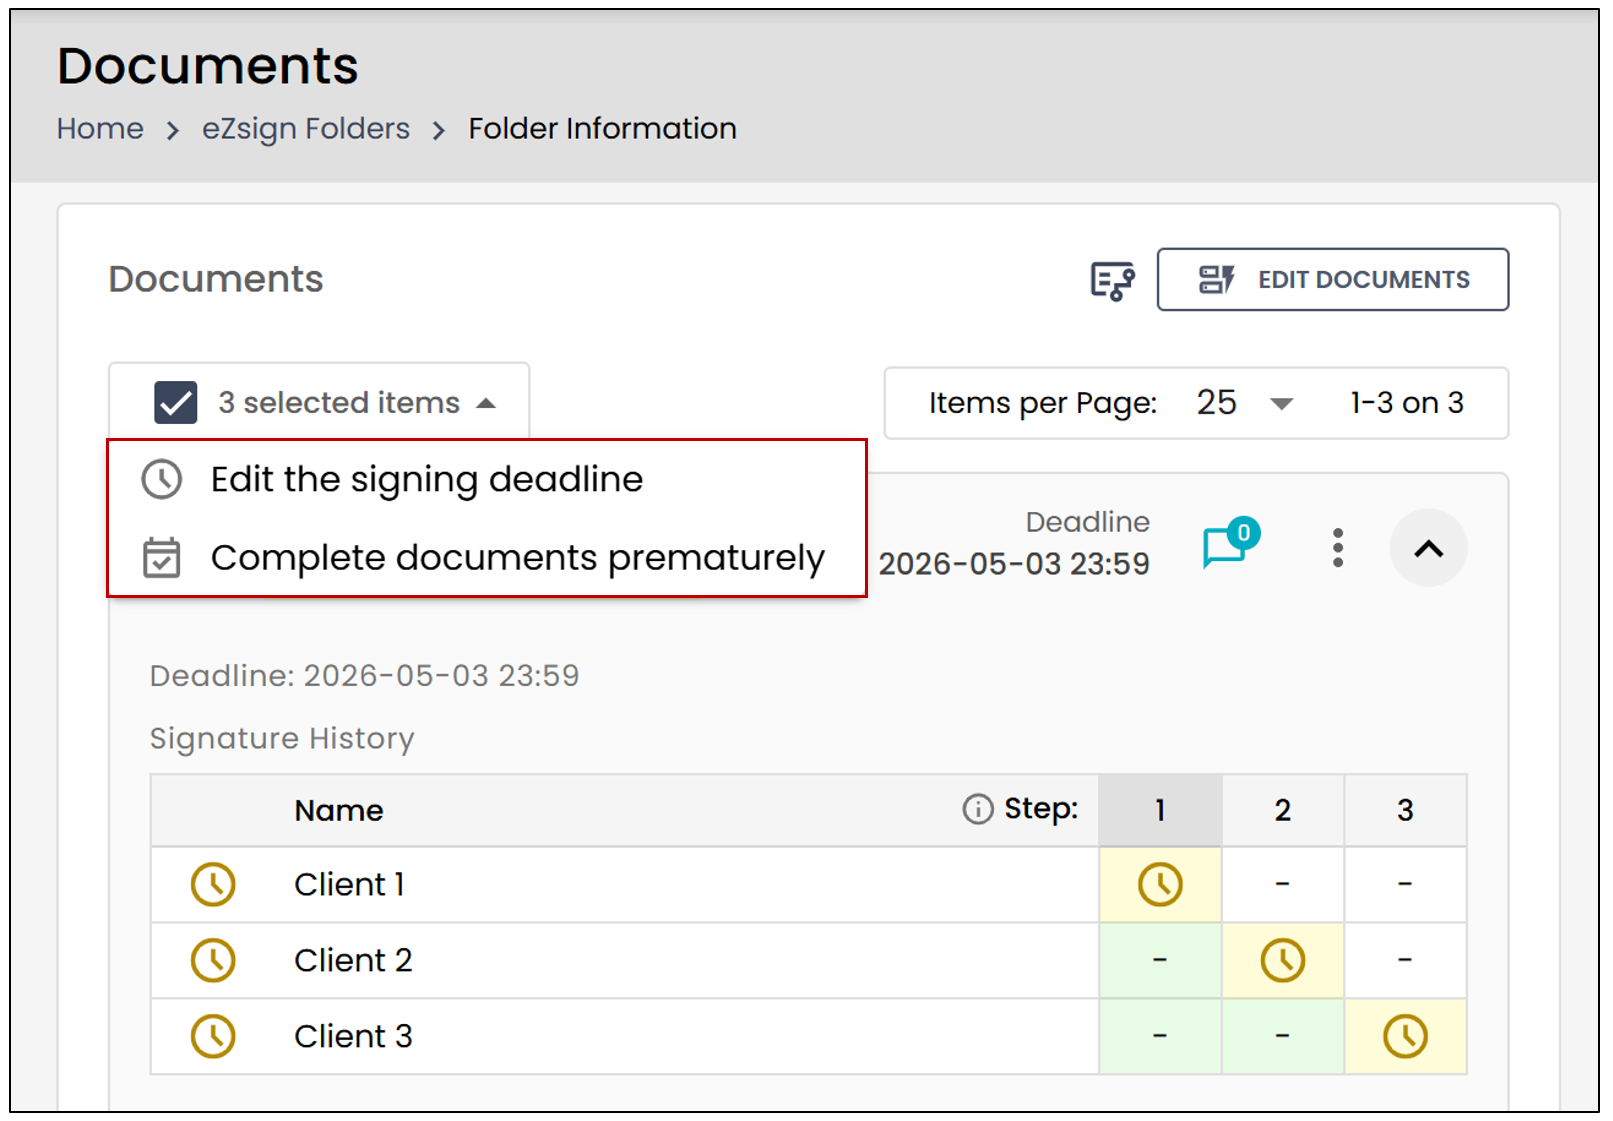
- Edit the signing deadline. For more information, please refer to the article Modify the signature deadline of a document.
- Complete documents early. For more information, please refer to the article Signatory No Longer Wants to Sign: Complete Prematurely the Document.
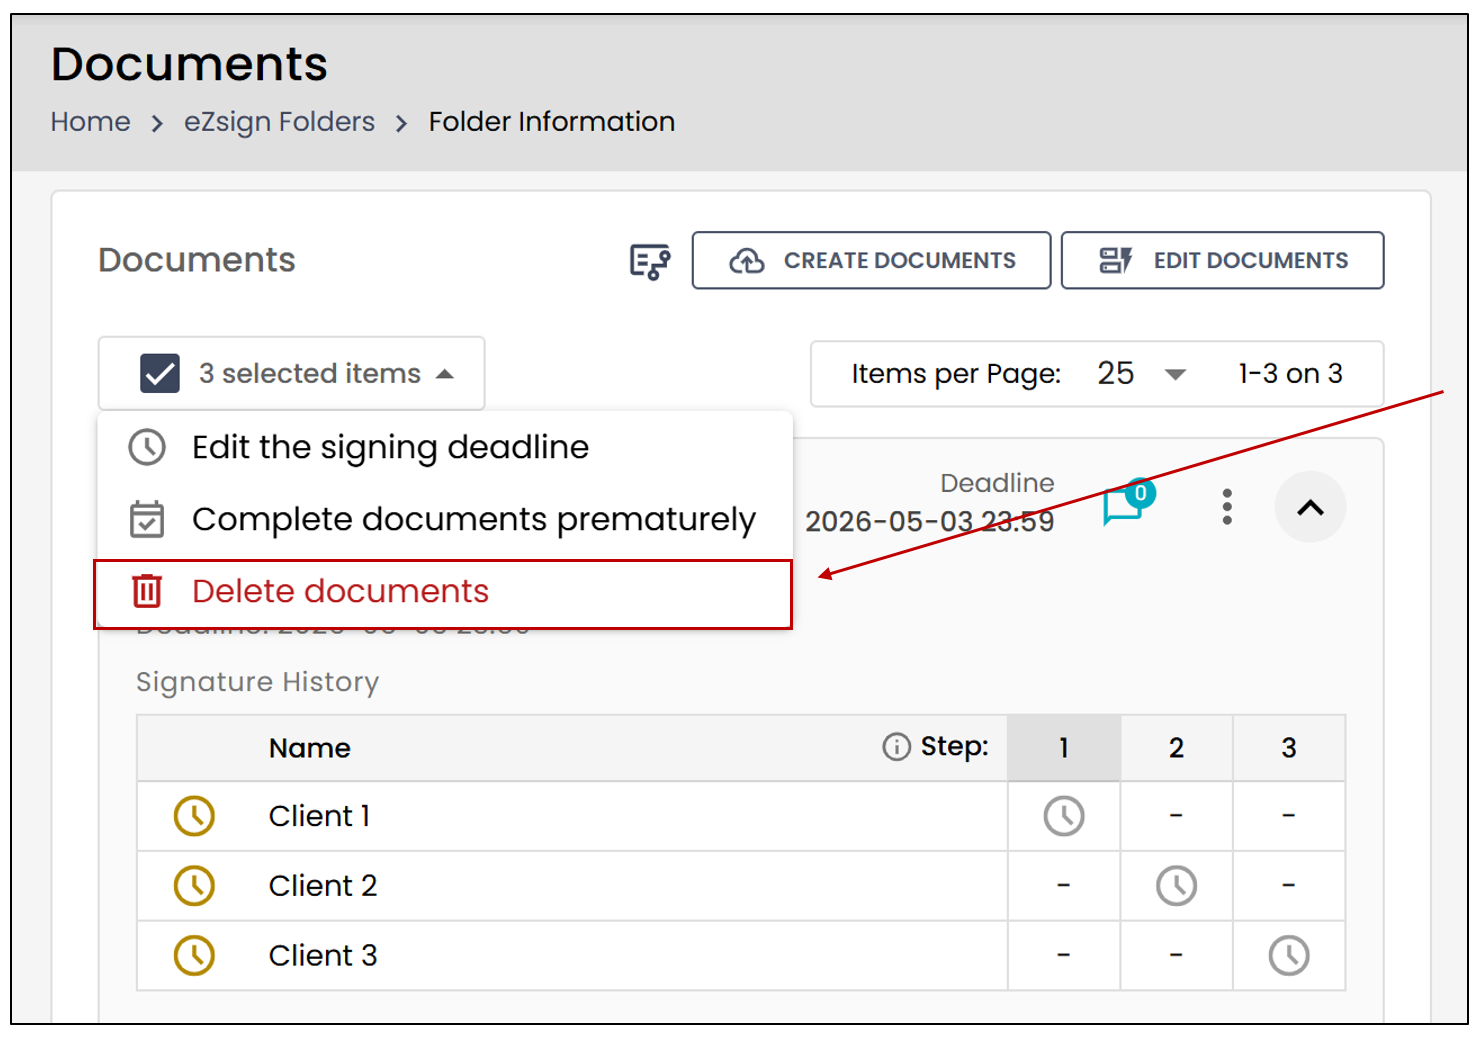
You will also be able to select and delete one or more documents Pending Sending at the same time.
- Check the desired documents, then select Delete documents.
View the document from the signatory’s perspective
You can now view the document exactly as a signatory sees it when signing.
- To view a document, click the

icon to the right of the document.
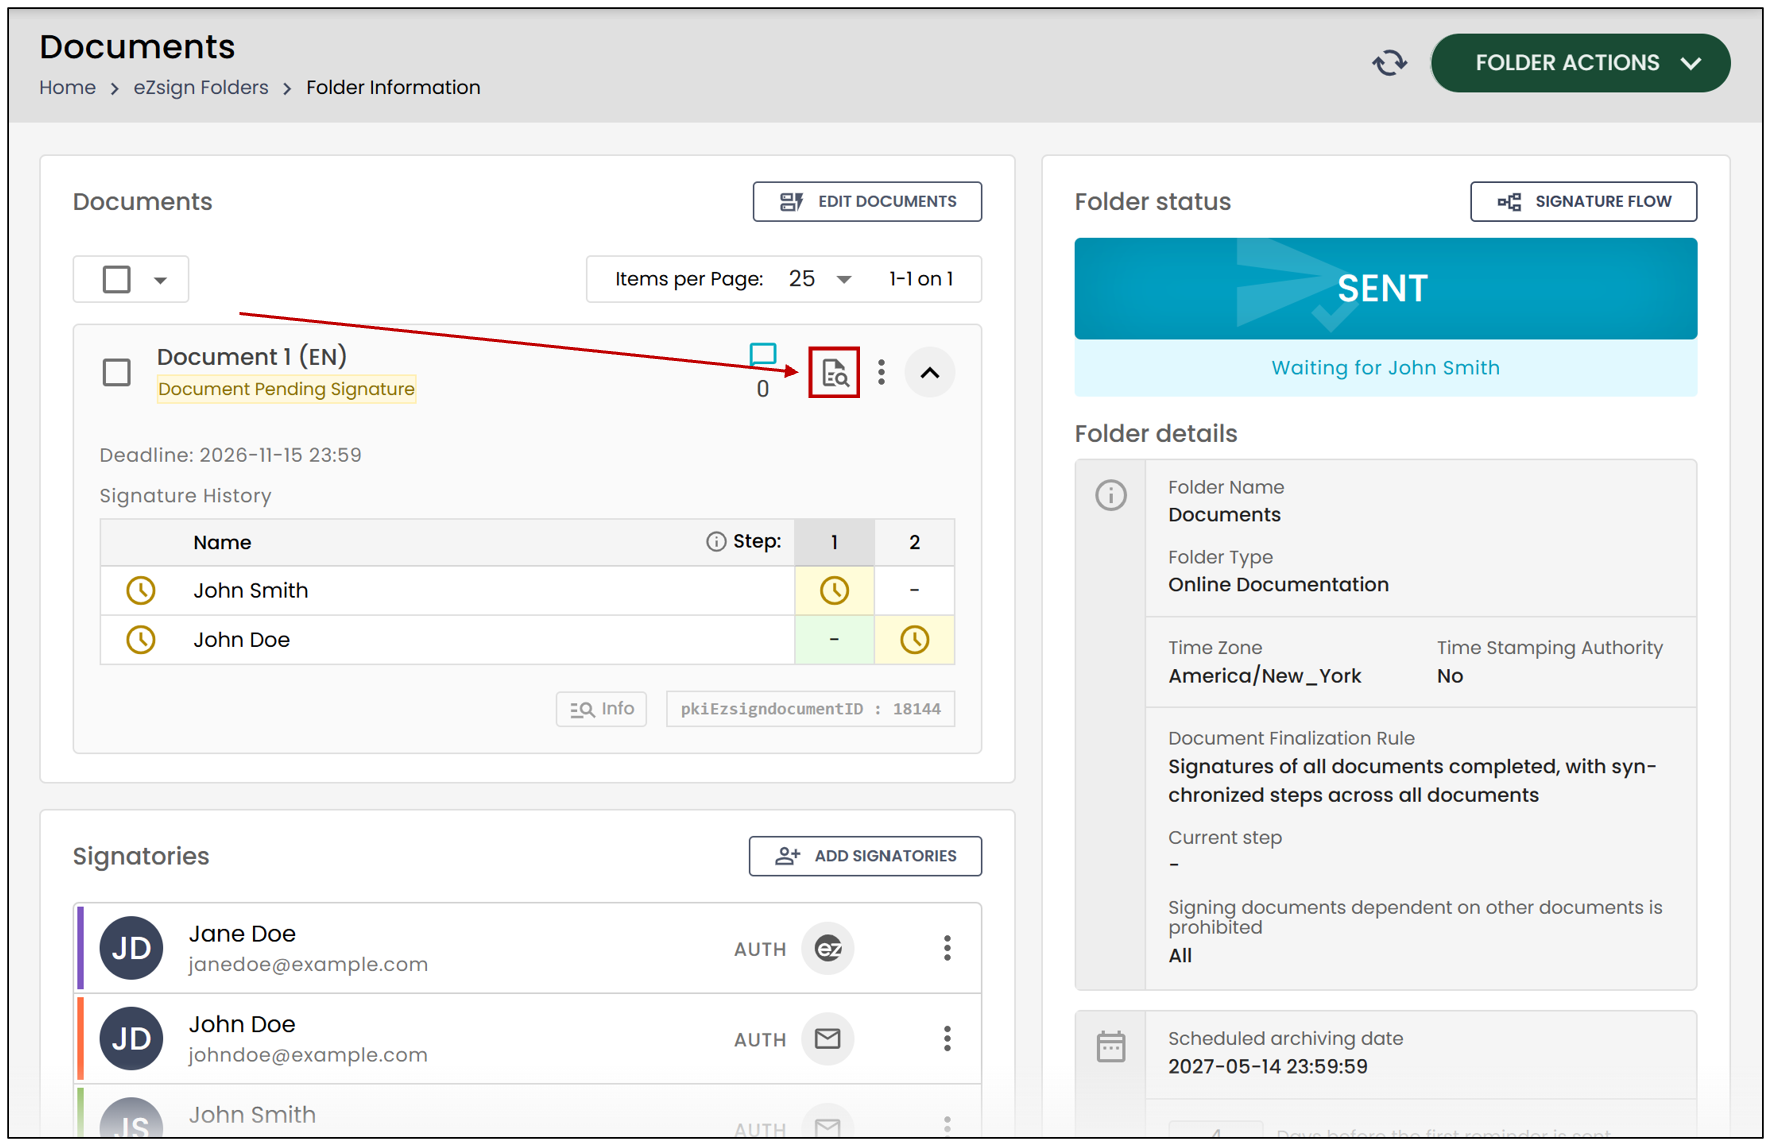
- In the top-right corner, click your name to display the drop-down menu containing all signatories in the folder. Then, select the desired signatory.
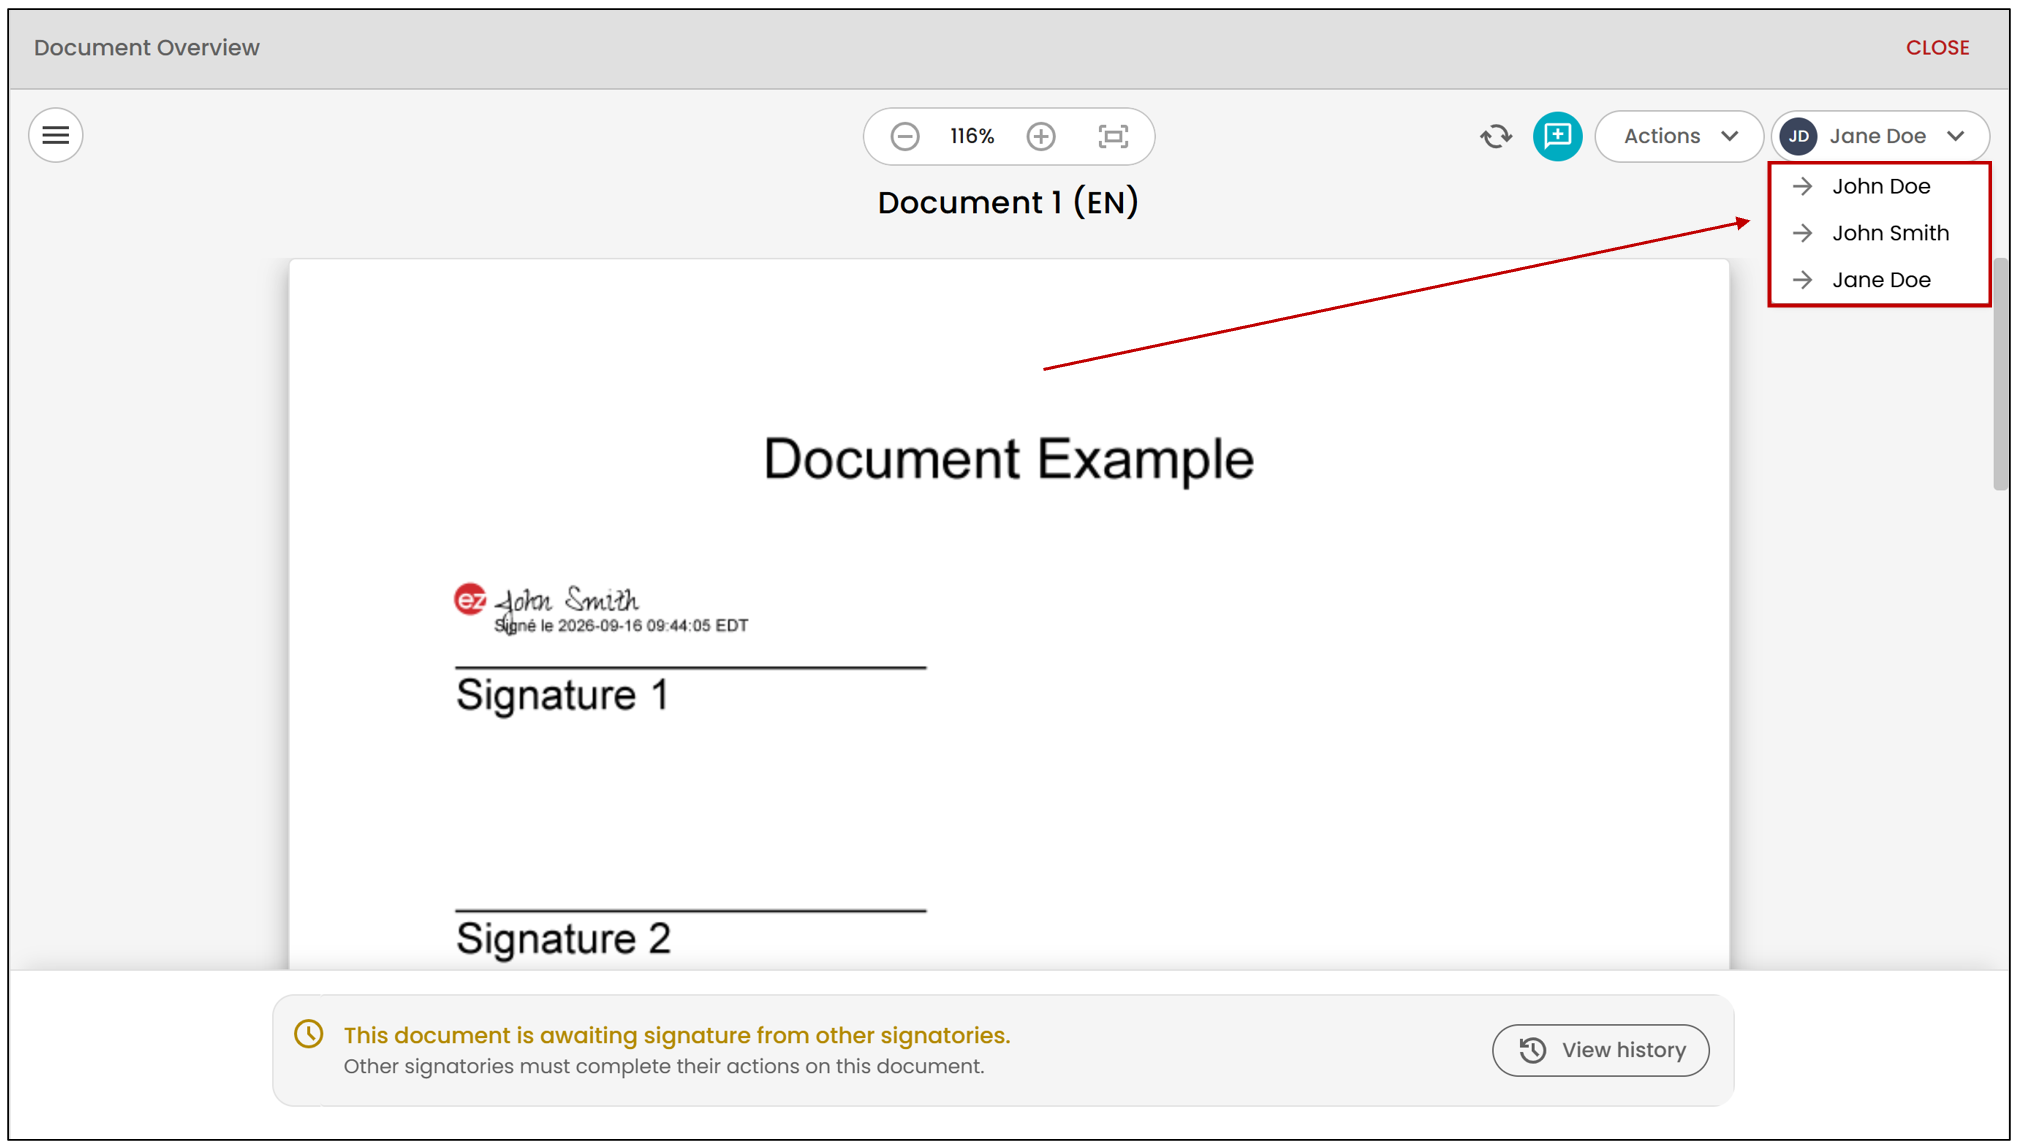
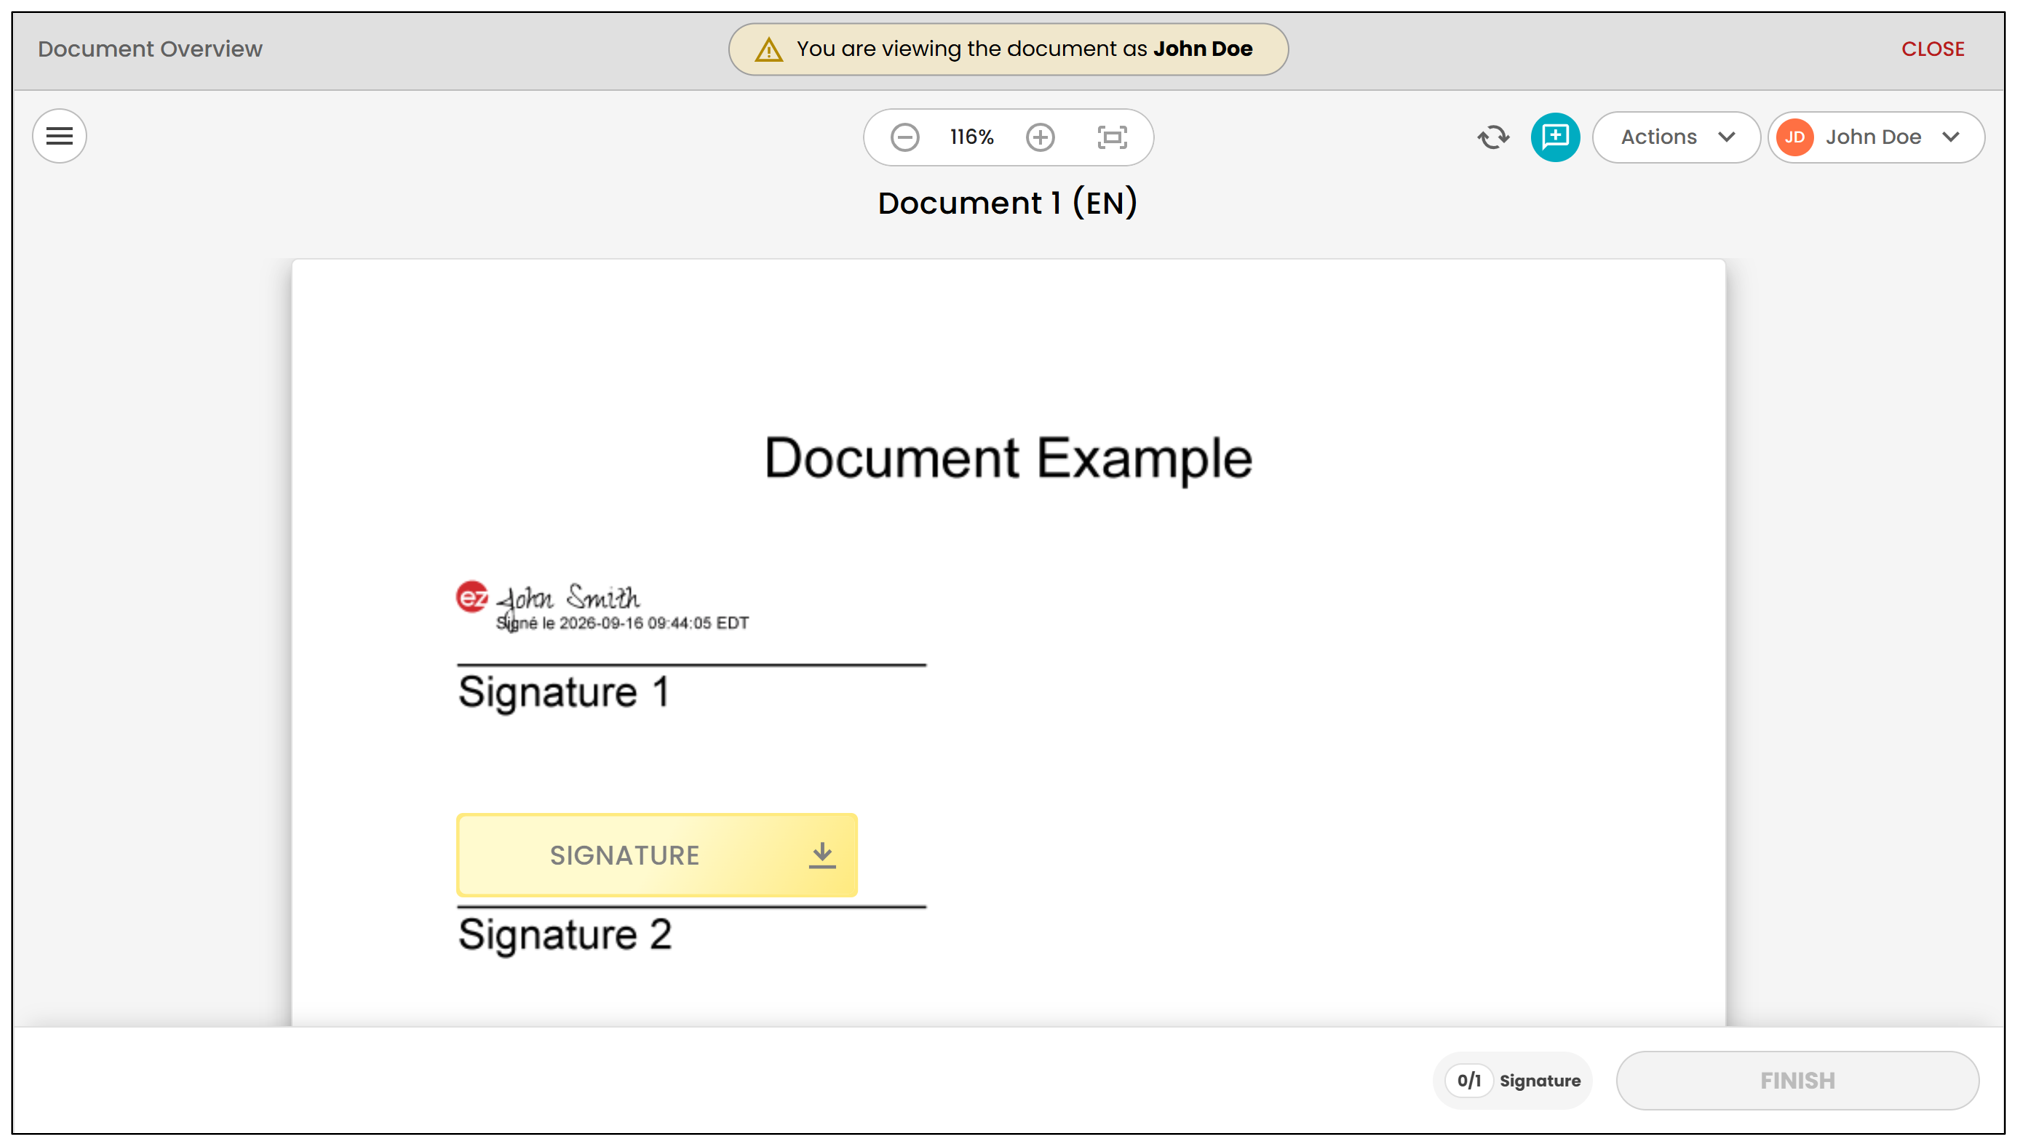
You will then view the document from the selected signatory’s perspective and see the signature fields exactly as they appear to them.
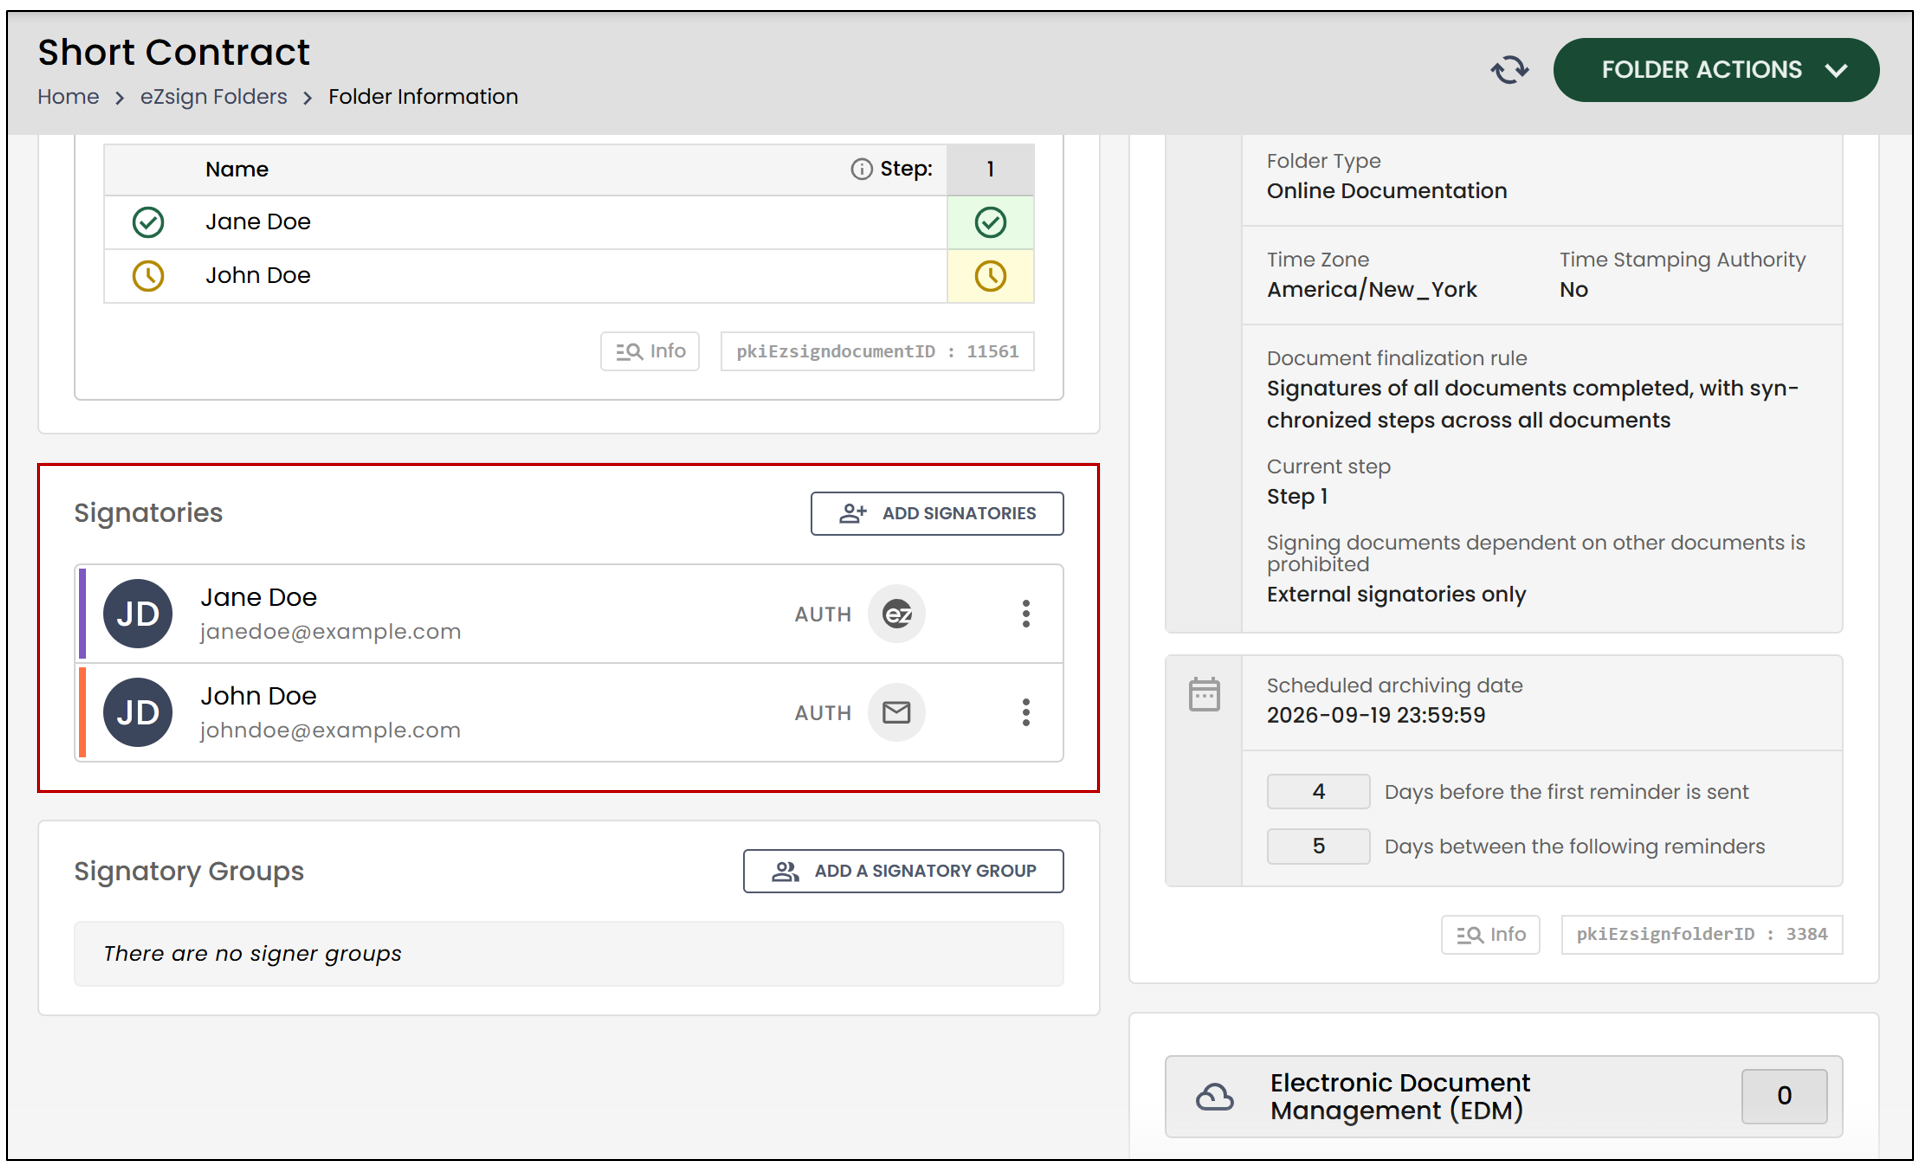
Signatories
- The user who created the folder is automatically added to the recipients. This is the section where you can add, modify, and/or delete signers. For more information, see the article Adding/Editing/Deleting a Signatory in an eZsign Folder.
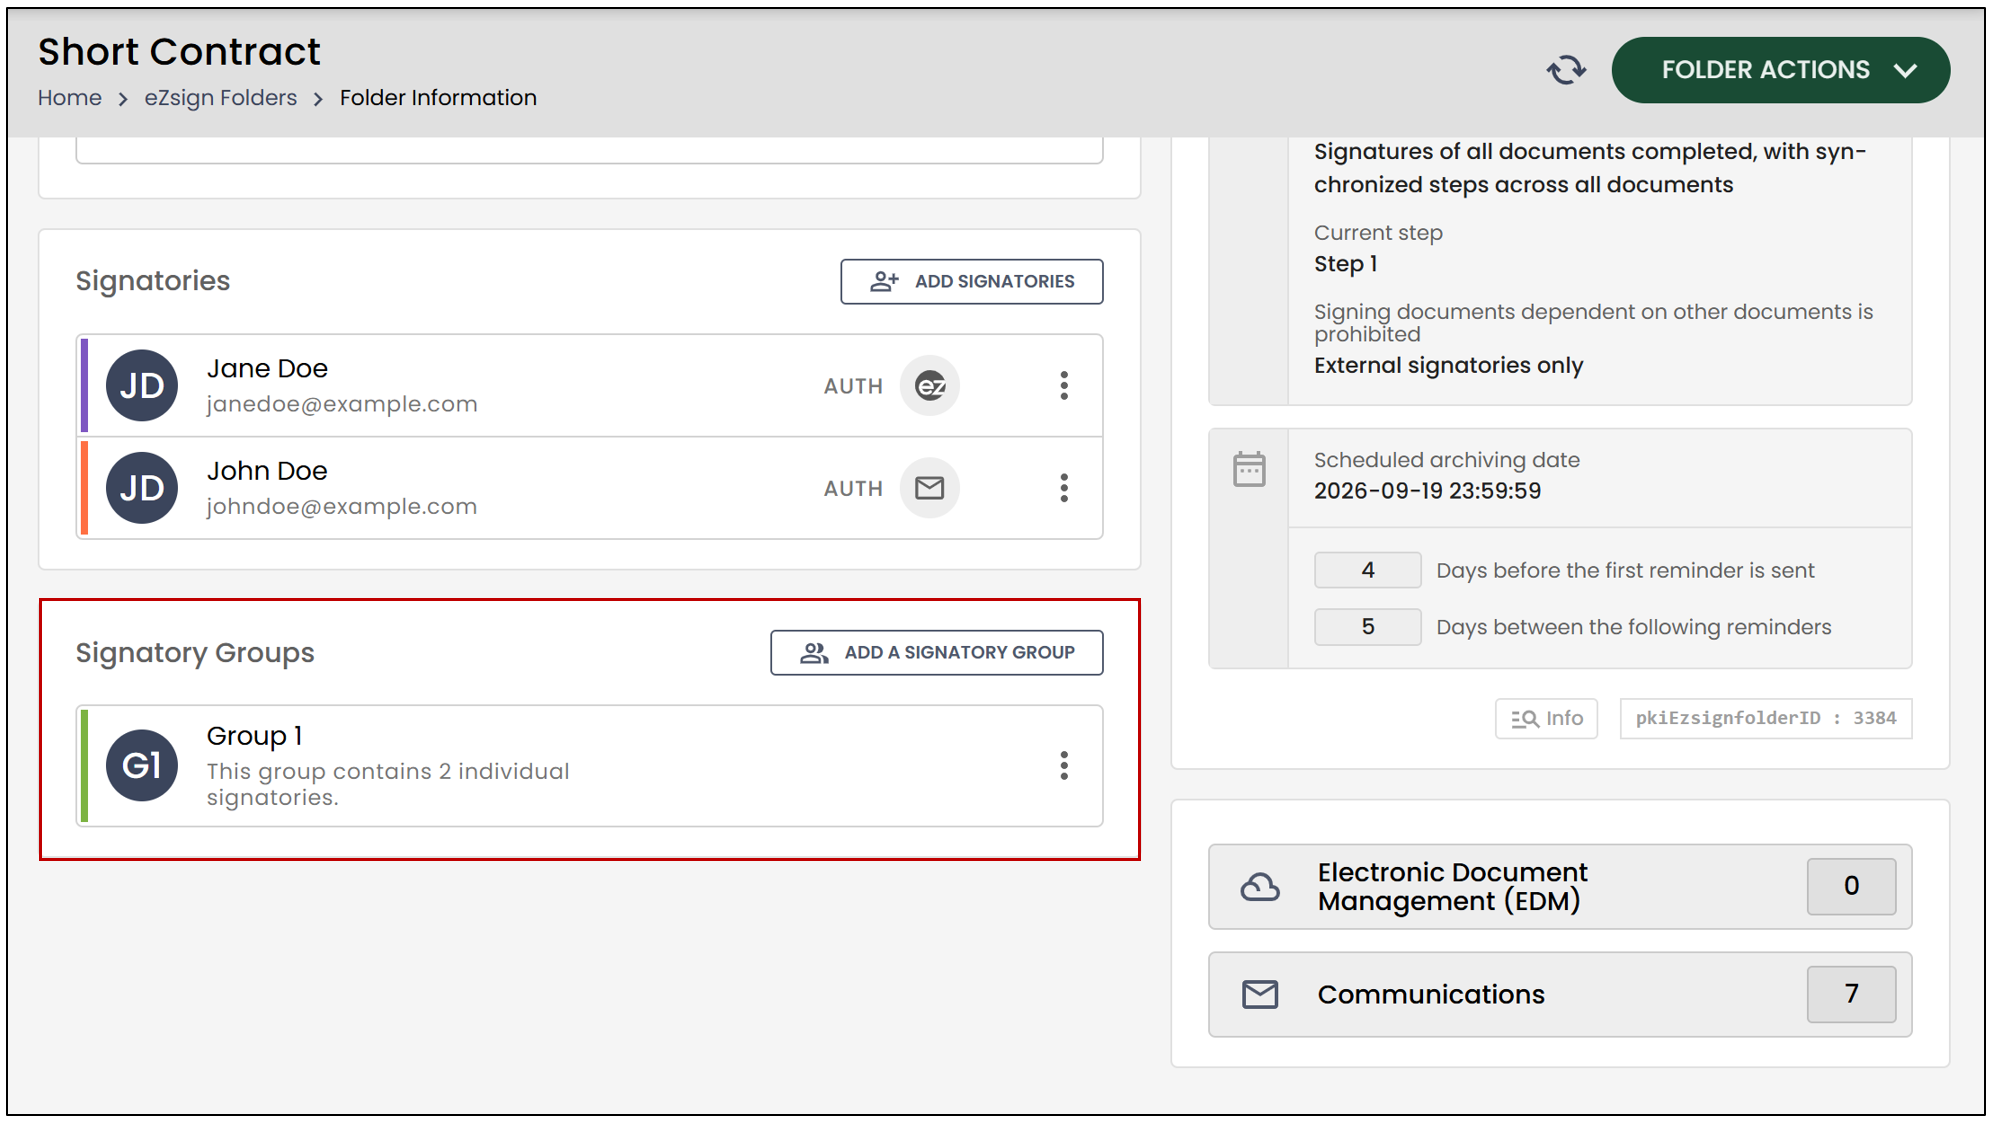
Signatory Groups
- Allows you to add groups of signers. Please refer to the article Add/Edit/Delete a signatory group in an eZsign folder.
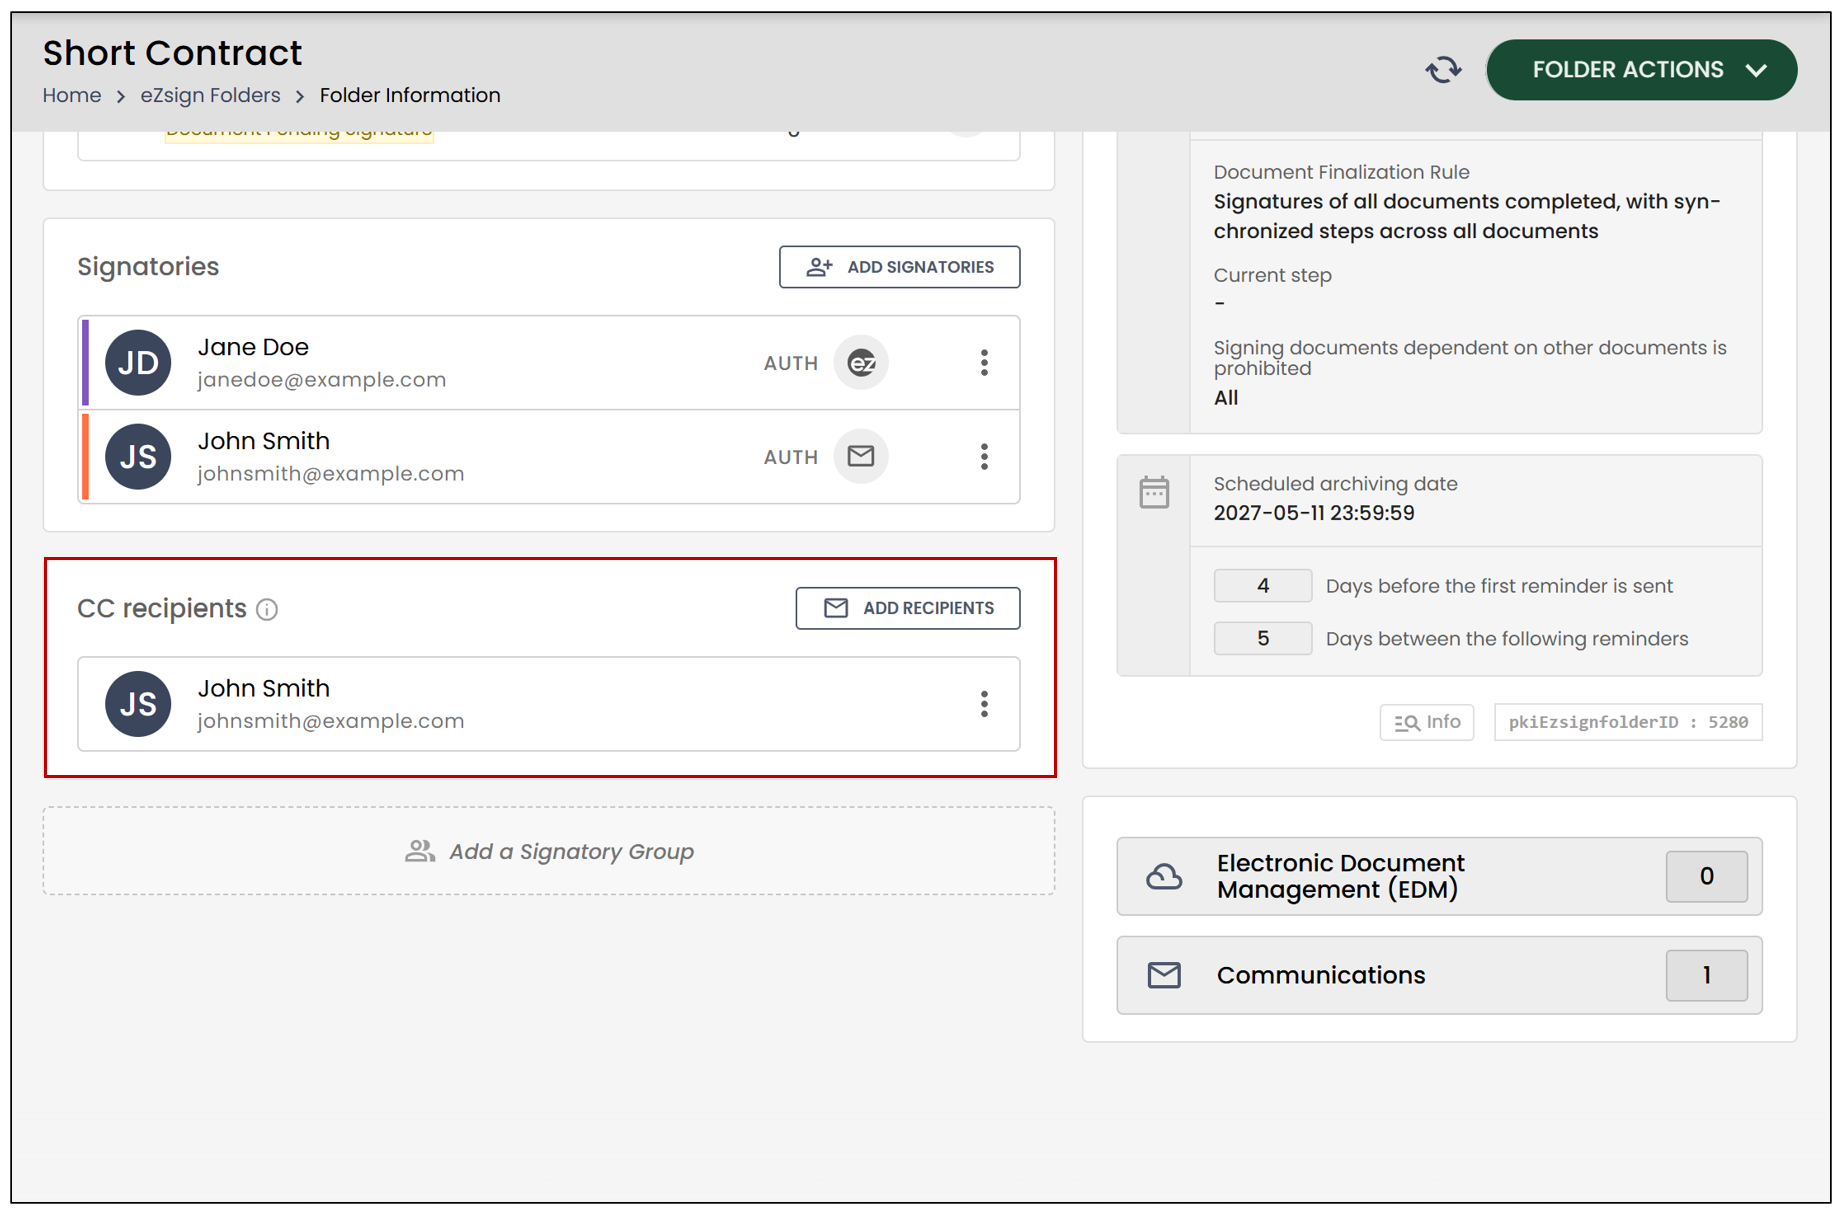
CC Recipients
For more information about CC recipients, please refer to the article Managing CC Recipients.
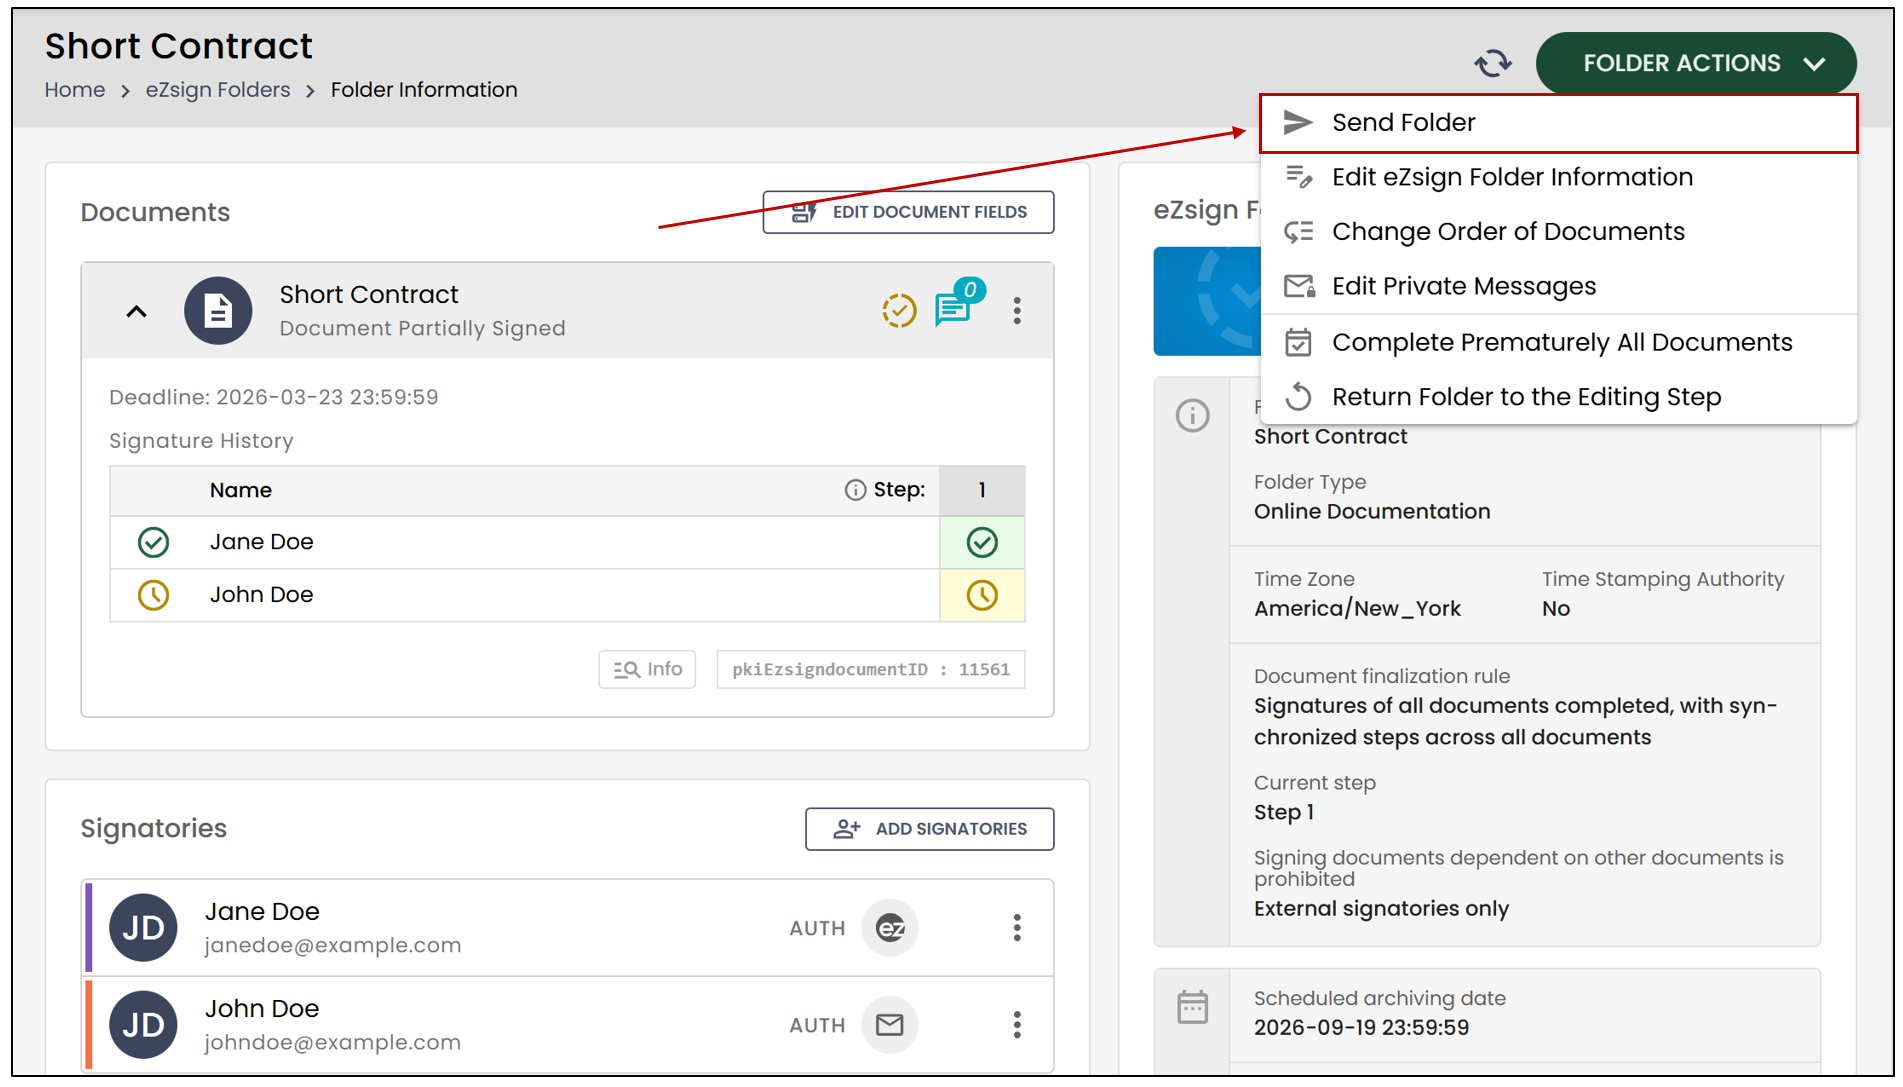
Send an eZsign Folder
- To send an eZsign folder, click on Send Folder. This will allow you to send a folder to one of the signers, notifying them that they have a document to review and sign.
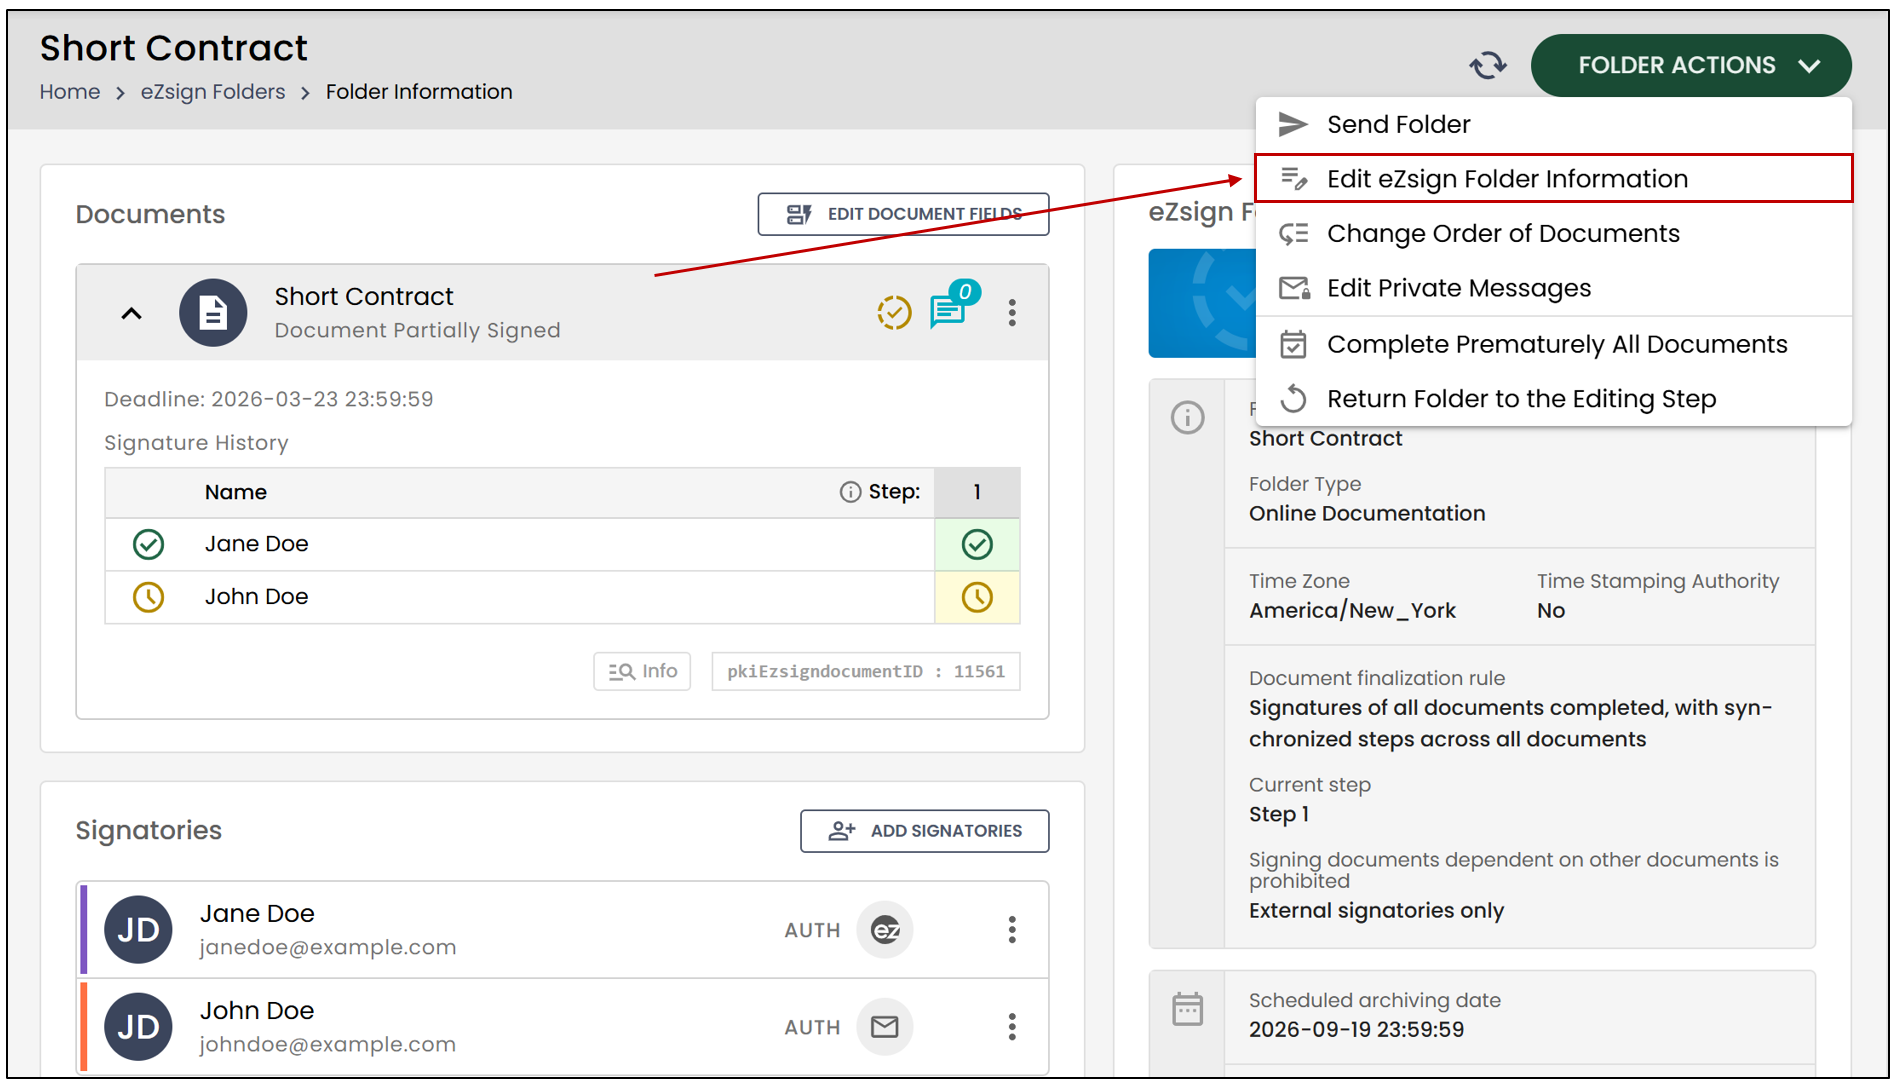
Edit eZsign Folder Information
Once a folder is created, you can modify its information, including the name, reminder frequency, and notes.
- When you are in the folder to be modified, click on the downward arrow (to the right of the Send Folder button) to Edit eZsign Folder Information.
- Make the desired changes and click on Save.
NOTE: Once the folder is created, you will not be able to modify the Folder Type, Time Stamping Authority, or the Conditions for completing a document.
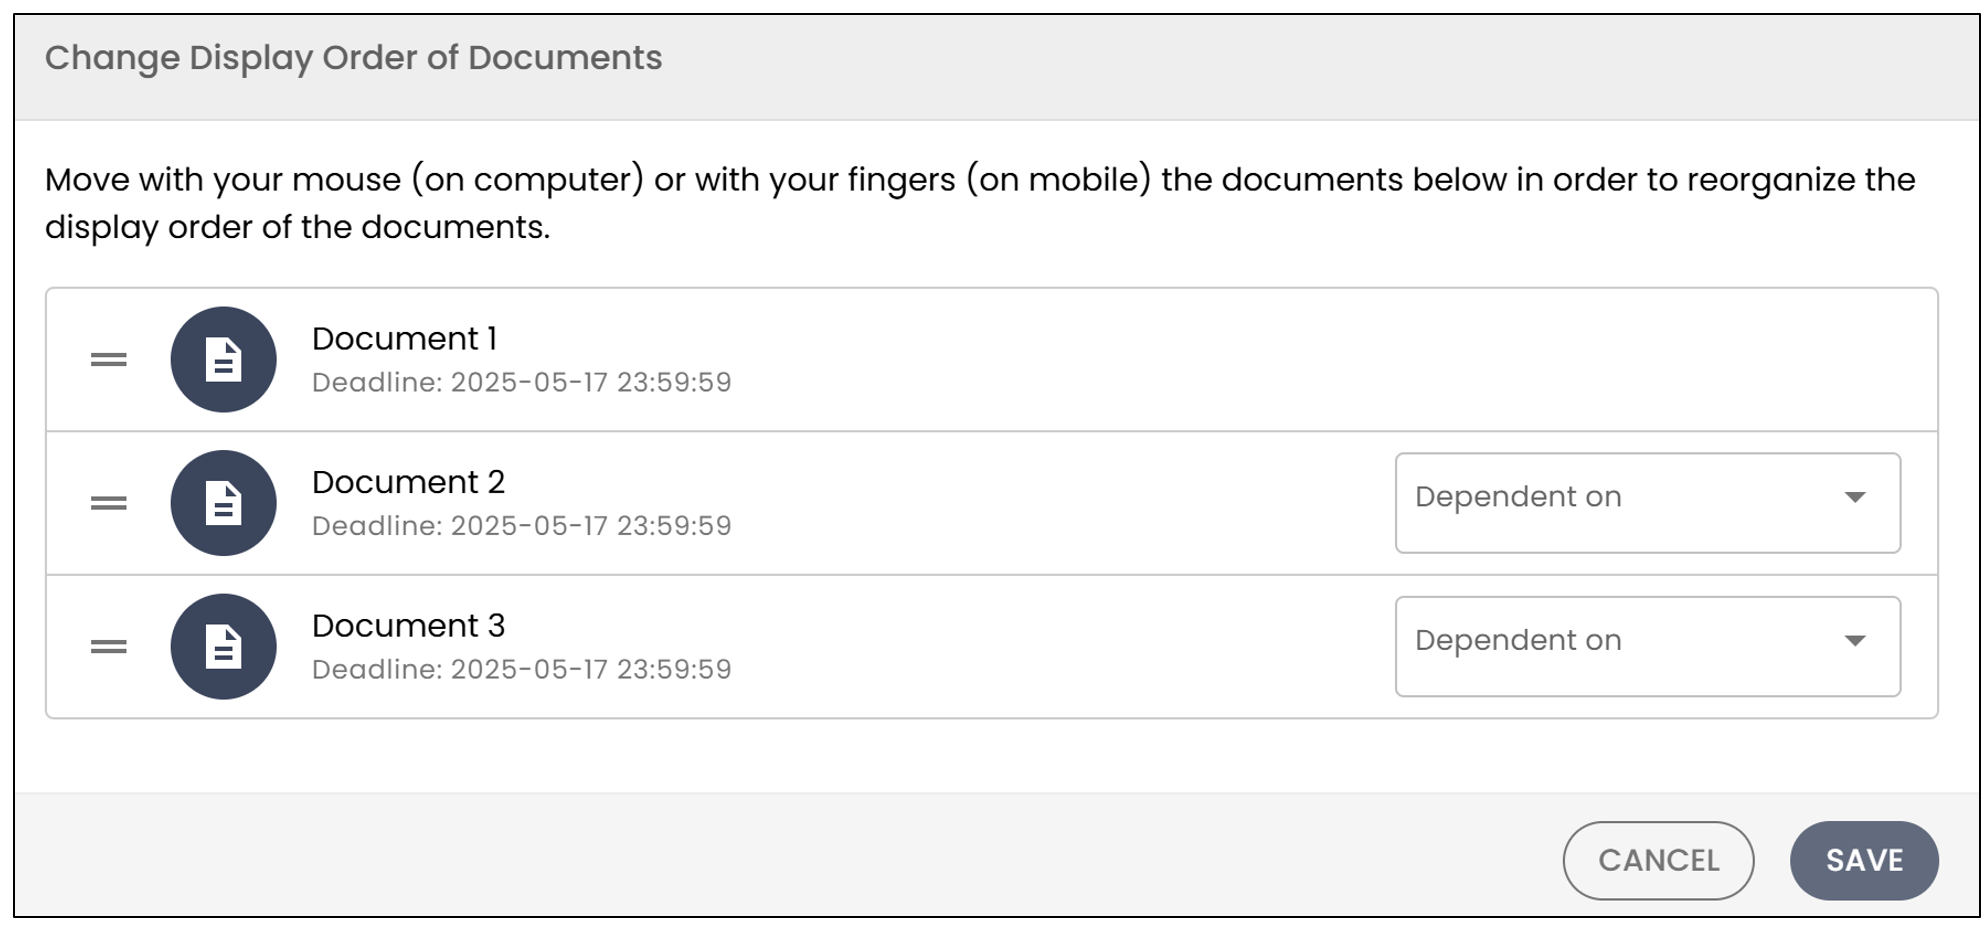
Change the order of documents
This feature allows you to change the order in which documents will appear in your folder.
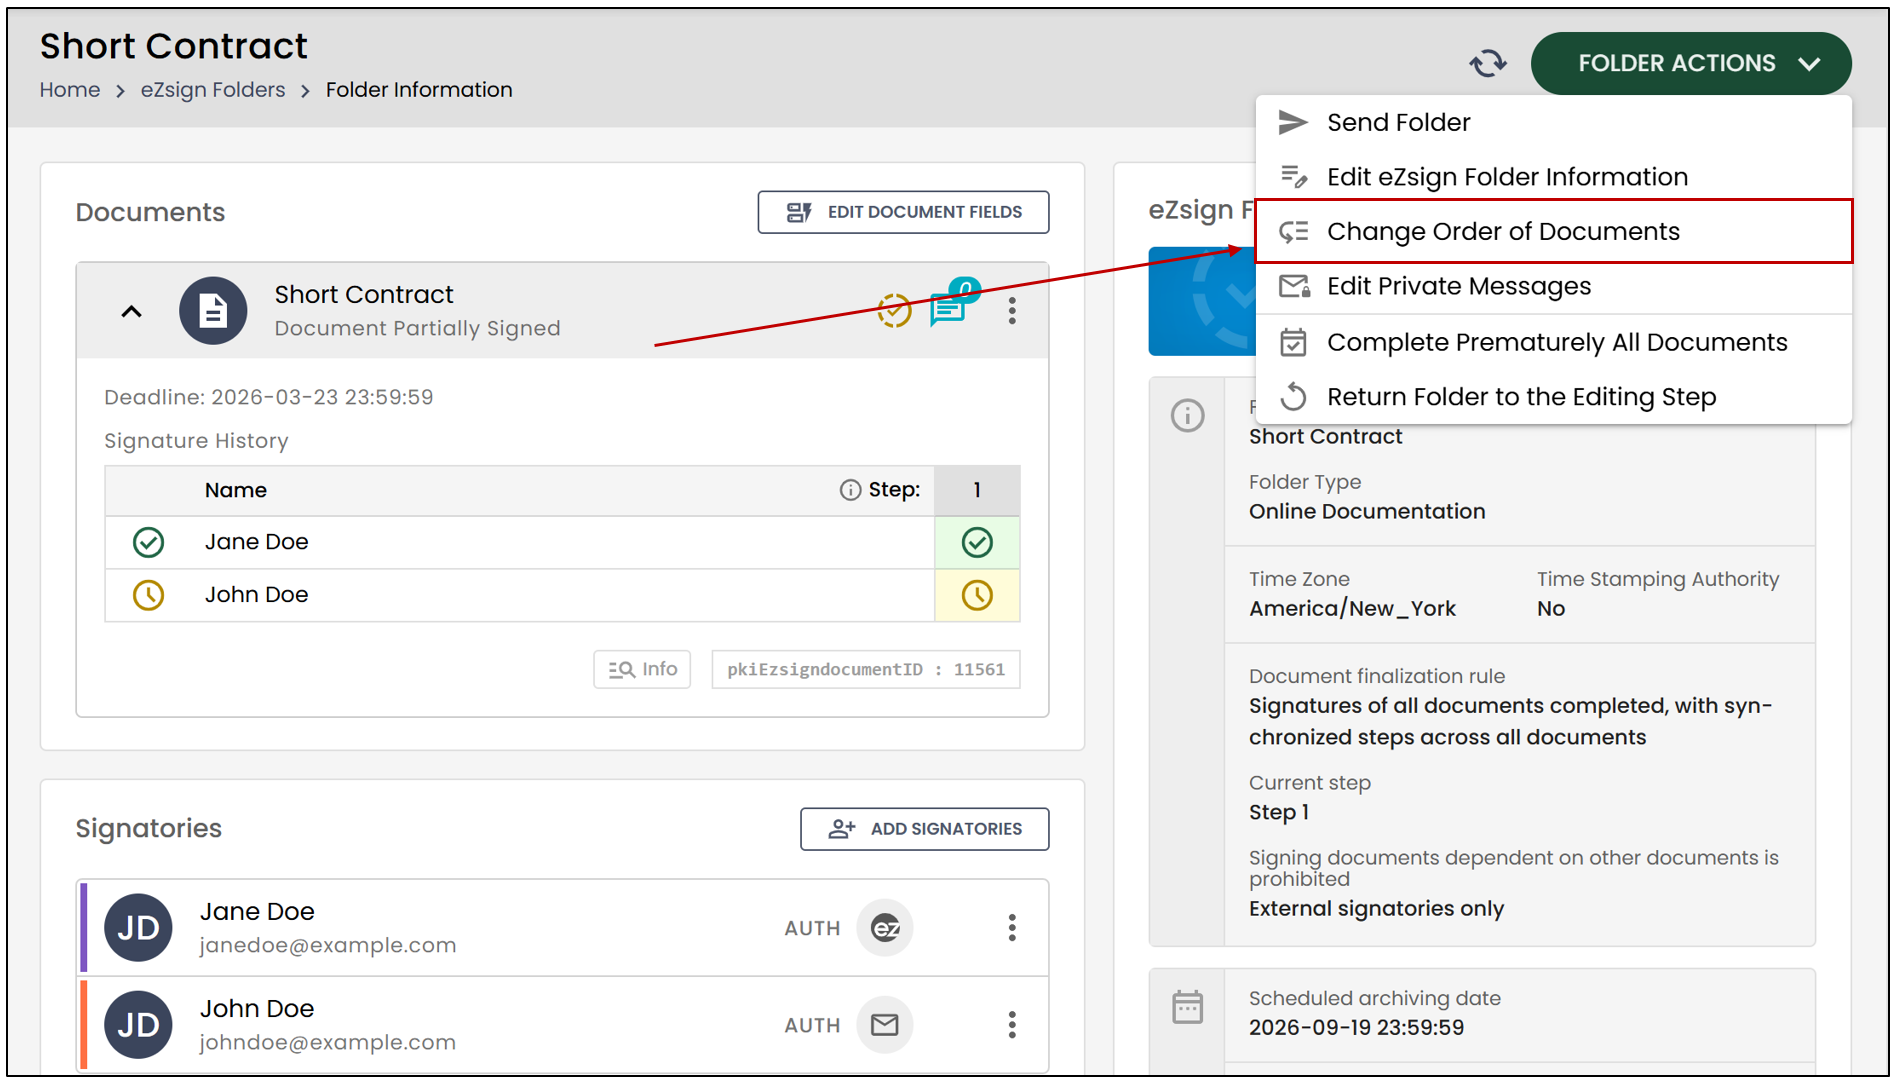
- Move the documents to reorganize them, and click on Save.
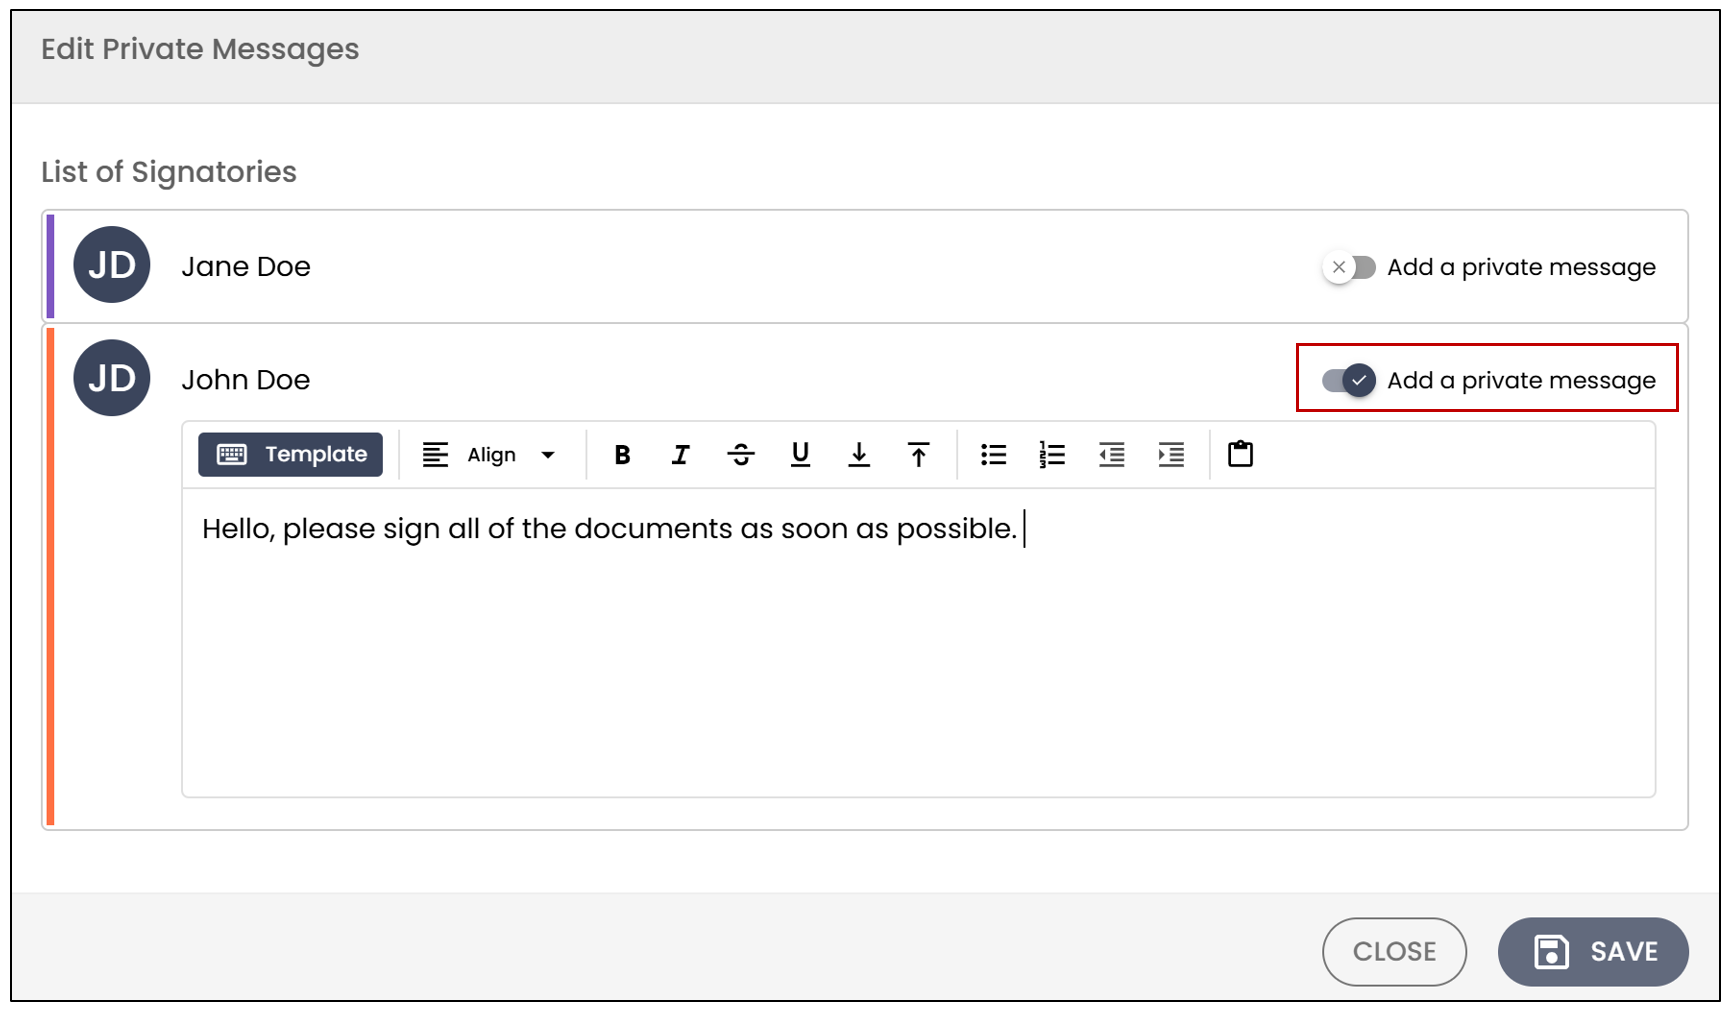
Edit Private Messages
- Allows you to modify the private messages sent to signers.
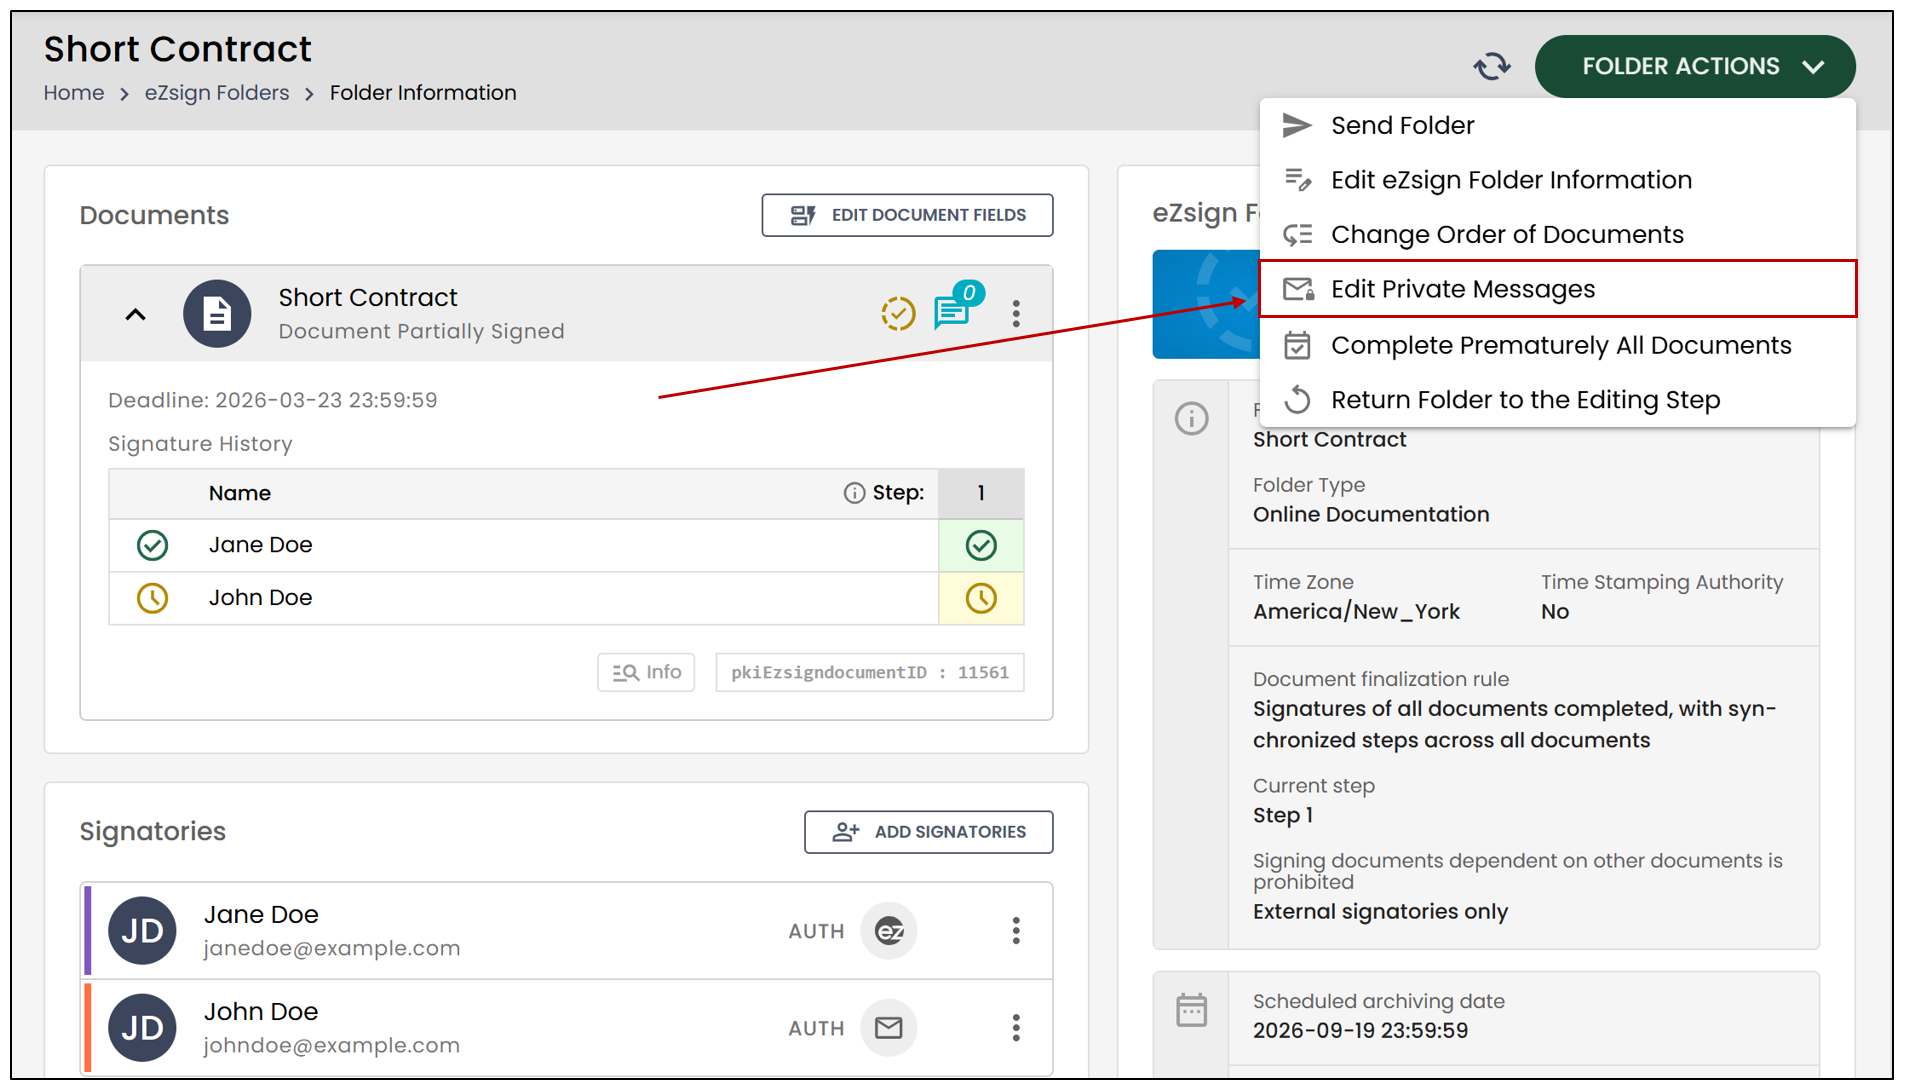
- Activate the option next to the desired signatory and type your message.
Complete Prematurely All Documents
- Allows you to prematurely complete all the documents in the folder.
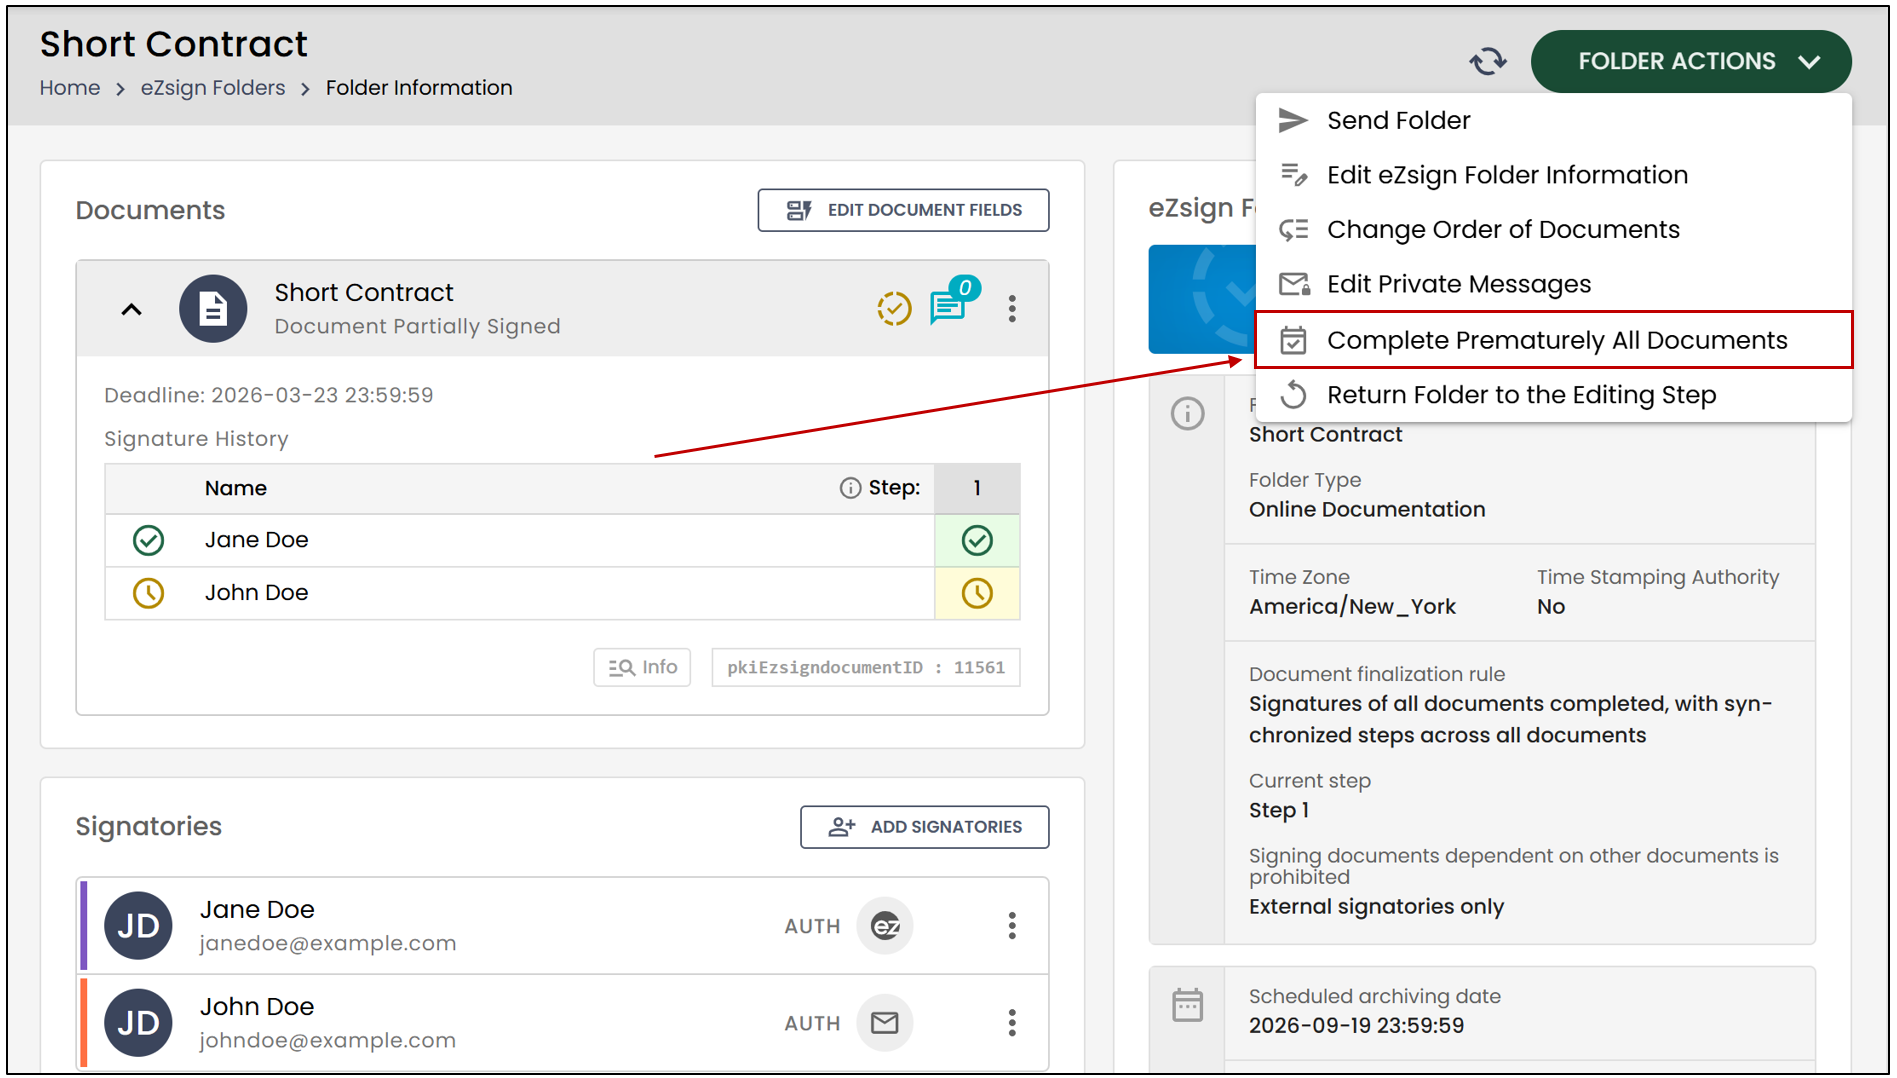
- This warning message will appear:
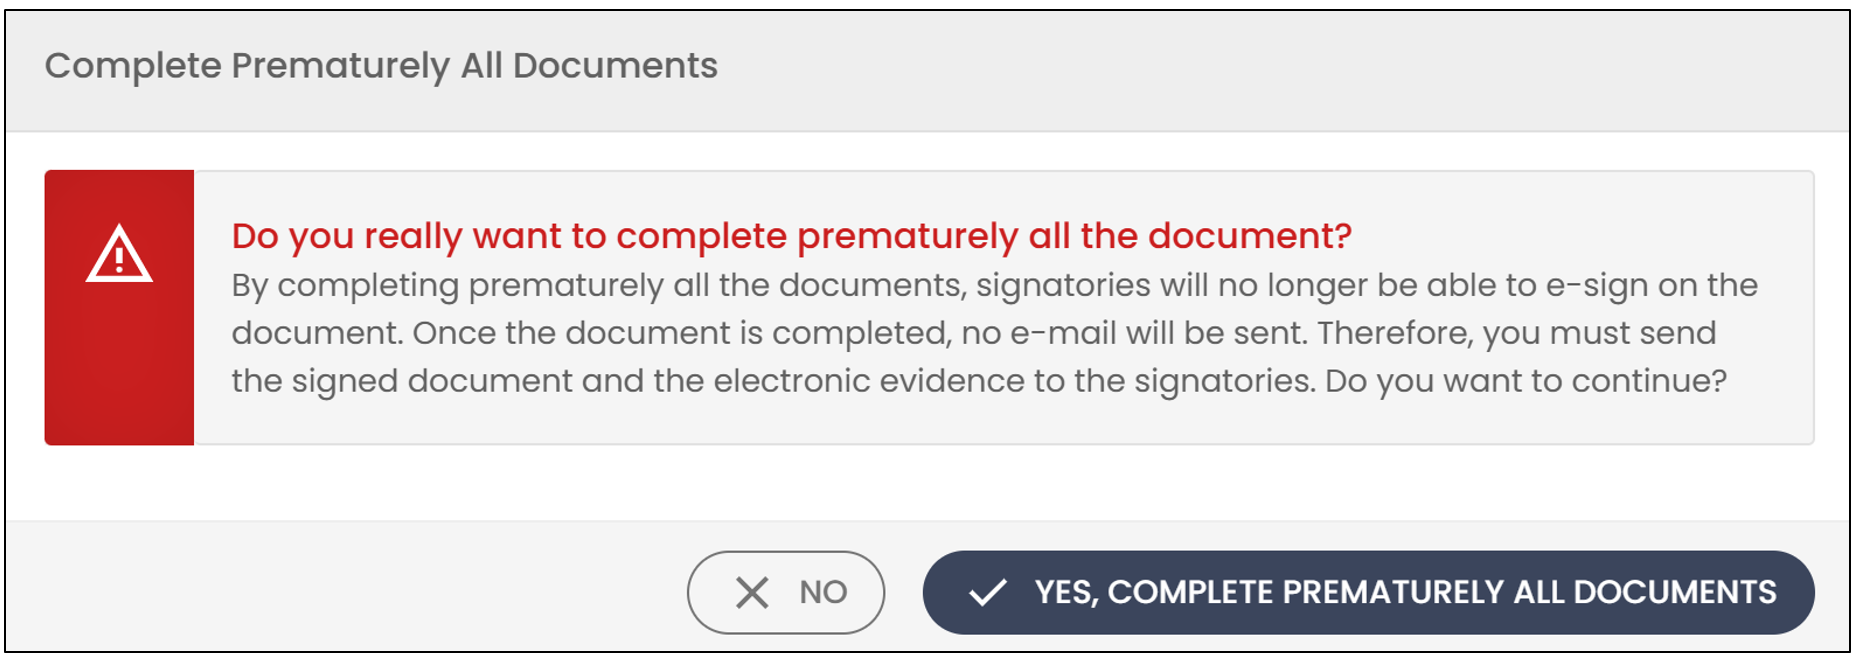
- Click on Yes, complete prematurely all documents to confirm.
For more information, see the article Premature Completion of an eZsign Folder.
Return Folder to the Editing Step
- Allows you to return the folder to the modification stage; any pending signatures in the incomplete documents will be lost, but you will be able to edit all fields in the documents.
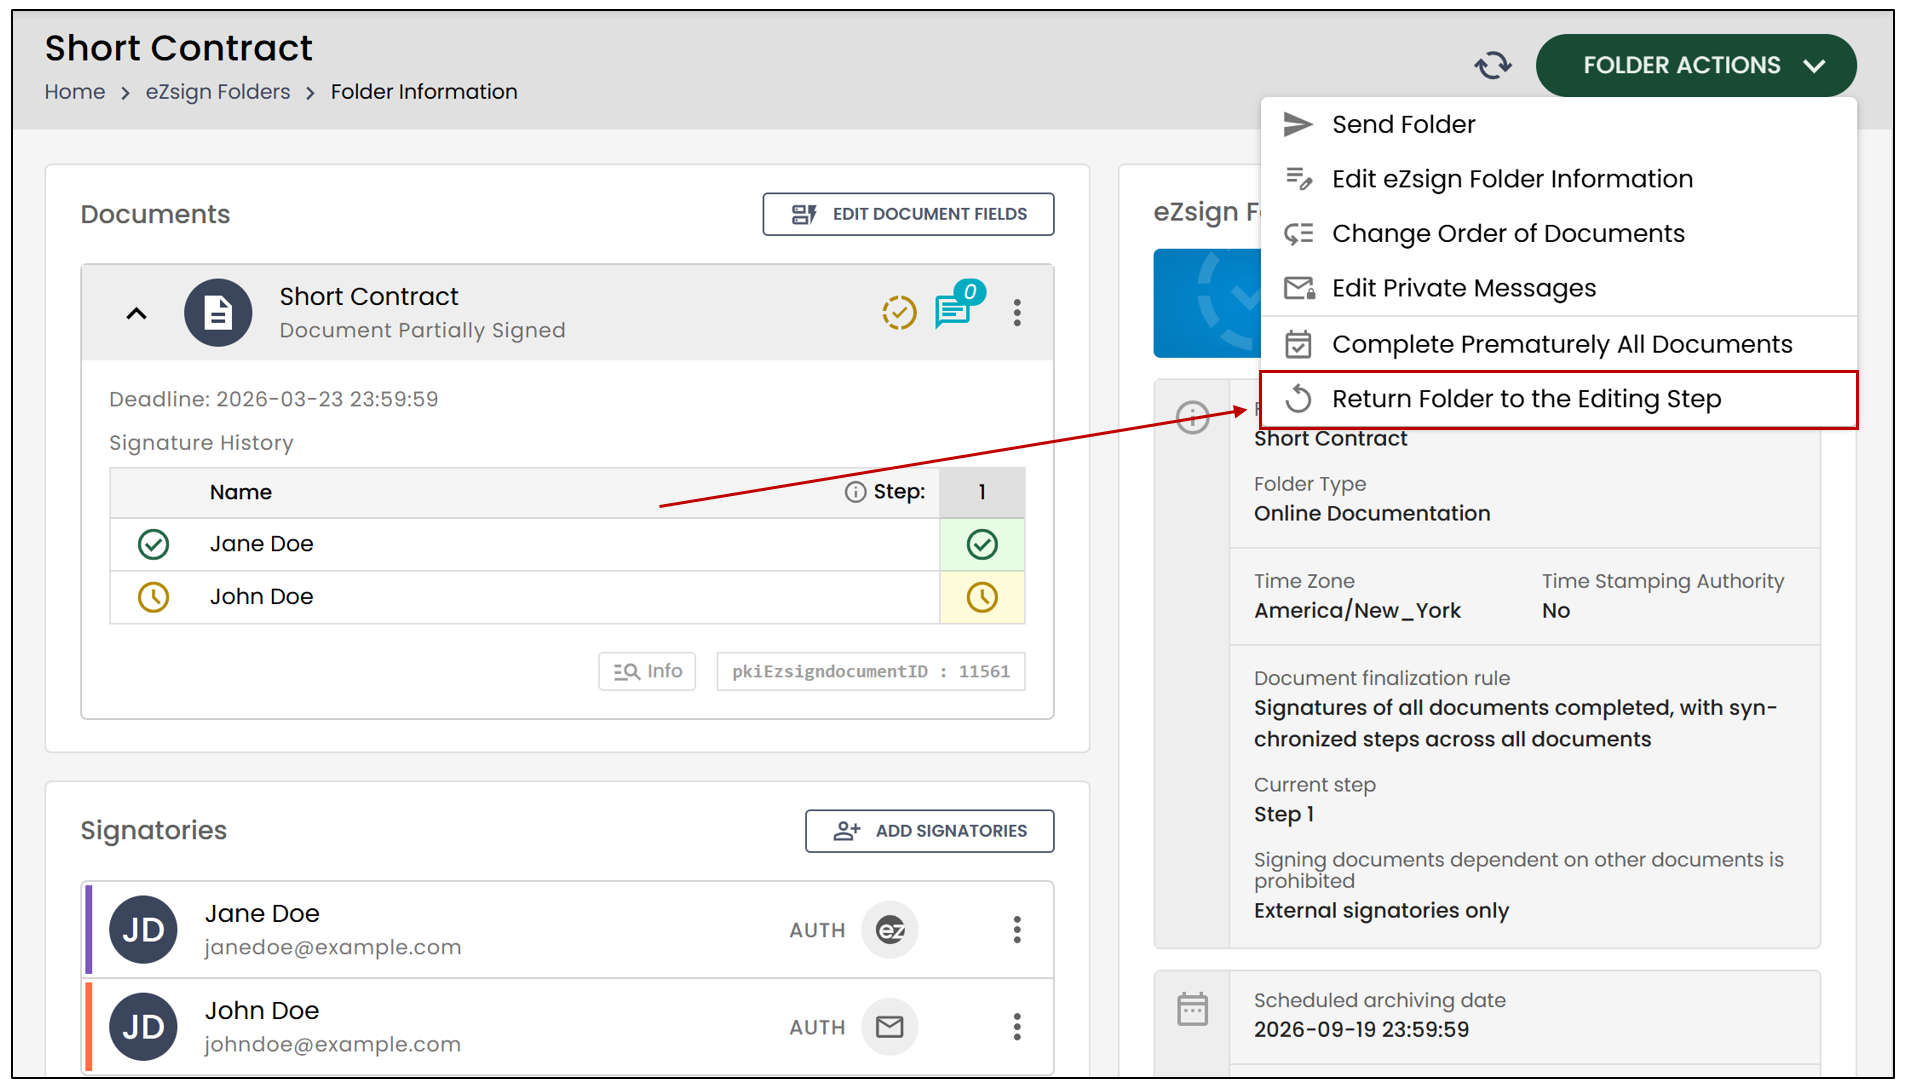
- This warning message will appear:
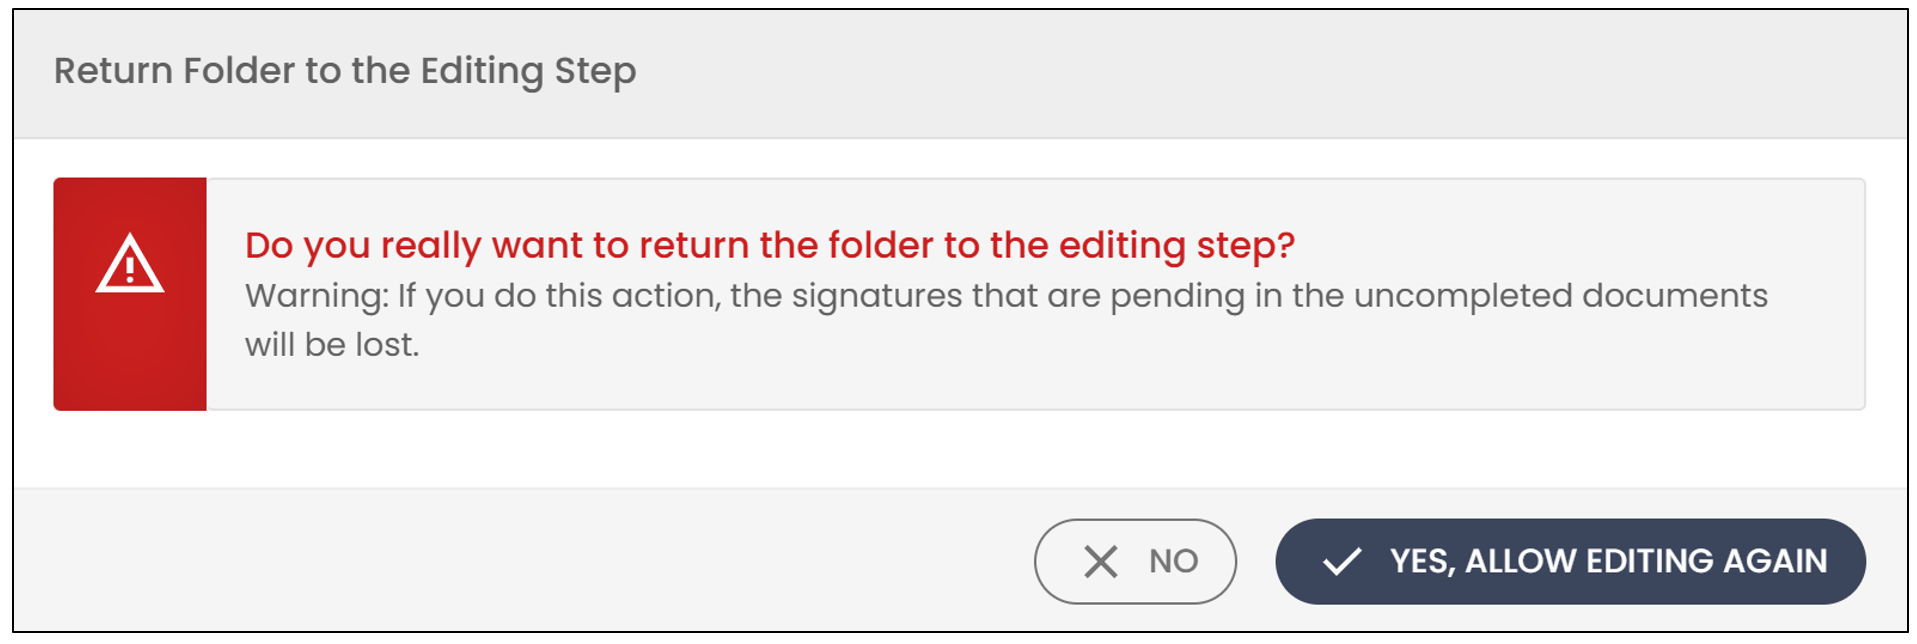
- Click on Yes, allow editing again.
Archive an eZsign folder
It is possible to archive an eZsign folder whether personal or shared, but only if it contains completed documents.
Warning
Once a folder is archived, it will no longer be possible to add new signatures or documents, but you will be able to view those that have already been applied to this folder.
An eZsign folder is archived automatically based on the number of days that have been configured. An archived folder cannot be reactivated, but you can create a new folder with the same name by adding "(2)" at the end, for example.
- Once in the folder to be archived, under Folder Actions , click on Archive eZsign Folder.
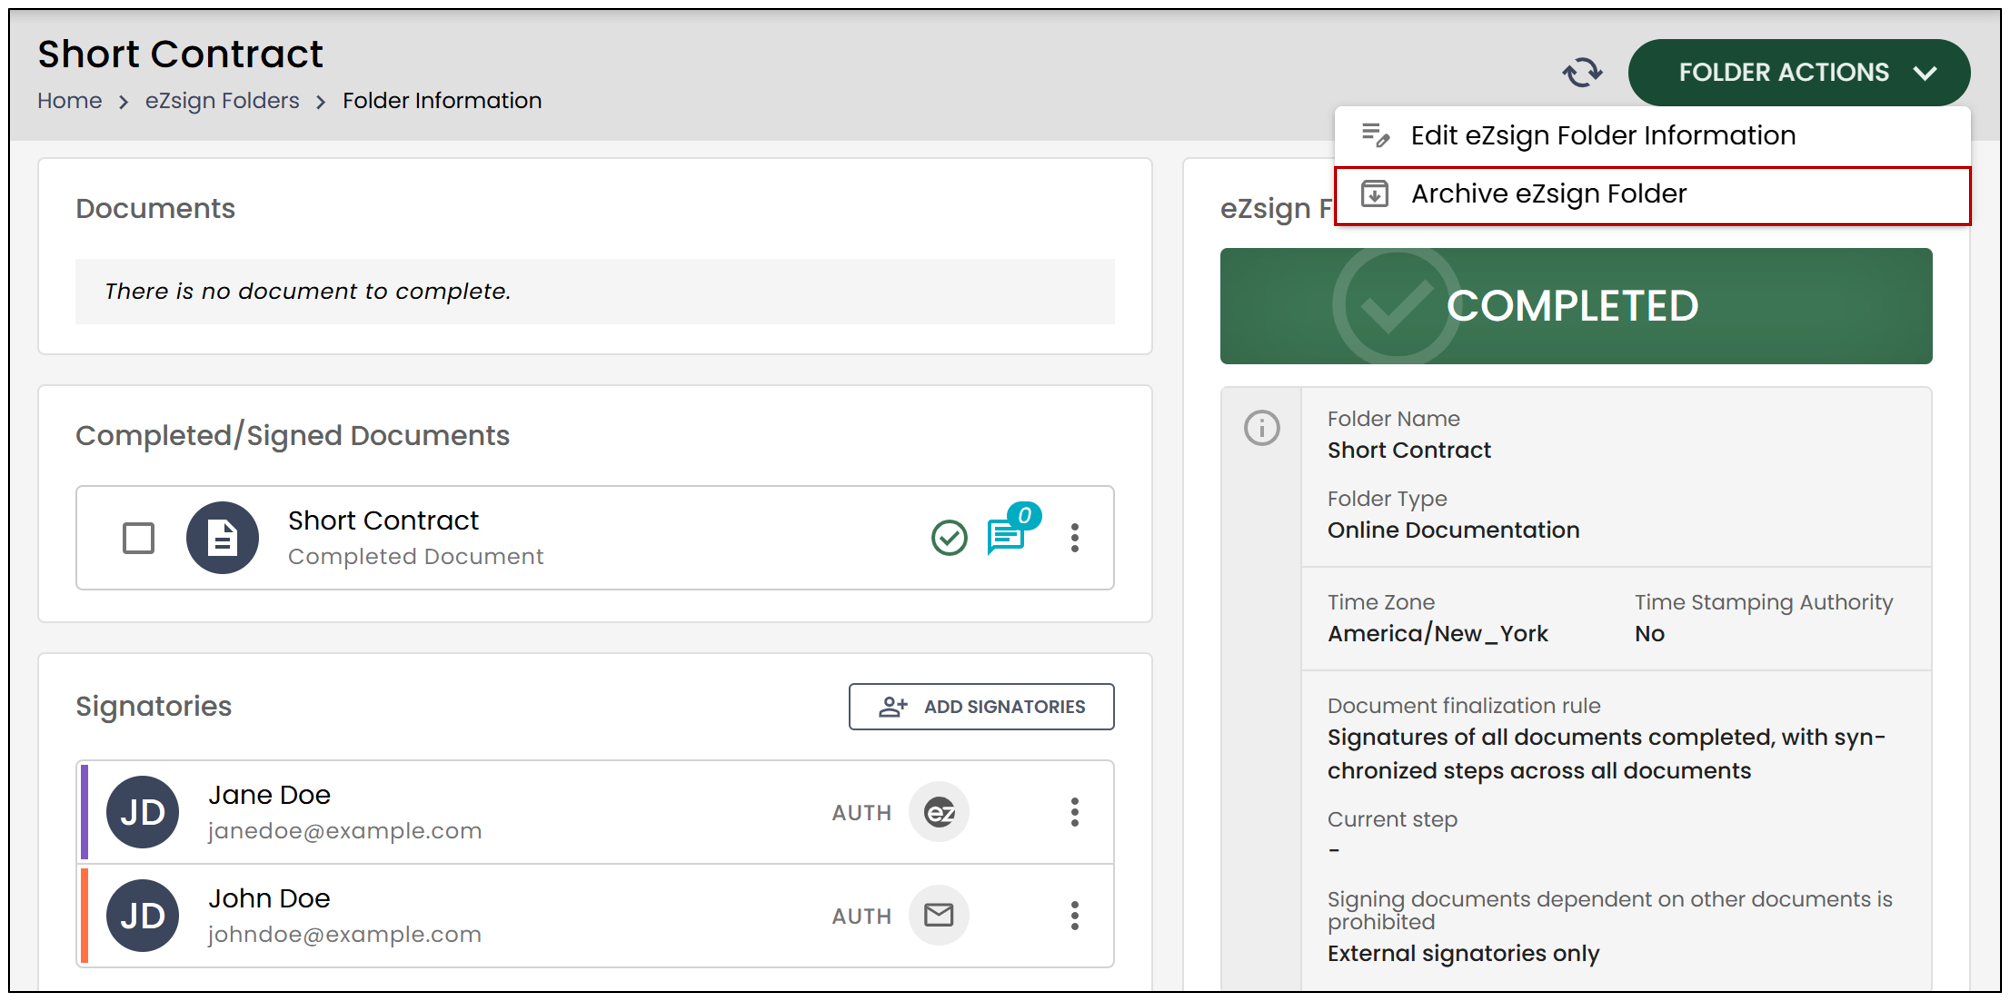
- This warning message will appear:
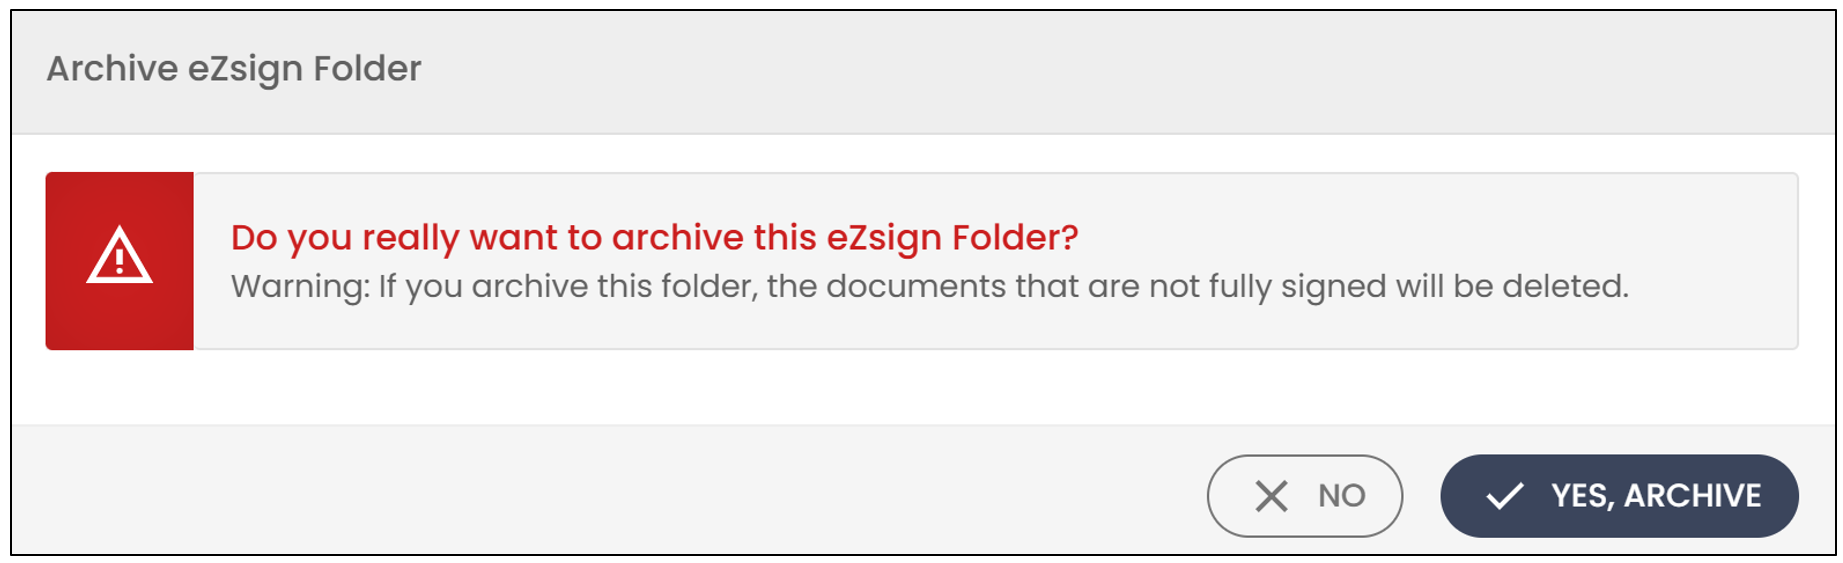
- Click on Yes, Archive to continue.
NOTE: You can archive a folder directly from the list of folders by clicking on the three vertical dots to the right of it.
Delete an eZsign Folder
It is possible to delete an eZsign folder, whether personal or shared, but only if no documents have been completed within the folder. Once a document has obtained the status of completed, the folder can no longer be deleted; it can only be eliminated.
- When you are in the folder to be deleted, click on Delete eZsign Folder.
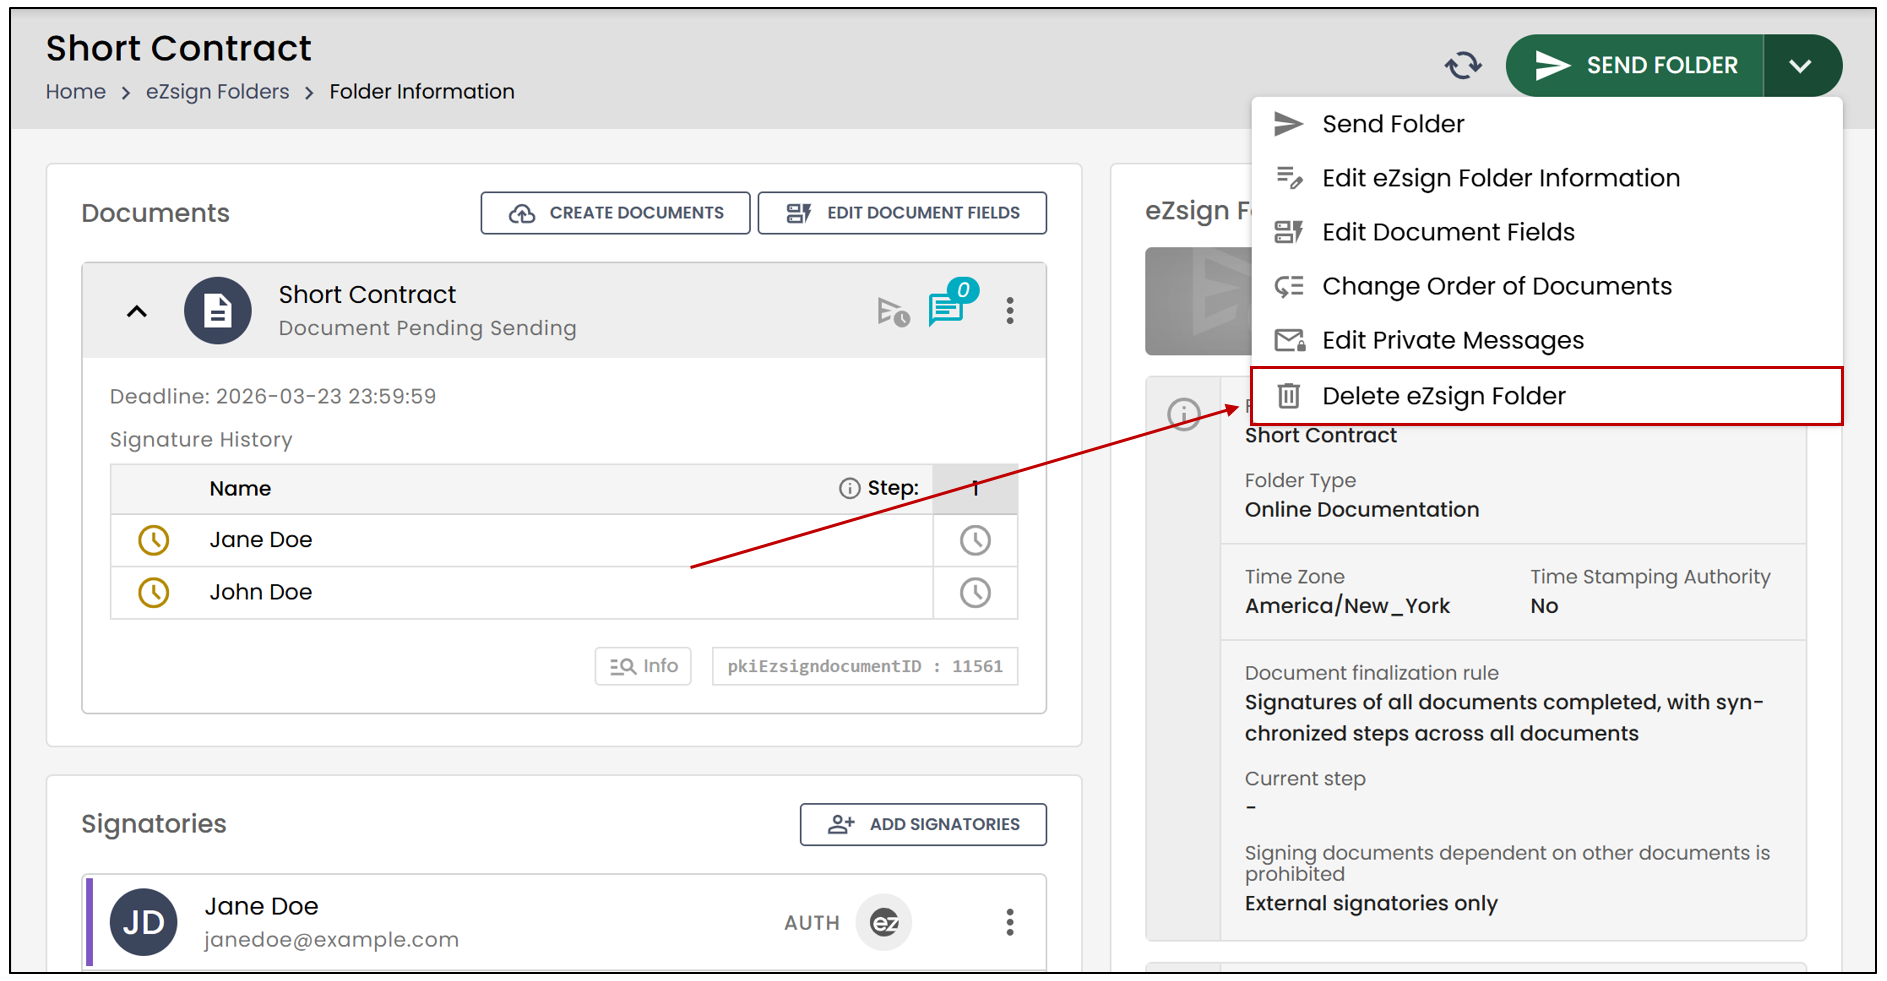
- This warning message will appear:
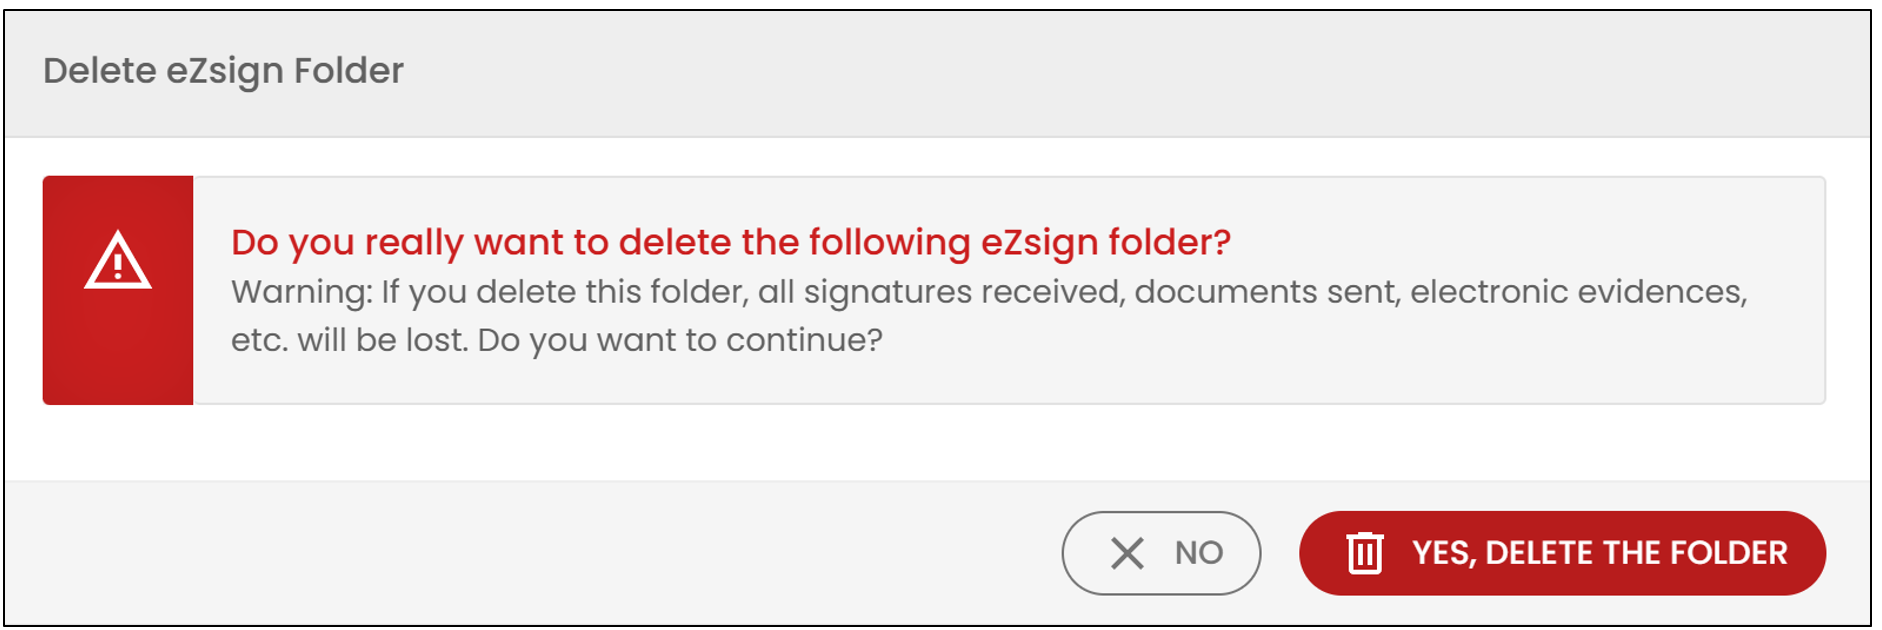
- Click on Yes, delete the folder to continue.
NOTE: You can delete a folder directly from the list of folders by clicking on the three vertical dots to the right of it.
NOTE: If a folder is partially signed, you must first return the folder to the modification stage before you can delete it.
Dispose an eZsign Folder
A folder can only be eliminated if it has been archived beforehand and if the folder type allows it.
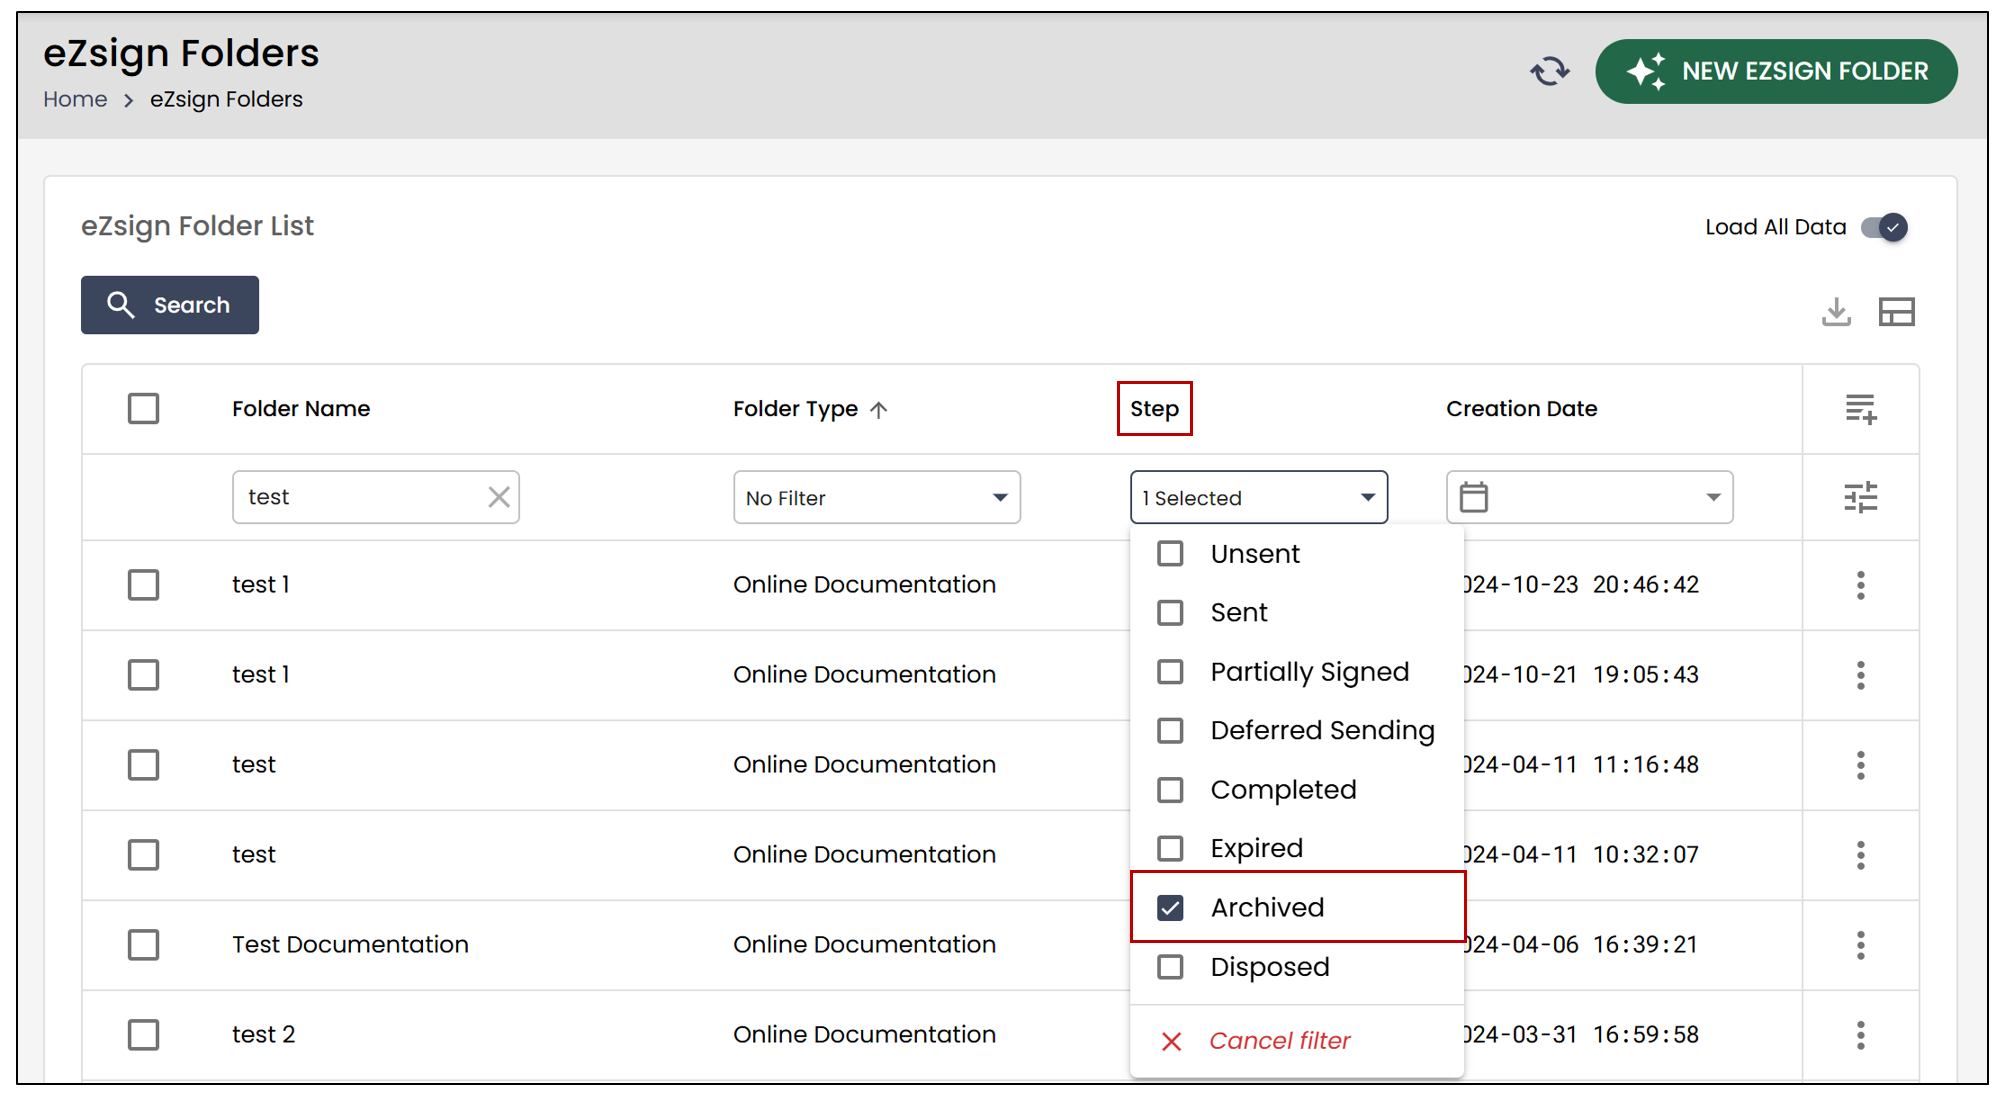
In the list of documents, you can select Archived under Step to quickly access all archived folders.
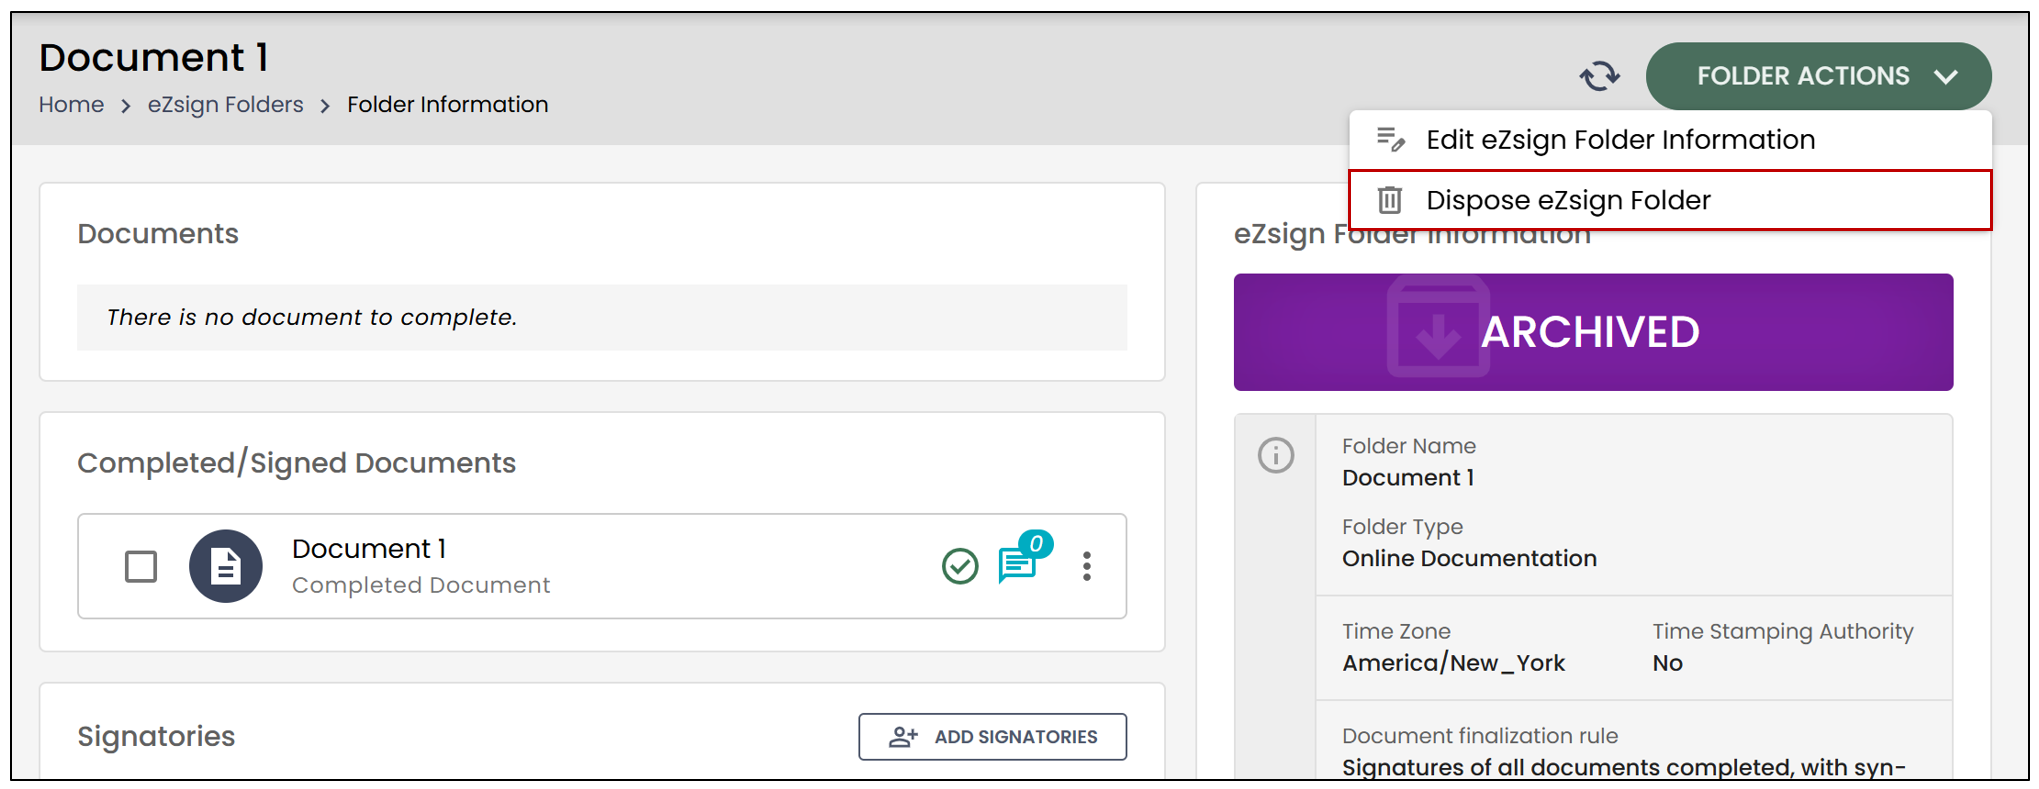
- Once you have selected the folder to be eliminated, click on Dispose eZsign Folder in the folder actions.
- This warning message will appear:
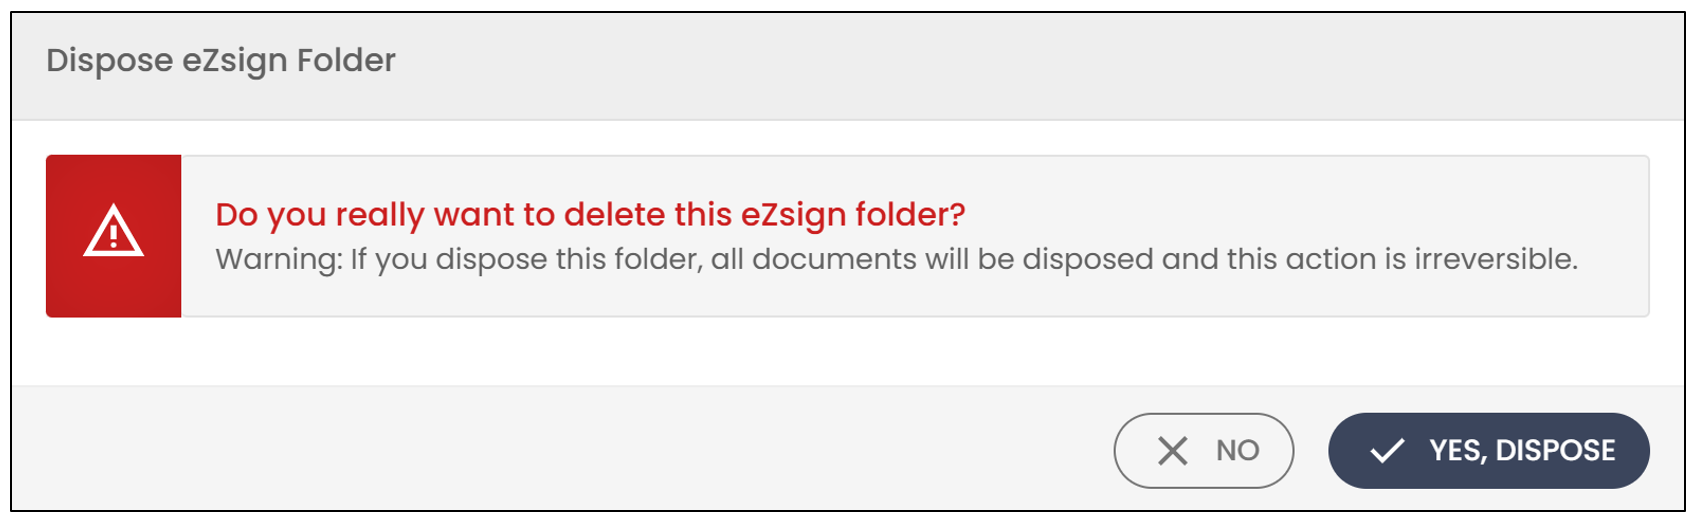
- Click on Yes, Dispose.
NOTE: If you have a manual disposition configuration, you will receive a message on your homepage when eZsign folders are ready to be eliminated. You will need to select the documents you wish to eliminate, then click on Eliminate eZsign Folders.
Reassign a signature on a partially signed document
It is now possible to reassign a signature to an internal signer (user) or an external user while retaining the previous signatures.
- From the left menu, click on eZsign Folders. Then, select the desired folder.
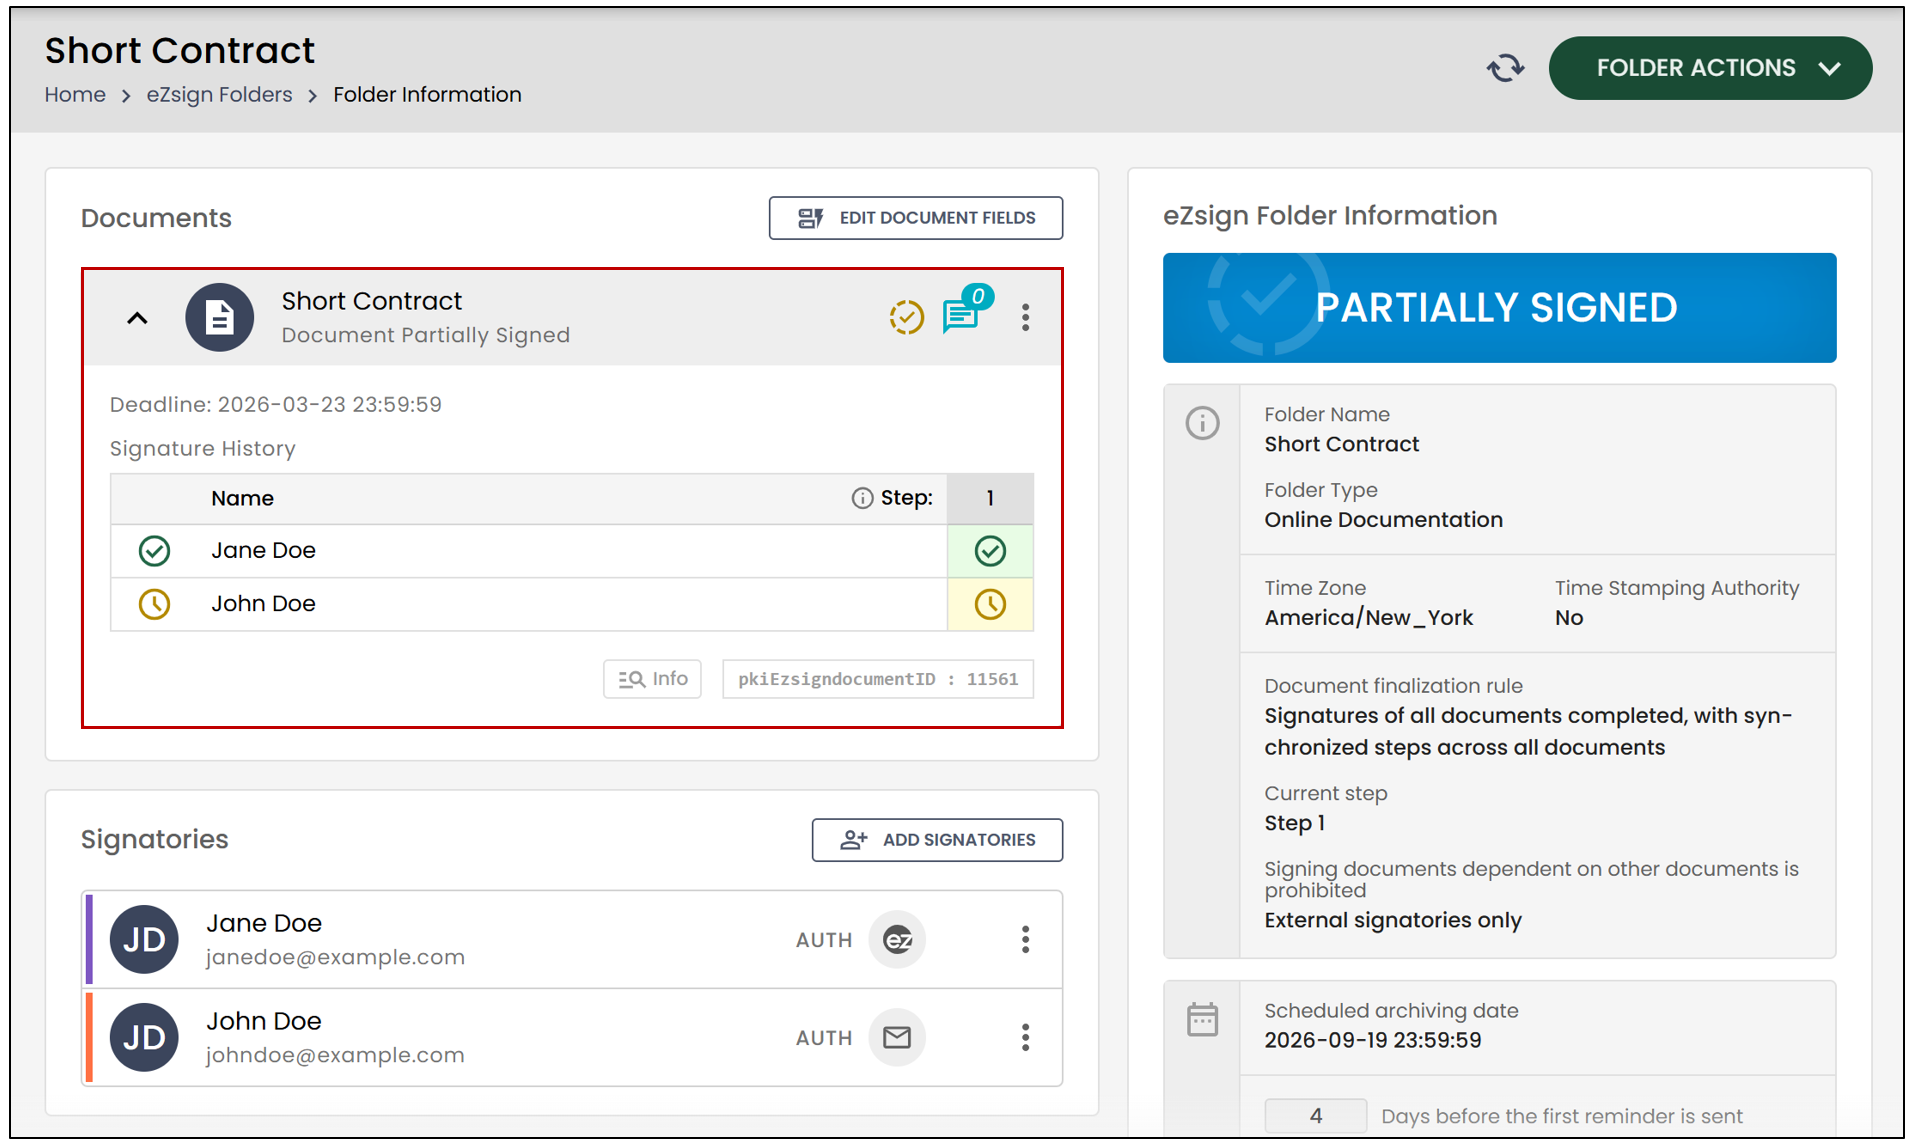
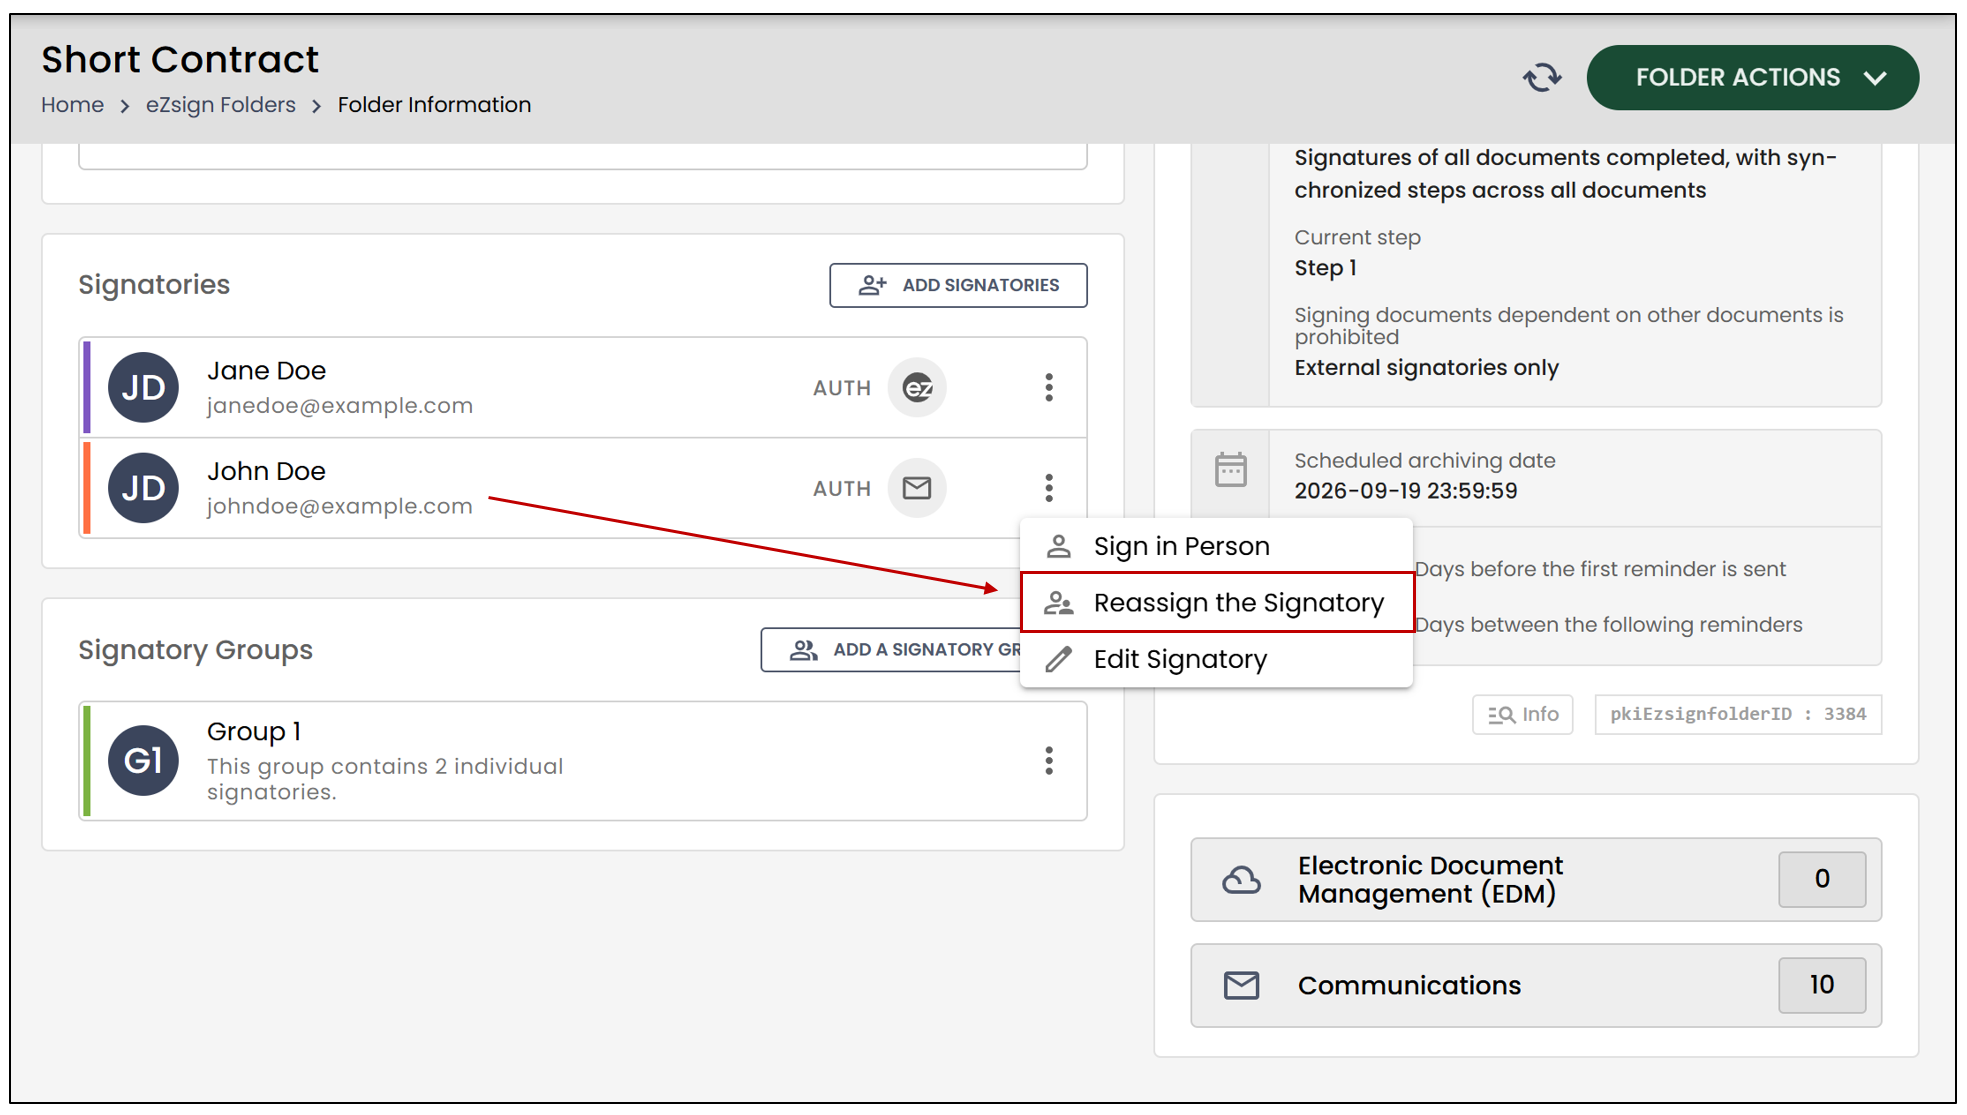
In the example below, you will see the green checkmark indicating that Jane Doe had signatures at step 1 and that she has signed.
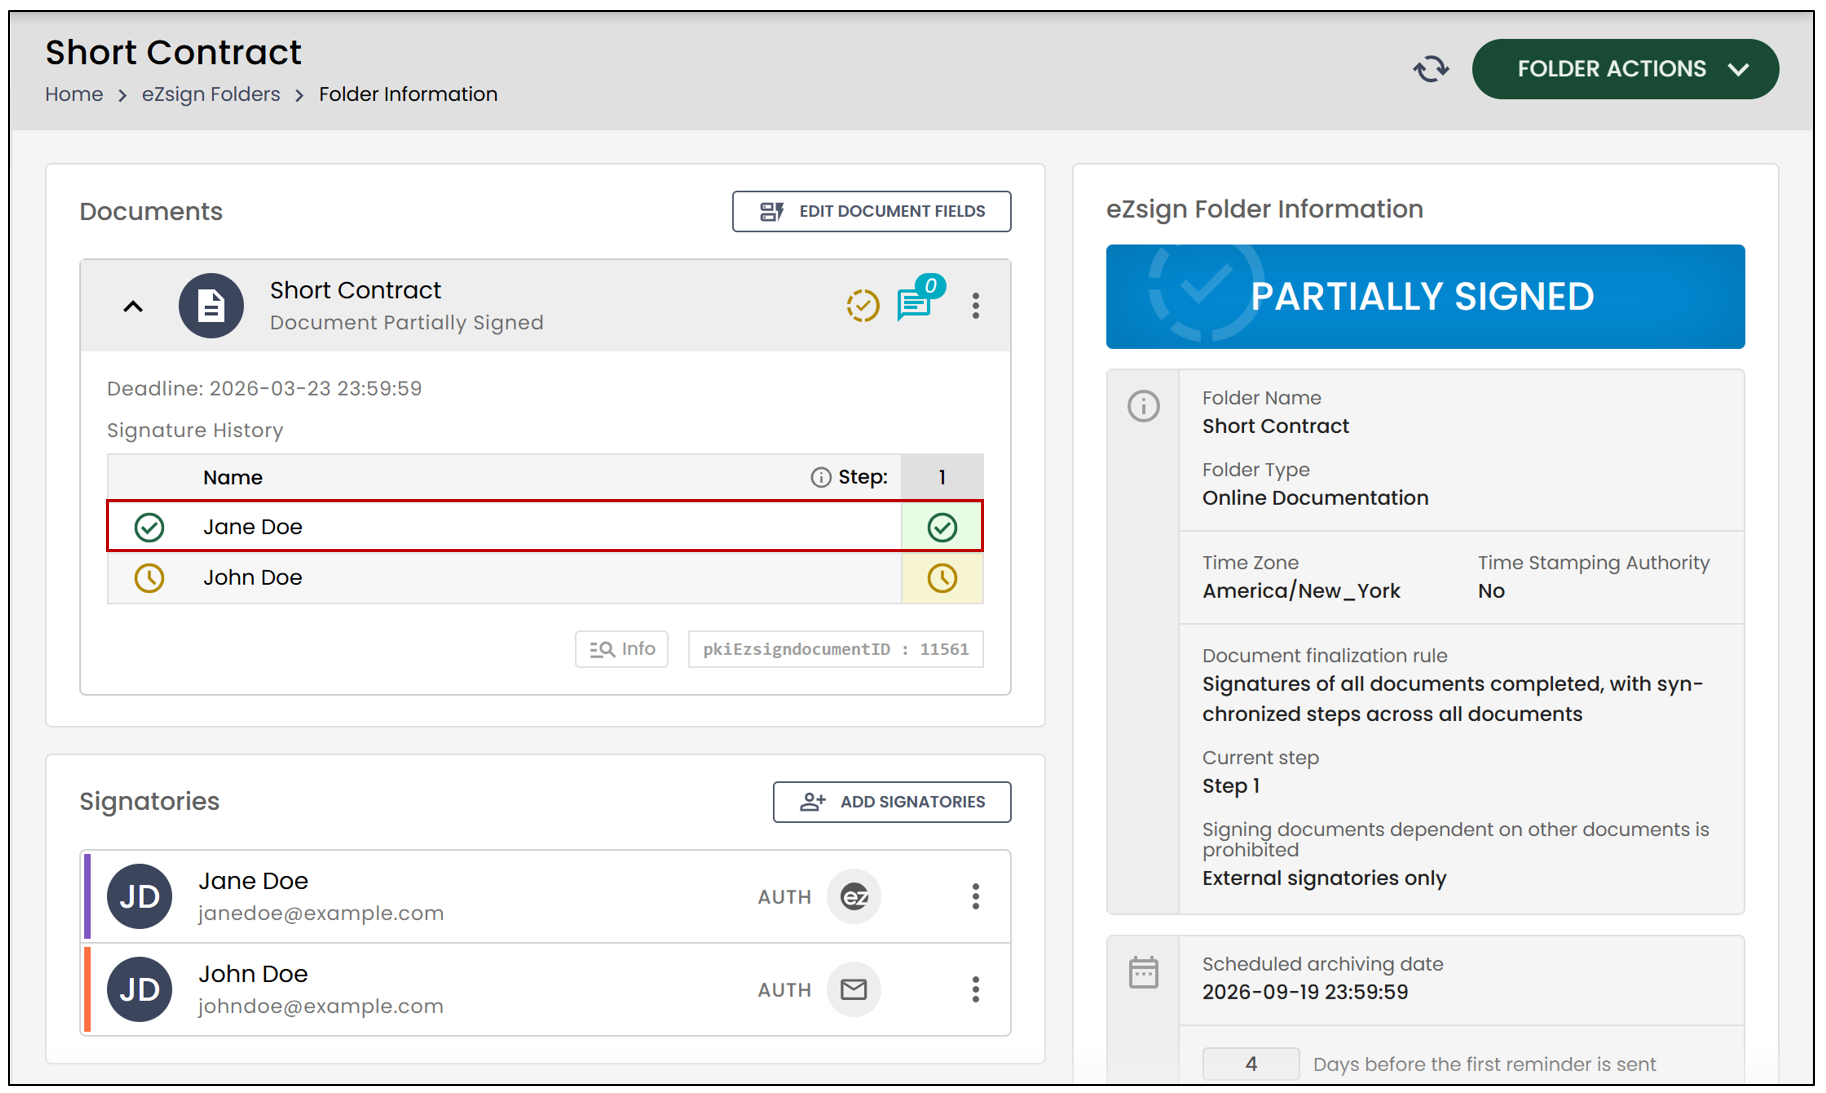
- If you wish to keep this signature but change the signer of the other fields, click on the three vertical dots to the right of the signer. Then click on Reassign the Signatory.
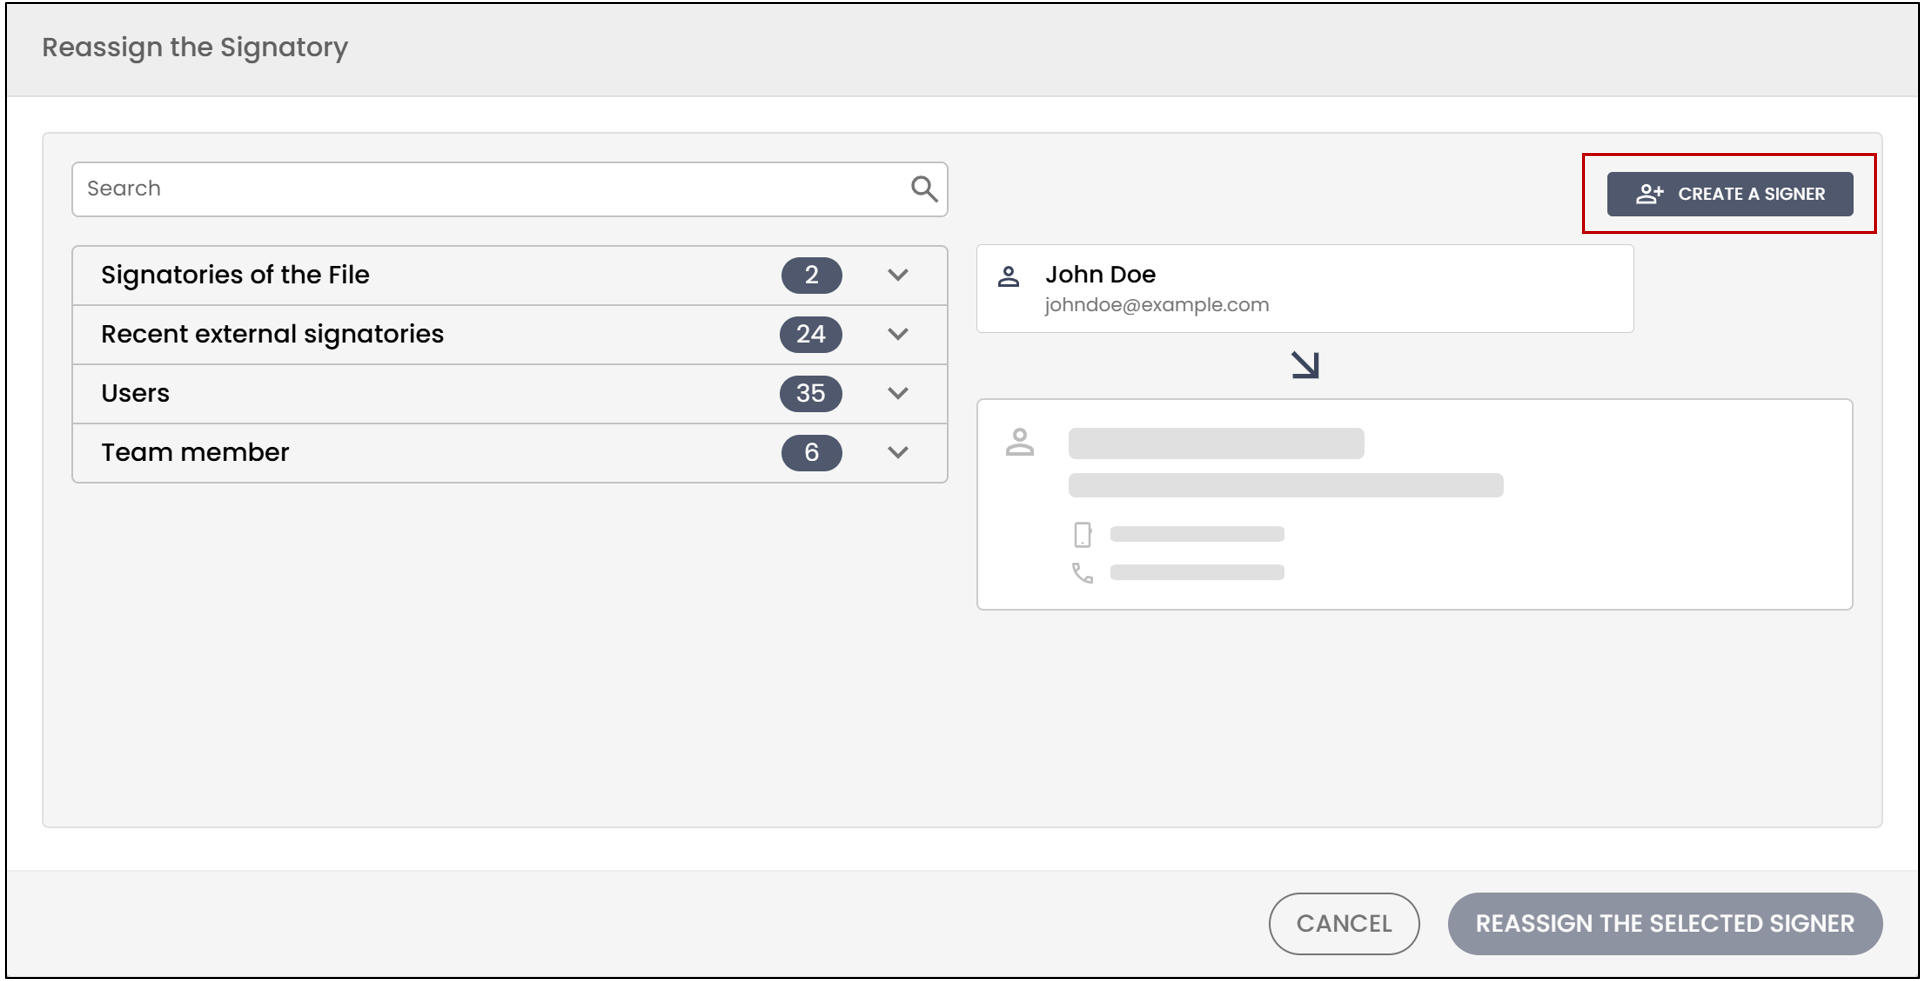
You will have the option to reassign the signature to an internal or external user. You will also have the option to create a new one.
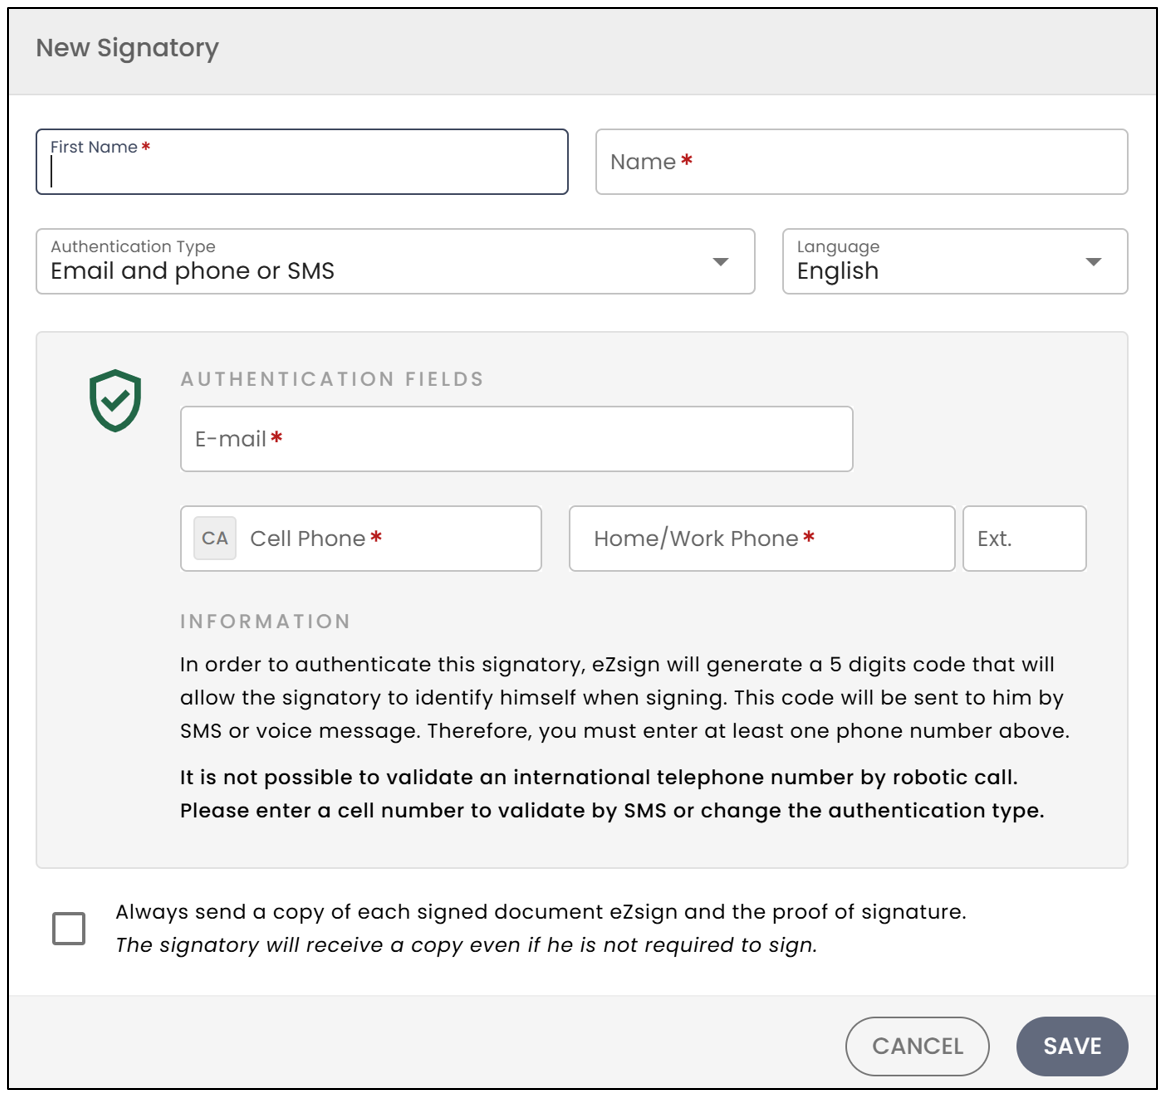
Click on Create a Signer.
- You can then enter the signer’s information and click on Save.
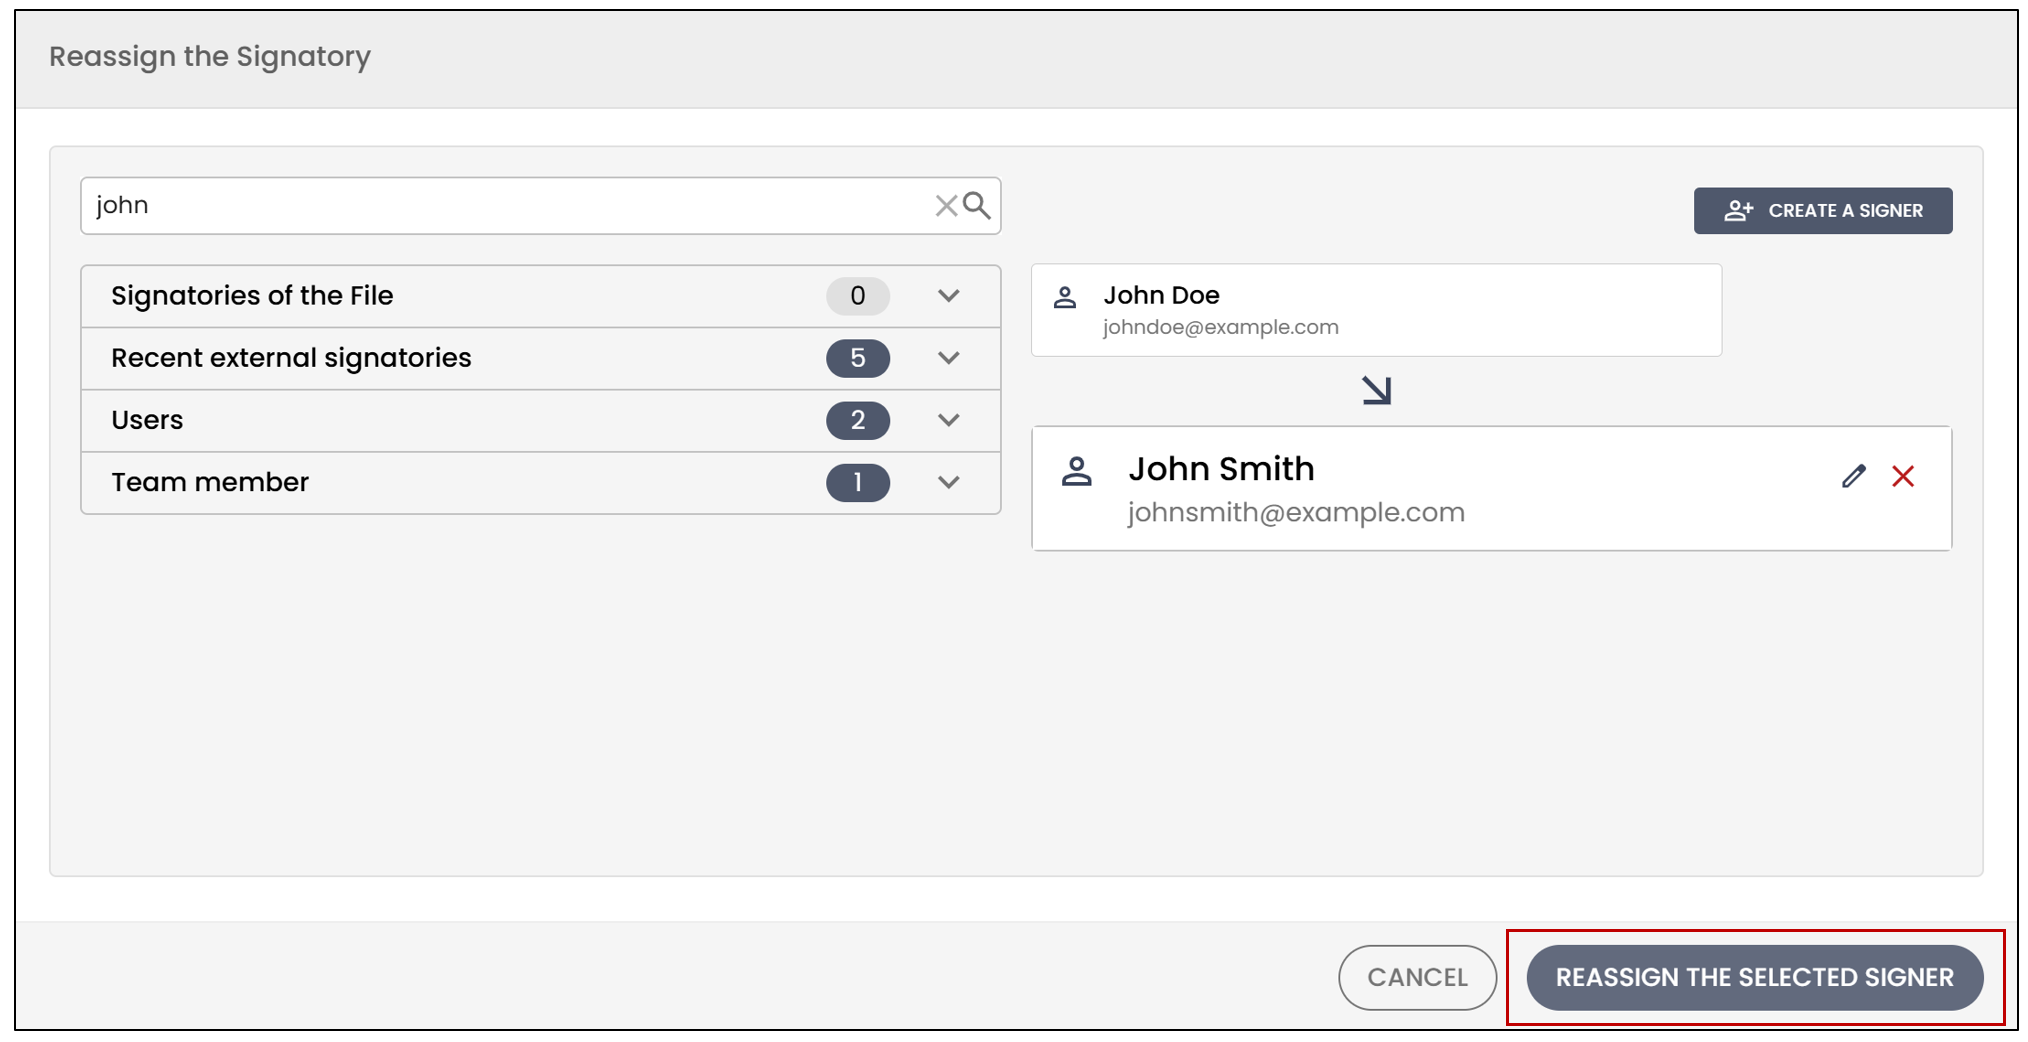
- If the desired signer is already on the list, select them, then click on Reassign the Selected Signer.
- The name of the new signer will appear in the Documents section. You will also be able to verify that all previous signatures have been retained.
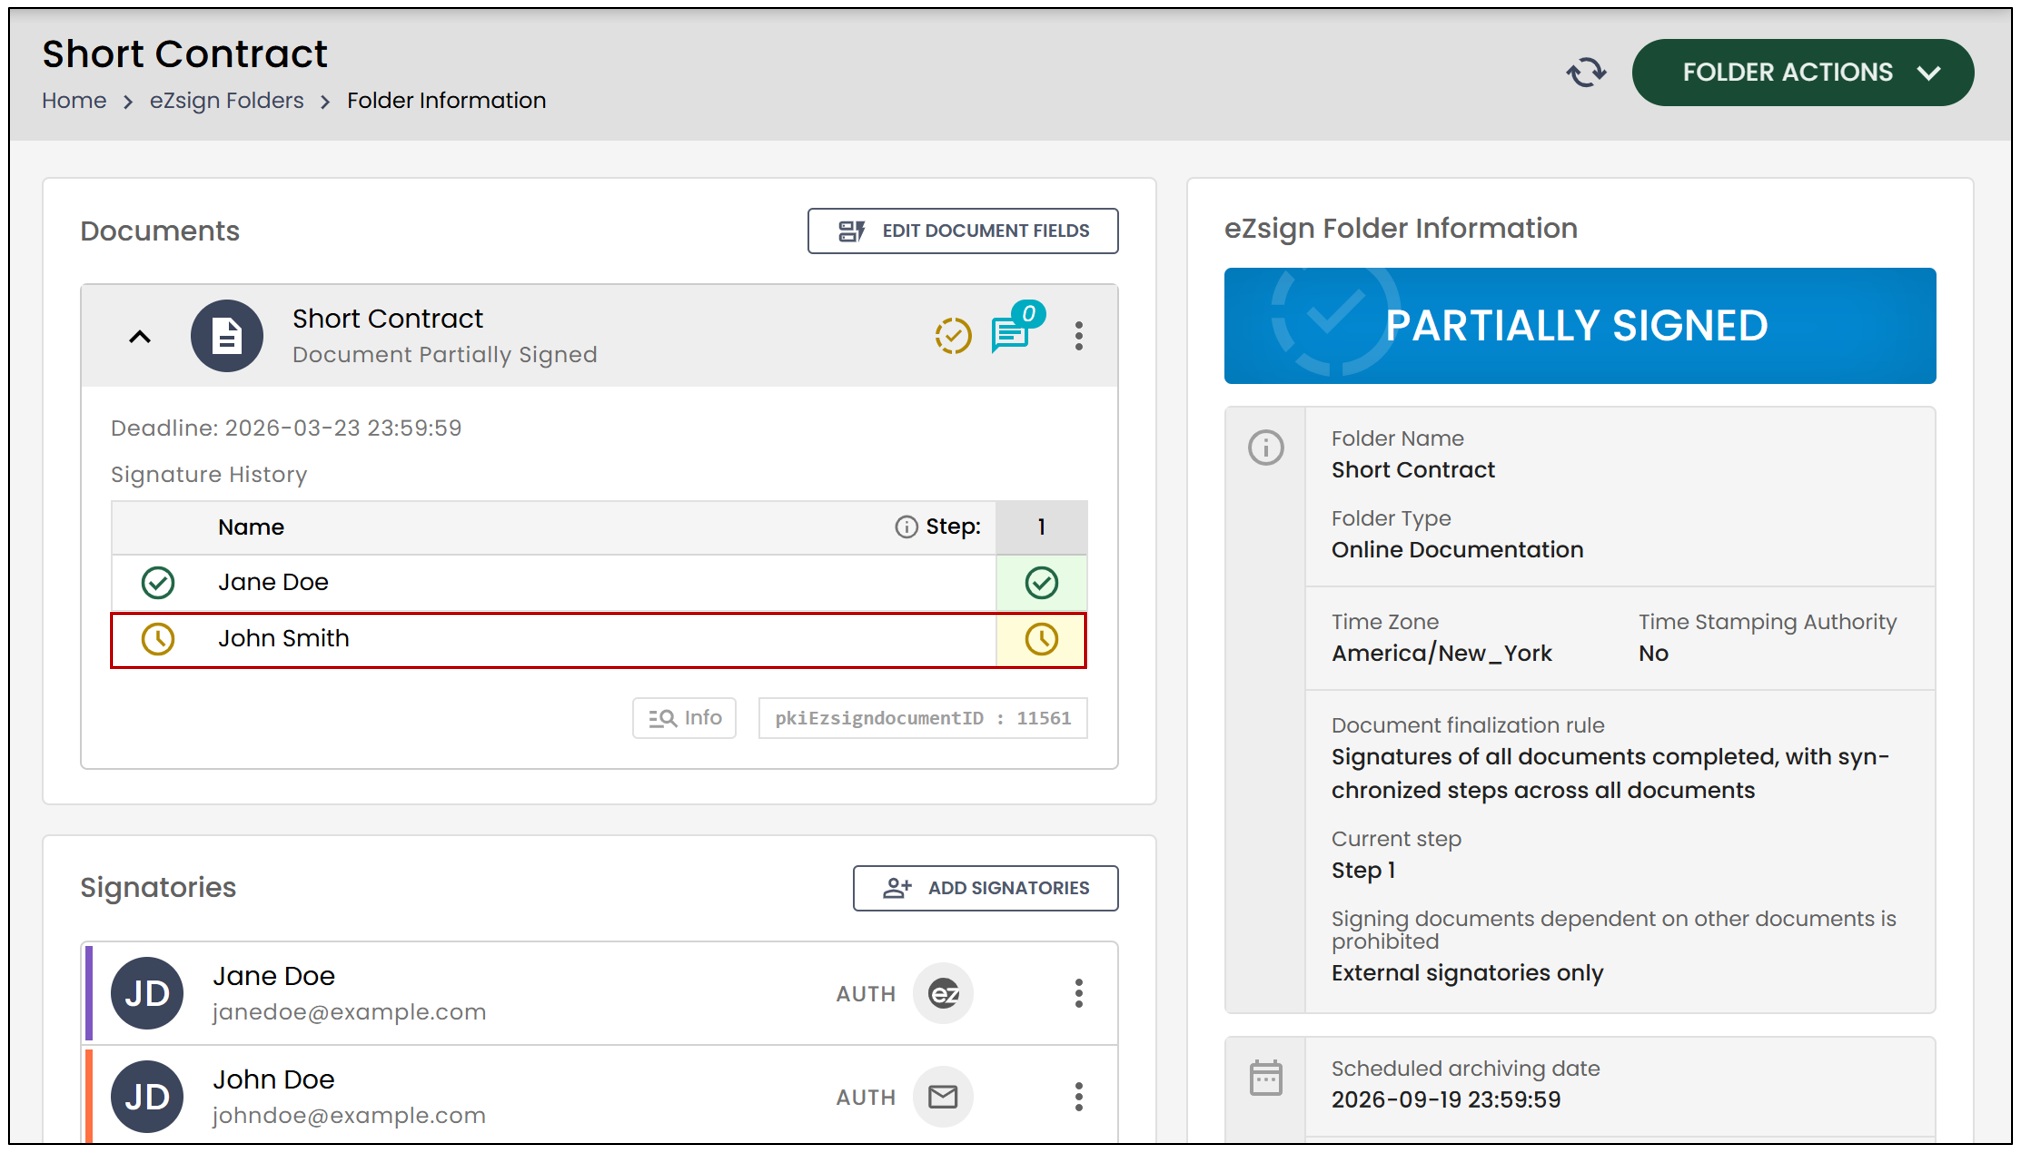
The new signer will receive an email notifying them that they have documents to sign. Once all signatures have been applied, you will be able to see that the document has been Completed.