
Français
Adding/Editing a Refused Offer
Adding a Refused Offer - Buyer’s Agent Only
This procedure for adding a refused offer is applied only in cases where the agent is collaborating (represents only the buyers) in the transaction.
From Main menu >> Real Estate >> List of Refused Offers.
Click on Actions >> New Refused Offer.
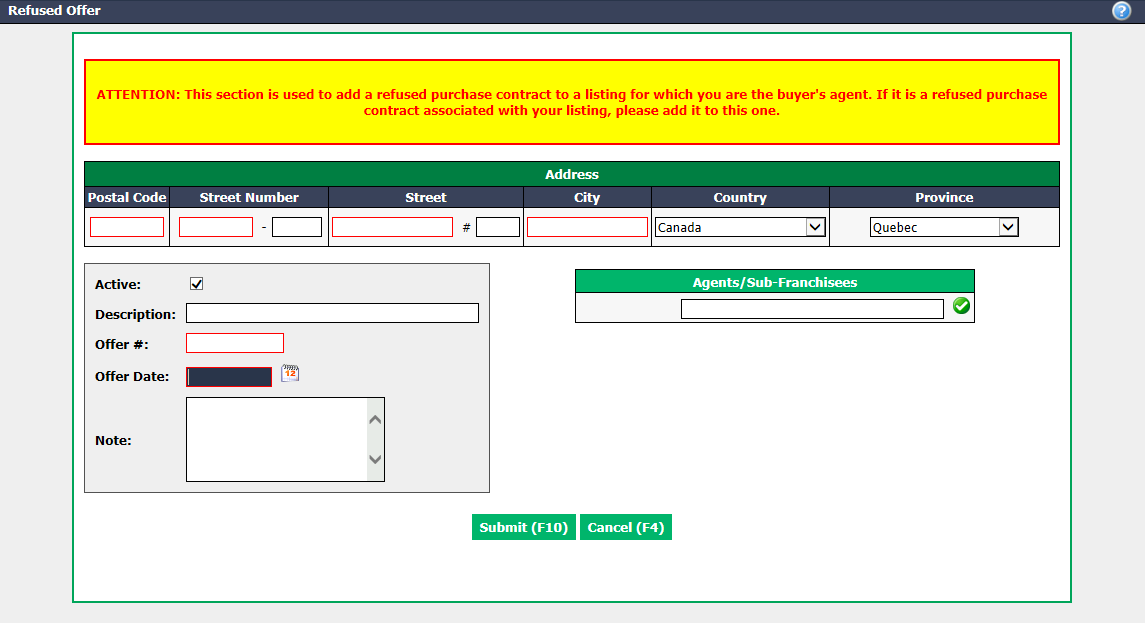
Active box will be checked when the refused offer is active. To inactivate a refused offer, uncheck this box.
Enter the complete property Address , the Offer # and the Offer Date (the signature date of the refusal).
You can enter a Description , such as the name of the buyers. This description will appear in the "Listing Information"/"Refused Offer" section of the transaction.
Start typing the name of the agent in the Agents/Sub-Franchisees field and select it from the list. Press TAB key on your keyboard or click on the Check Mark button.
If necessary, a Note can be added.
Click on Submit and the refused offer will be added in the List of Refused Offers.
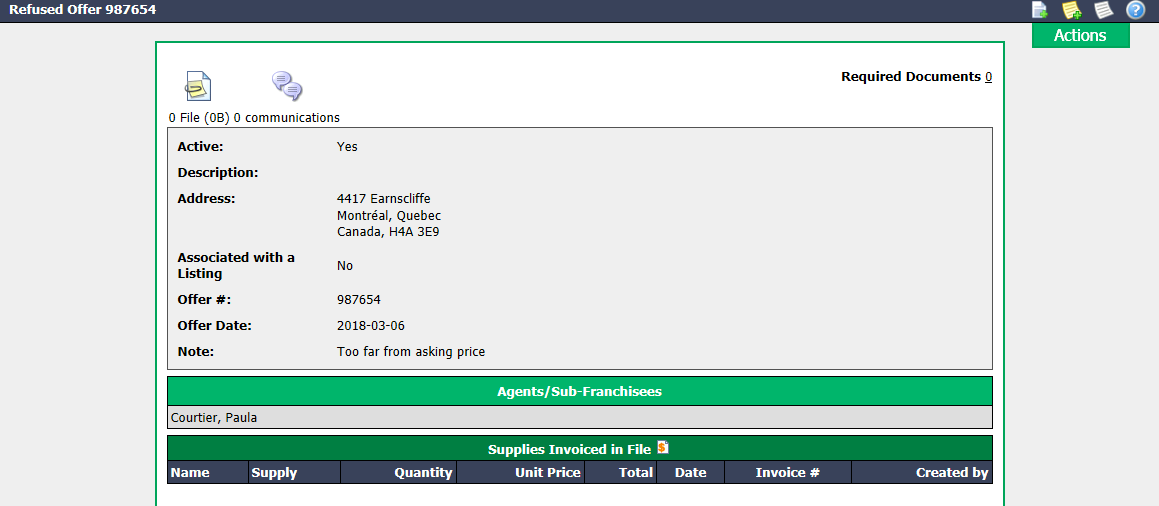
- You can add the document of the refused offer to EDM (Electronic Document Management) by clicking on the Document Management icon

located at the top left of the page. For more information, please see the article Adding Documents to EDM.
You can also add supplies to the file by clicking on the Dollar Sign icon. For more information, please see the article Express Supply Invoicing.
To view the history of e-mails sent, click on the Communication Management icon

.
Click on the number to the right of Required Documents to display the List of Documents. For more information, please see the article Adding Documents to EDM.
From the Actions menu, you have the option to:
- Edit the Refused Offer
- Delete the Refused Offer
Adding a Refused Offer - Seller’s Agent or Seller’s Agent + Buyer’s Agent
This procedure for adding a refused offer is applied only in cases where the agent is collaborating (represents only the buyers) in the transaction.
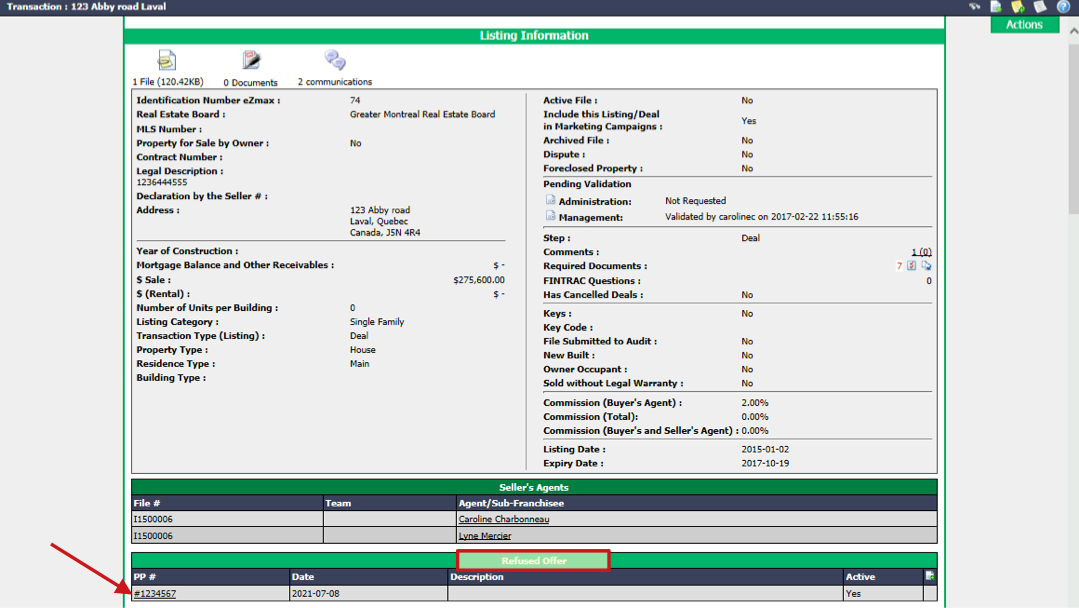
- From the desired transaction, in the "Listing Information"/"Refused Offer" section.
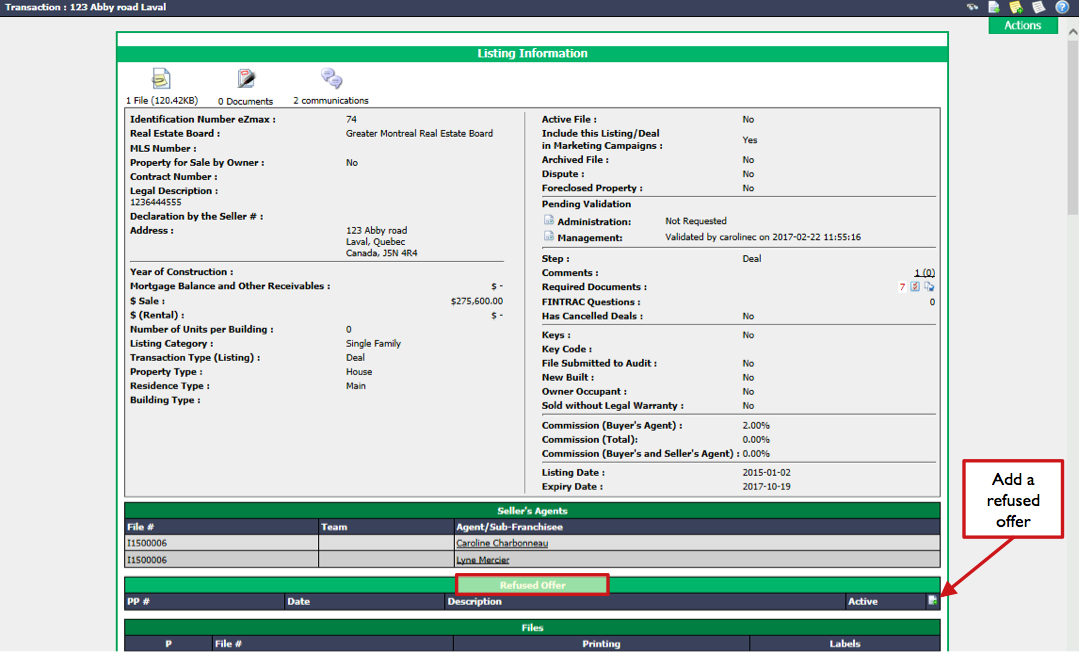
- Click on the Sheet with a + icon.
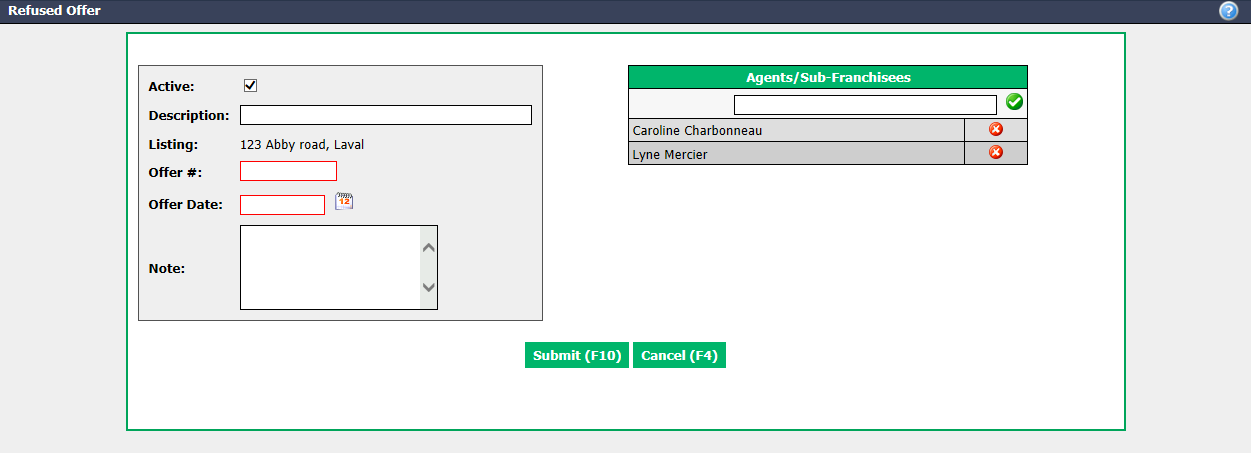
- Active box will be checked when the refused offer is active. To inactivate a refused offer, uncheck this box.
NOTE: The Listing address will be entered automatically.
Enter the Offer # and the Offer Date (the signature date of the refusal).
You can enter a Description , such as the name of the buyers. This description will appear in the "Listing Information"/"Refused Offer" section of the transaction.
The name of the seller’s agent in file will be entered automatically. You can delete it by clicking on the Red X or add one by typing the name in the Agents/Sub-Franchisees field, selecting it from the list and pressing the TAB key on your keyboard or click on the Check Mark button.
If necessary, a Note can be added.
Click on Submit and the refused offer will be added in the List of Refused Offers and will appear in the transaction.
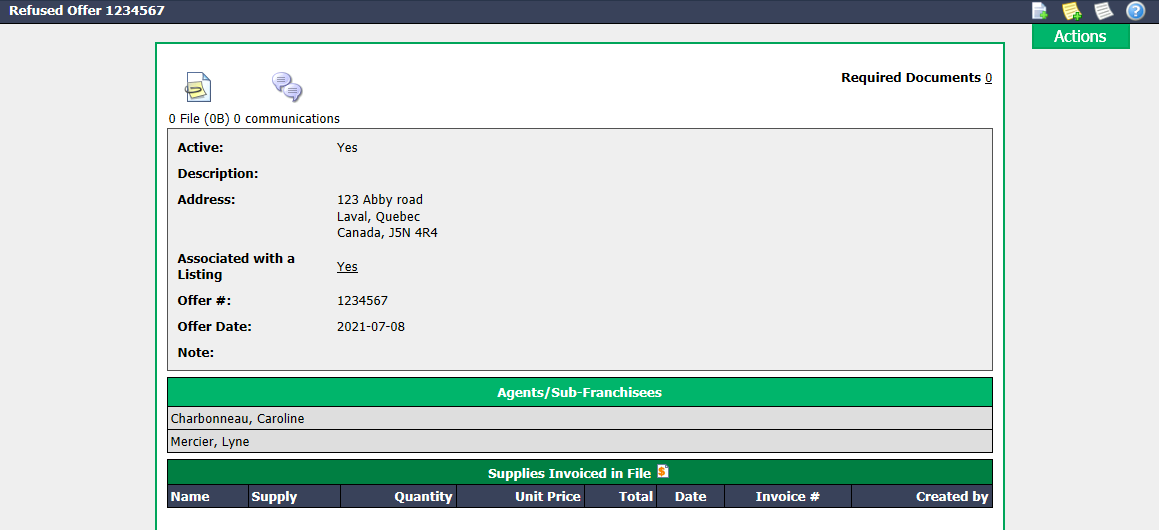
- You can add the document of the refused offer to EDM (Electronic Document Management) by clicking on the Document Management icon
located at the top left of the page. For more information, please see the article Adding Documents to EDM.
You can also add supplies to the file by clicking on the Dollar Sign icon. For more information, please see the article Express Supply Invoicing.
To view the history of e-mails sent, click on the Communication Management icon
.
Click on the number to the right of Required Documents to display the List of Documents. For more information, please see the article Adding Documents to EDM.
From the Actions menu, you have the option to:
- Edit the Refused Offer
- Delete the Refused Offer
To return to the transaction, click on "Yes" to the right of Associated with a Listing.