

Français
Adding/Using/Editing a Standard Document Group
It is possible to create a standard document group that you can select when adding documents in an eZsign folder instead of individually selecting each of the desired standard documents. This could be, for example, an employer having several separate forms (with the same information for all employees) to be signed electronically by a new employee of the company and who must acknowledge receipt.
Adding a Standard Document Group
From Main menu >> General >> List of Standard Document Groups - eZsign.
Click on Actions New Standard Document Group.
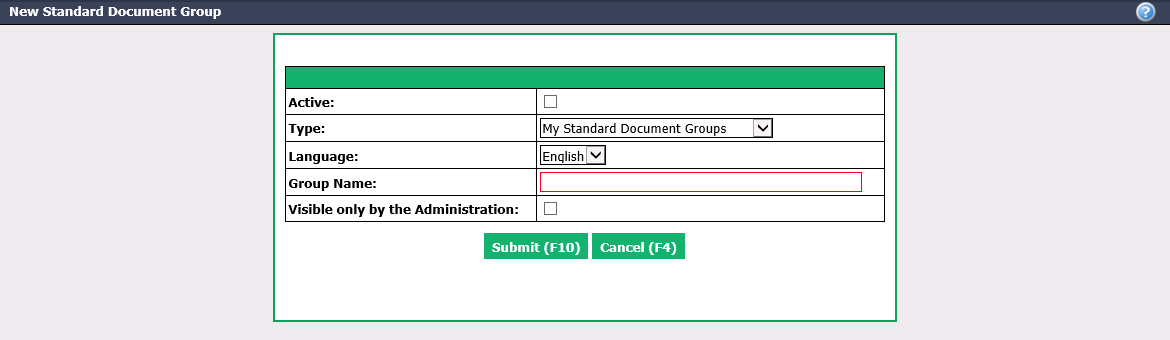
Active will be checked when the group is active. To inactivate a group, uncheck this box.
Select the desired group/folder Type from the drop-down list. For more information, please see the articles Adding/Editing a Type of Personal Folders and Adding/Editing a Type of Shared Folders.
Select the appropriate Language.
Enter the desired Group Name. For example: "New employee - Forms to sign".
Visible only by the Administration : Check this box if you want this template to be visible only to administrators.
Click on Submit.
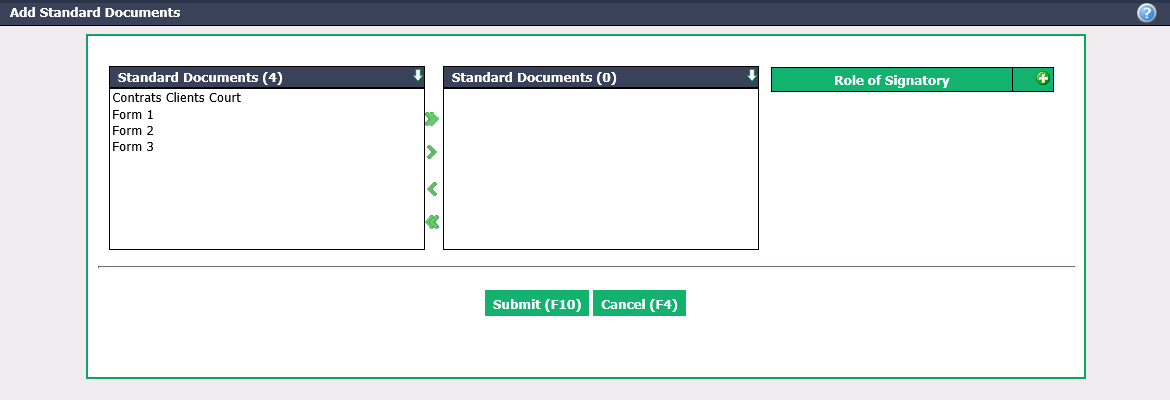
- Select the desired Standard Documents using the green arrows. The double arrow allows you to select all documents with one click, while the single arrow selects only one at a time.
You can double-click on a document to select it instead of using the green arrow.
NOTE: If the desired standard document is not in the choices, you must add it. For more information, please see the article Adding/Using/Editing a Standard Document.
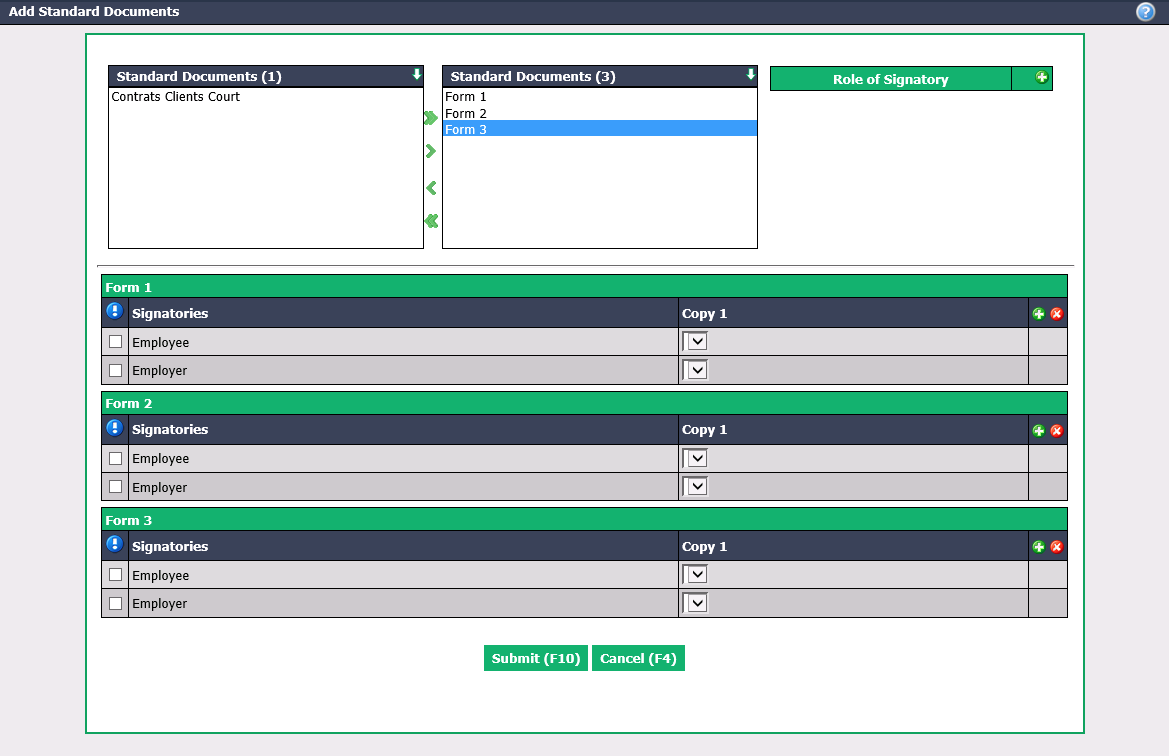
Role of Signatory : Click on the Green + icon to add each of the roles the signatories will have. These roles will be added to the drop-down list below the copies.
For each of the Signatories , associate it a role by selecting it from the drop-down list.
Exclamation Mark icon: Check the box if this signatory will have the same role on all copies. Only applies if you have more than one copy.
For each of the standard documents, you can click on the Green + icon to add a copy of this document. To delete a copy, click on the Red X icon.
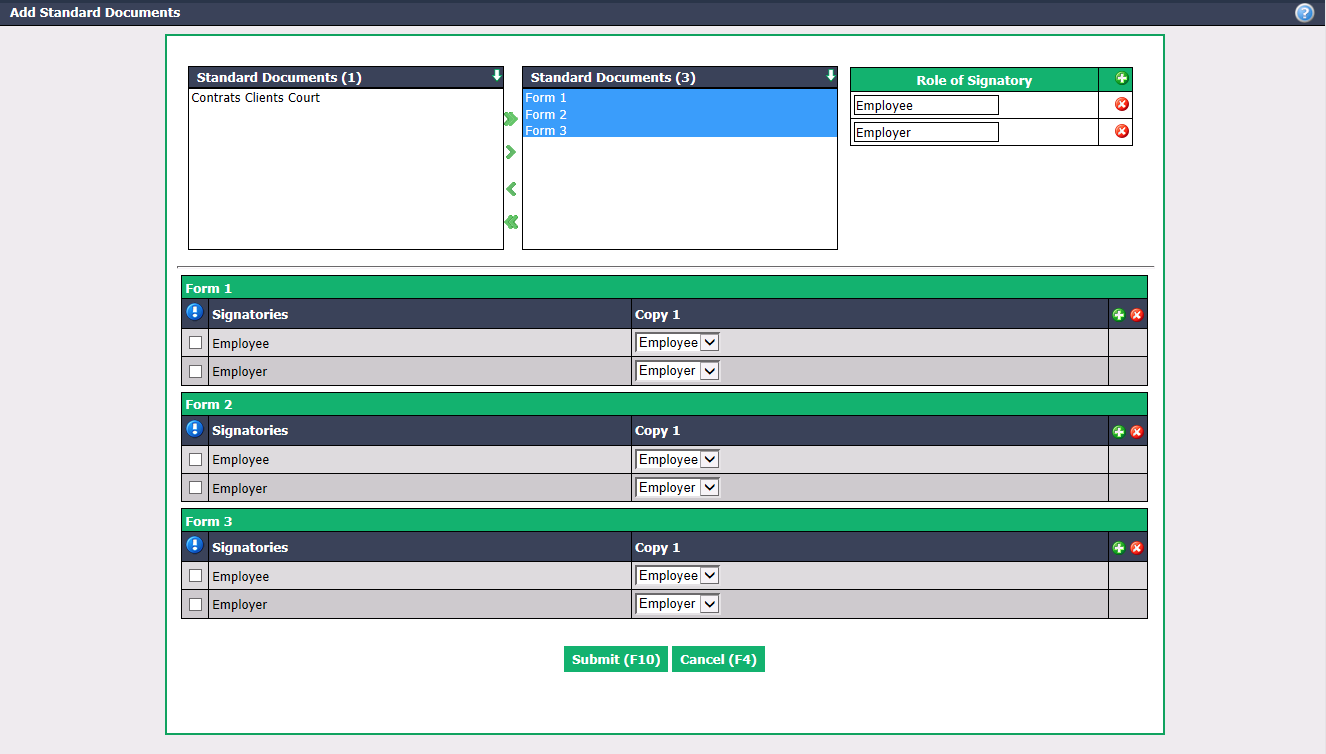
- Click on Submit and the standard document group will be added in the system.
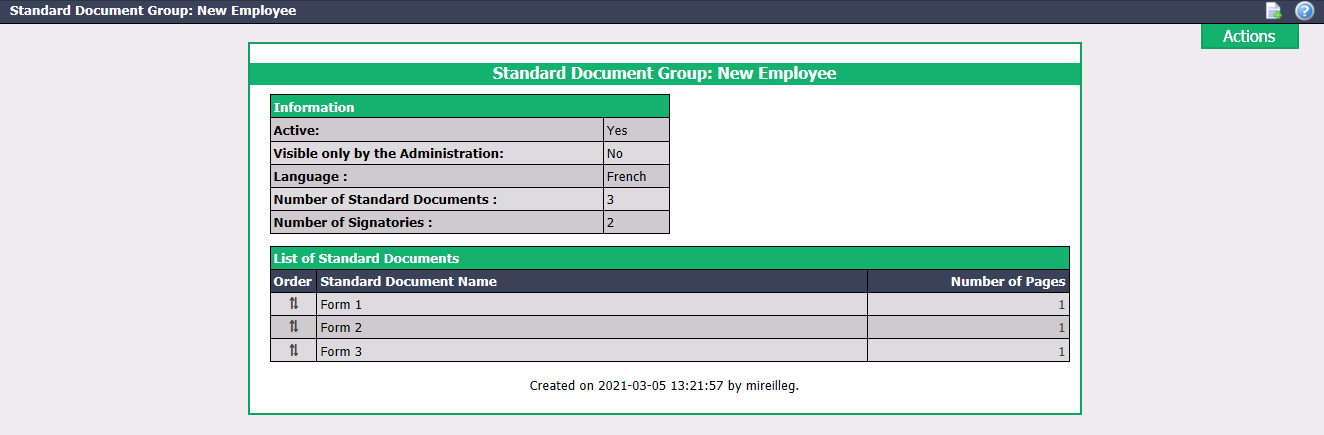
You can see the group Information and the List of Standard Documents contained in this group.
To change the order of these documents, select a document using the left mouse button, drag to the destination while keeping the button pressed and release it when you reach the desired destination.
Using a Standard Document Group in an eZsign Folder
Once a standard document has been added in the system, it is possible to use it in an eZsign folder to quickly add several documents.
- From the desired eZsign folder.
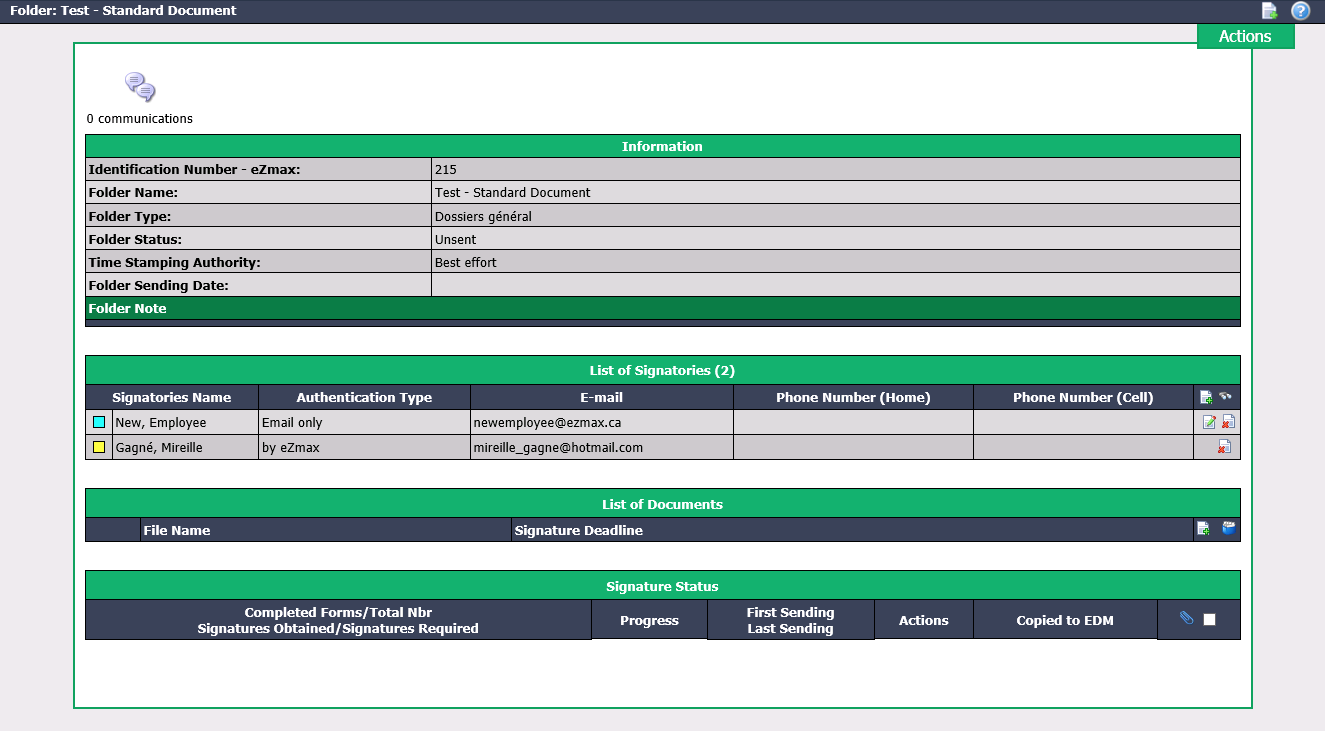
- In the "List of Documents" section, click on this icon

(Add Standard Documents).
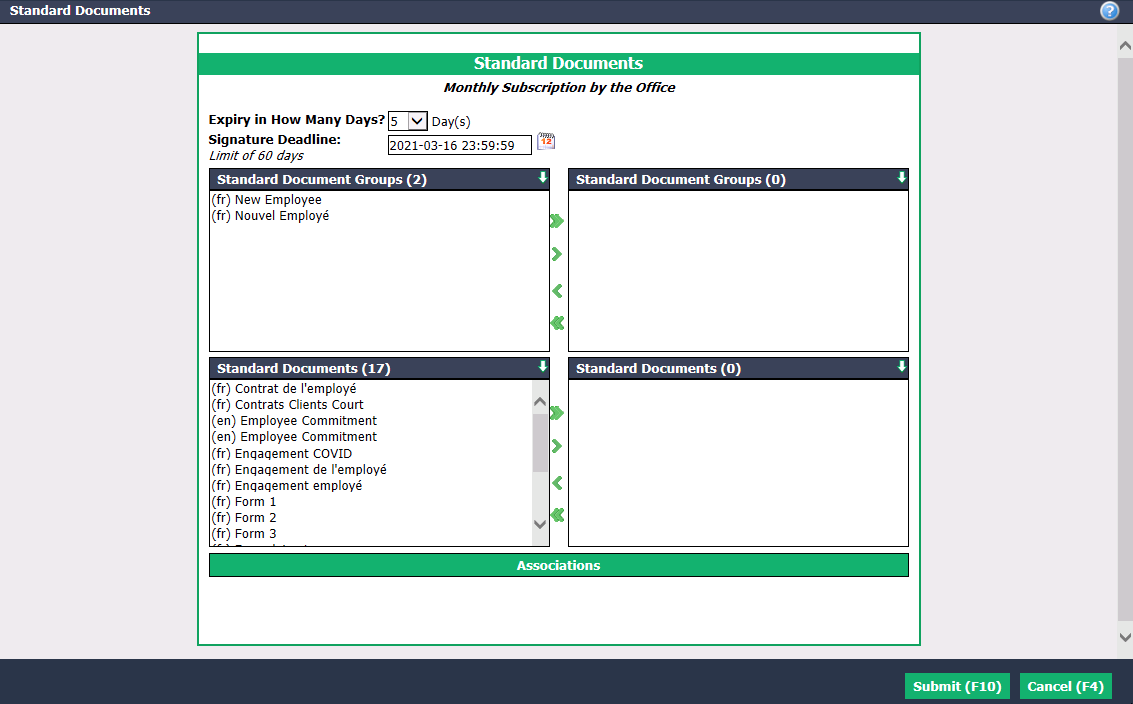
- Select the desired Standard Document Groups using the green arrows. The double arrow allows you to select all groups with one click, while the single arrow selects only one at a time.
You can double-click on a group to select it instead of using the green arrow.

Associations : For each of the roles (on the left), select the desired signatory from the drop-down list.
Click on Submit and the standards documents will be added in the folder.
Editing a Standard Document Group**
To modify an existing standard document group, select it from the List of Standard Document Groups - eZsign.
From the Actions menu, you have the option to Edit Group Information or Edit Standard Documents.
Make the desired changes and click on Submit to save them.
Deleting a Standard Document Group
To delete an existing standard document group, select it from the List of Standard Document Groups - eZsign.
From the Actions menu, you have the option to Delete Standard Document Group.
Confirm by clicking on Yes(F10)